Background Noise Removal Software Free: Tools and Tips
You've finished recording a podcast interview, and the guest sounded great until you notice the air conditioner, keyboard clicks, and street noise sitting underneath every answer. Re-recording isn't realistic, so you need background noise removal software free enough to rescue the audio without turning the speaker into a metallic robot.
The right choice depends less on the longest feature list than on when the noise exists, how long the file is, and how natural the voice must remain. A live call needs a real-time filter. A finished voiceover needs offline control. A short clip may be ideal for a browser cleaner, while a weekly interview show will quickly expose the limits of a freemium plan.
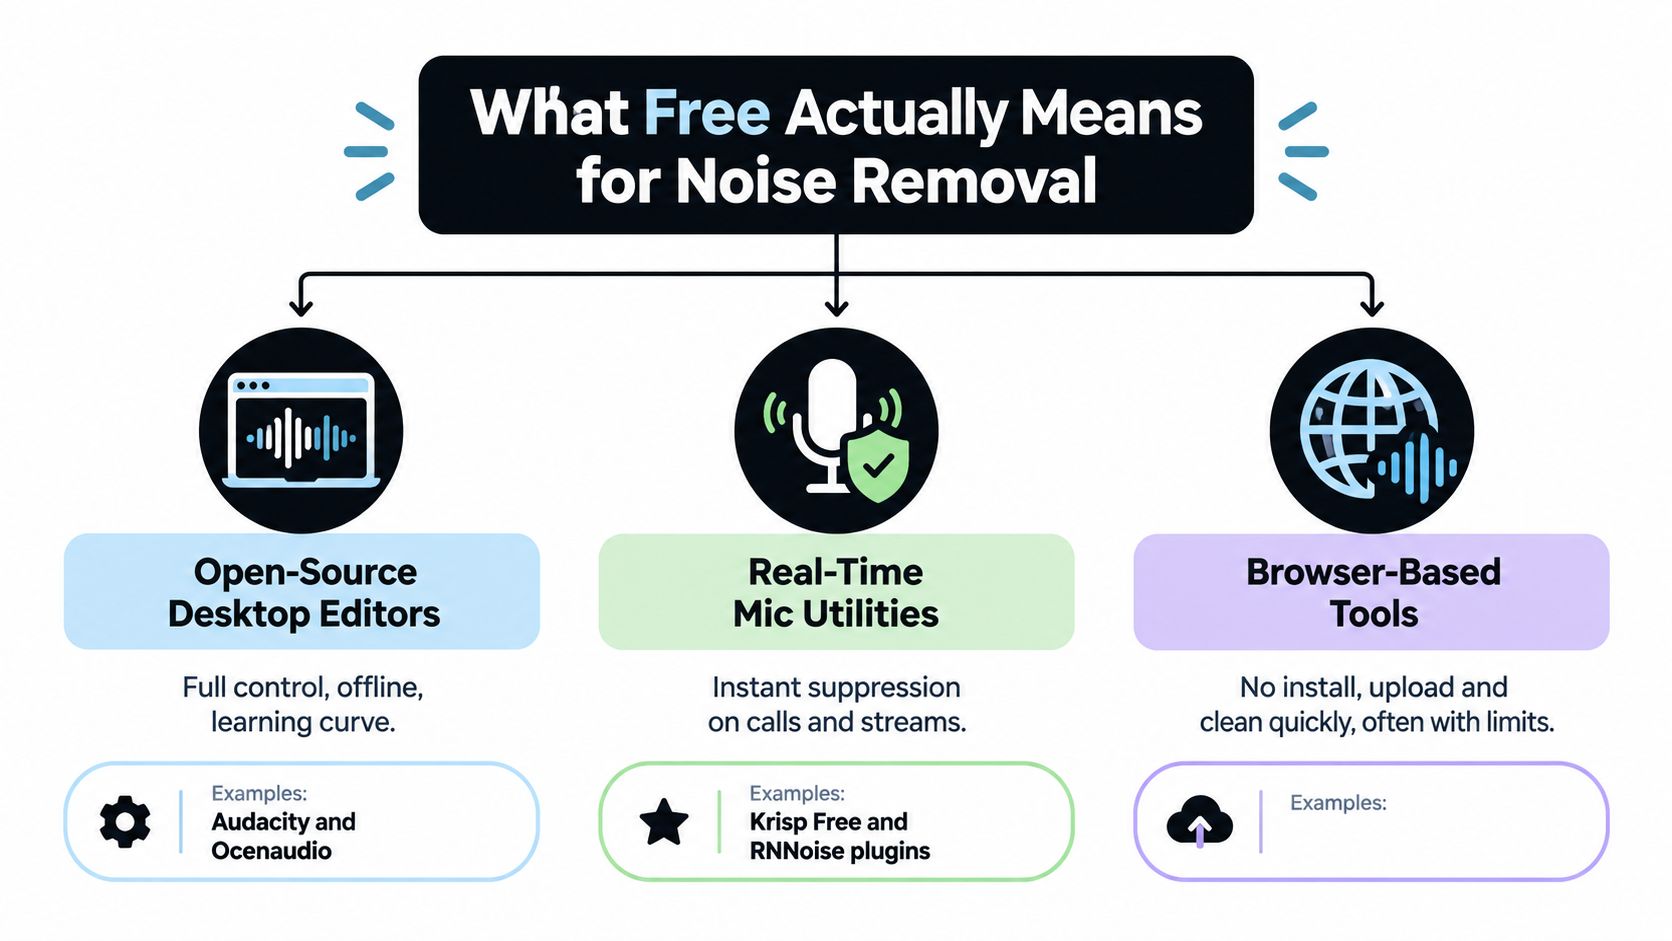
What “Free” Actually Means for Noise Removal
Free audio cleanup falls into three different categories, and each solves a different problem. Open-source desktop editors such as Audacity give you offline processing and detailed control. Real-time microphone utilities suppress sound before it reaches Zoom, OBS, or your recorder. Browser-based AI tools let you upload a file and download a cleaned version without installing an editor.
The word “free” hides the important part: the workload limit. A desktop editor may have no subscription or upload quota, but it can require manual work for every recording. A browser service may clean speech faster, yet restrict file duration, file size, daily use, export quality, or batch processing. Some tools also place registration or upgrade prompts between you and the final download.
Match the tool to the recording stage
Use this quick test before choosing anything:
- The recording already exists. Start with an offline editor. You can capture a noise profile, preview changes, undo mistakes, and export a version that suits your production.
- You're recording live. Use a real-time microphone utility or an in-app suppression filter. It prevents guests or viewers from hearing the untreated signal.
- You have a short, isolated problem. A browser AI cleaner can be the fastest route, provided the file fits its free allowance and you're comfortable uploading it.
A basic understanding of signal-to-noise ratio in audio helps you judge the result. Noise removal isn't successful merely because the room sounds quieter. The voice must remain intelligible, stable, and natural after processing.
Audacity has been free and open source since 2000, helping establish offline cleanup as a practical alternative to proprietary software. A recent comparison measured +12.3 dB of signal-to-noise improvement from Audacity's basic noise reduction, while a cloud enhancer reached +15.1 dB in the same test, with stronger artifacts and a slower 22-second processing time. Those figures come from the comparison at CleanAudio's free noise remover guide, and they show the trade-off clearly: more suppression isn't automatically a better listening experience.
Three Free Paths You Can Start With Today
Choose one of these paths based on the state of your audio. Don't start with a browser tool just because it promises AI, and don't install a real-time utility when you're trying to repair a completed interview.
| Path | Best For | Example Free Tools | Typical Limit |
|---|---|---|---|
| Desktop editors | Recorded podcasts, voiceovers, interviews, and field audio | Audacity, Ocenaudio | Manual editing, no live microphone cleanup |
| Real-time mic utilities | Calls, streams, online interviews, and gaming chat | Krisp Free, NVIDIA Broadcast, RNNoise plugins | Hardware, app compatibility, or usage restrictions |
| Browser-based tools | Short clips and one-off speech cleanup | Adobe Podcast Enhance, LALAL.AI demo, AudioCleaner | Upload limits, file caps, registration, or export restrictions |
Path one for recordings you've already captured
Audacity is the practical first choice for a finished recording. It works offline, supports a noise-profile workflow, and lets you compare the processed version against the original instead of trusting a single automatic result. Ocenaudio is easier to approach if you want fewer controls and a live preview, but it doesn't replace the broader editing workflow of a full desktop editor.
This path suits a solo podcaster, voiceover artist, or researcher who can spend a few minutes checking the result. It's also the safest option for sensitive recordings because you don't need to upload the file to a cloud service.
Path two for live audio
Real-time suppression makes sense when the noise must disappear before another person hears it. Krisp can provide system-level processing, while NVIDIA Broadcast offers a free local option for users with GeForce RTX 2060 or higher GPUs, including microphone suppression, echo removal, and virtual backgrounds, as documented in the 2026 remote-work noise cancellation summary.
RNNoise remains a useful lightweight baseline. One technical comparison describes roughly 10 ms latency and good performance on ordinary steady noise, while also noting weaker handling of sudden or changing sounds. Use it for fan hum and consistent room noise, not as a miracle fix for overlapping conversations or unpredictable traffic.
Path three for a quick browser cleanup
Browser AI tools are convenient when you have a short clip and no desire to learn an editor. They're useful for a stray voice memo, a short social video, or a single sentence that needs rescuing. They become frustrating when you're processing long interviews, multiple takes, or a folder of recordings.
For a broader editing workflow, creators may also want this guide to best free video editing software from Studio Liddell. If the job is specifically an upload-and-clean task, compare the actual allowance before committing. The useful question is not “does it have a free button?” but “can it process my whole workload without a manual workaround?” Background noise removal online can be convenient for isolated files, but offline software remains more dependable for repeat production.
Cleaning a Recording in a Free Desktop Editor
For a finished voice recording, Audacity gives you the control that automatic cleaners often hide. The workflow below is deliberately conservative. The goal is to lower the noise floor while protecting consonants, breaths, and the speaker's tone.

Build a safe working copy
Import the original file, then duplicate the track before applying anything. Keep the duplicate muted as your safety copy. If the recording contains several speakers or camera audio, label tracks immediately so you don't process the wrong source.
Find a clean one-to-two-second section where nobody is speaking. Room tone between sentences works well if it contains the same fan, hiss, or computer noise heard beneath the dialogue. Select that section, open Effect, choose Noise Reduction, and click Get Noise Profile.
Now select the full working track and open Noise Reduction again. Start with:
- Noise Reduction: 12 dB
- Sensitivity: 6
- Frequency Smoothing: 3
Preview the change before applying it. Listen to the quiet spaces and the consonants at the beginning and end of words. If the voice becomes hollow or develops a watery texture, reduce the amount rather than compensating with more EQ.
Restore the voice gently
After noise reduction, use a light compressor to keep the dialogue stable, then apply a restrained EQ boost only if the processing made the voice feel dull or thin. Don't chase a bright, polished sound until the denoising is finished. Compression and high-frequency boosts can make leftover hiss more obvious.
Export a production copy as 16-bit WAV when you're continuing to edit. Use 192 kbps MP3 when you need a compact delivery file and the format suits the destination. Keep the untouched original, because repeated exports and repeated noise reduction make later repairs harder.
Practical rule: Apply noise reduction once, preview it at a comfortable listening level, and stop before the voice sounds cleaner than it sounds real.
The most common mistakes are predictable. A short or contaminated noise profile teaches the editor the wrong material. Applying the effect twice often creates musical noise and removes low-level speech details. Pushing reduction above 18 dB can eat consonants, especially in quiet recordings. Those values are starting points, not a quality guarantee. Every microphone and room behaves differently.
DarkAudacity builds that include RNNoise can suit users who want a built-in suppression effect, while Ocenaudio is a reasonable alternative for simpler live-preview editing. If the project also contains long silent gaps, a dedicated silence remover for Premiere Pro may help with the editing stage, but silence removal and denoising solve different problems.
This walkthrough shows the basic sequence in practice:
Listen to the processed audio on headphones and speakers. Headphones reveal watery artifacts, while speakers reveal whether the speech still cuts through ordinary room playback.
Suppressing Noise in Real Time With Free Tools
Real-time suppression is the better choice when you're joining a live call, streaming, or recording directly into a production app. It prevents the untreated signal from reaching the audience, but it gives you less room to repair damage afterward.
Start by selecting the correct physical microphone in your operating system. Then select the utility's virtual microphone inside Zoom, Teams, OBS, Discord, or your recording software. Avoid stacking multiple suppression systems. Running a utility and a meeting app's strongest suppression mode together can make the voice sound processed and unstable.

Choose the lightest setting that works
For Krisp, begin with the ordinary noise cancellation setting rather than the most aggressive option. With NVIDIA Broadcast, select your microphone, enable Noise Removal, and move the strength toward moderate suppression first. NVIDIA's free tool is hardware-dependent, but local GPU processing makes it a strong route for supported systems.
In OBS, add the Noise Suppression filter to the microphone source and try RNNoise for stronger processing or Speex when you need a lighter option. Add a noise gate only after checking the raw suppression result. A gate can silence pauses, but it can also chop off word endings if the threshold is too high.
Test with a 30-second loop before going live. Speak normally, produce a few plosives, say words containing “s” and “sh,” and create the background sound you're trying to remove. Listen for a watery metallic tone, disappearing consonants, or a voice that changes character whenever you stop speaking. Those are signs to lower suppression.
Real-time processing can also burden older laptops, especially when the utility runs alongside video, screen capture, and a browser full of tabs. If the system struggles, use the lightest available filter, close unnecessary applications, or use an in-app toggle instead. The principles of real-time audio processing still apply: stable routing and a clean input gain matter as much as the denoiser itself.
Where Free Tools Hit Their Limits
Free tools fail in predictable ways. Browser cleaners may restrict the number of files, the duration of each upload, or the total amount of processing. One documented free plan allows 3 files per day, with a 200 MB file cap and a 30-minute duration limit, according to the provider's free-plan FAQ. Those restrictions are manageable for a short voice memo and painful for a long interview archive.
The second ceiling is workload. A solo YouTuber cleaning one short clip can work around an upload cap. A weekly interview show with separate guest tracks, revisions, and multiple exports needs repeatable processing. Free browser tiers often lack batch handling, spectral repair, detailed transient control, or reliable support for long video files.
| Tool | Free Cap | File Length Limit | Export Quality |
|---|---|---|---|
| Audacity | No subscription workflow | Depends on your computer and file | User-controlled export |
| Ocenaudio | No subscription workflow | Depends on your computer and file | User-controlled export |
| Krisp Free | Plan-dependent access | Live processing rather than file export | Depends on the recording application |
| NVIDIA Broadcast | Hardware-dependent access | Live processing rather than file export | Depends on the recording application |
| Browser AI cleaners | Often credit- or upload-limited | Varies by service and plan | May include format or quality restrictions |
Demo-grade cleanup usually means the main hum is lower, but room reverb remains, breaths stay prominent, and a faint hiss returns whenever the speaker pauses. That may be perfectly acceptable for a casual video. It's a poor fit for a paid voiceover, documentary interview, or show where listeners expect a consistent studio-like result.
If you keep hitting a duration, file-size, batch, or export restriction, free is no longer the right tool for that workload.
When Stronger Suppression Starts Hurting the Voice
Turning the suppression knob to maximum is usually the fastest way to damage a recording. Denoisers can mistake quiet consonants, breaths, and vocal transients for unwanted sound. The result may contain musical noise, a hollow midrange, or robotic artifacts around plosives.
Listen for these two patterns:
- Before: The fan is audible beneath the speaker, but the words have natural texture. After: The fan is quieter, yet the “s” sounds flatten into the “sh,” and the voice seems to come from behind a soft filter.
- Before: A passing vehicle briefly raises the noise floor. After: The vehicle is reduced, but the first syllable after the interruption bends or flickers as the algorithm rebuilds the speech.
RNNoise is a useful real-time baseline, but benchmark results show why you shouldn't judge only by the apparent noise drop. In a Microsoft DNS Challenge-based test, Koala Noise Suppression reduced STOI distance by roughly half or more across tested noise levels and was reported as up to 17.3 times more effective than RNNoise at 0 dB SNR, where speech and noise are equally loud. The benchmark is described by Picovoice's noise suppression evaluation, and its practical lesson is simple: test difficult noise separately from ordinary room hum.

The working rule for podcast edits is to pull the reduction back until the noise floor sits just below the quietest consonant, then stop. If the listener notices the processing before noticing the original noise, you've gone too far. The Forasoft comparison of real-time noise suppression also describes why stationary noise is easier than transient noise and warns that greater suppression doesn't automatically improve intelligibility.
Picking the Right Free Tool and Knowing When to Upgrade
A weekly podcaster should start with Audacity or another offline editor. You can preserve the original, learn a noise profile, process each speaker separately, and make deliberate decisions about voice tone. If you're recording live interviews and need the guest to hear clean audio immediately, use a real-time utility instead of hoping post-production will rescue every interruption.
A remote worker who only needs cleaner calls should use the suppression built into the meeting platform or a system-wide microphone utility. A hobbyist voiceover artist making short takes can use a browser cleaner when the file is uncomplicated, but should move to desktop processing once repeated revisions make uploads tedious.
Use this decision rule
Stay with free tools when the recording is short, the noise is steady, and minor artifacts won't undermine the audience's trust. Consider an upgrade when:
- Your episodes exceed the free file allowance: Long interviews turn repeated splitting and reassembly into wasted editing time.
- You need batch processing: Manual cleanup becomes the bottleneck when several files require the same treatment.
- Speakers overlap: Dialogue isolation and adaptive noise learning handle complex scenes better than a simple captured noise profile.
- You need spectral repair: Sudden beeps, chair squeaks, traffic bursts, and other isolated events need more than steady-state reduction.
- Voice naturalness is essential: Paid and advanced AI workflows generally earn their price through finer control over artifacts and transient preservation.
For objective testing, compare before-and-after intelligibility at matched noise conditions instead of trusting the quietest result. The technical comparison described by Picovoice uses STOI distance, where lower is better, and separates low-SNR performance from moderate conditions. That approach is useful for creators too, even if your final decision is made by ear.
The short checklist is straightforward:
- Finished recording with steady hum: Use Audacity and a conservative noise profile.
- Live call or stream: Use one real-time suppression path, then test the virtual microphone.
- Short one-off clip: Try a browser cleaner, provided its upload and export rules fit.
- Long show, overlapping voices, or critical delivery: Upgrade when manual work or voice damage costs more than the subscription.
Isolate Audio lets you upload audio or video, describe the sound you want removed or isolated in plain English, and download the resulting separation for cleanup workflows. If your free denoiser can't handle a difficult background or mixed sound scene, visit Isolate Audio and test the file against a more targeted isolation workflow.