Best Software to Remove Background Noise from Video (2026)
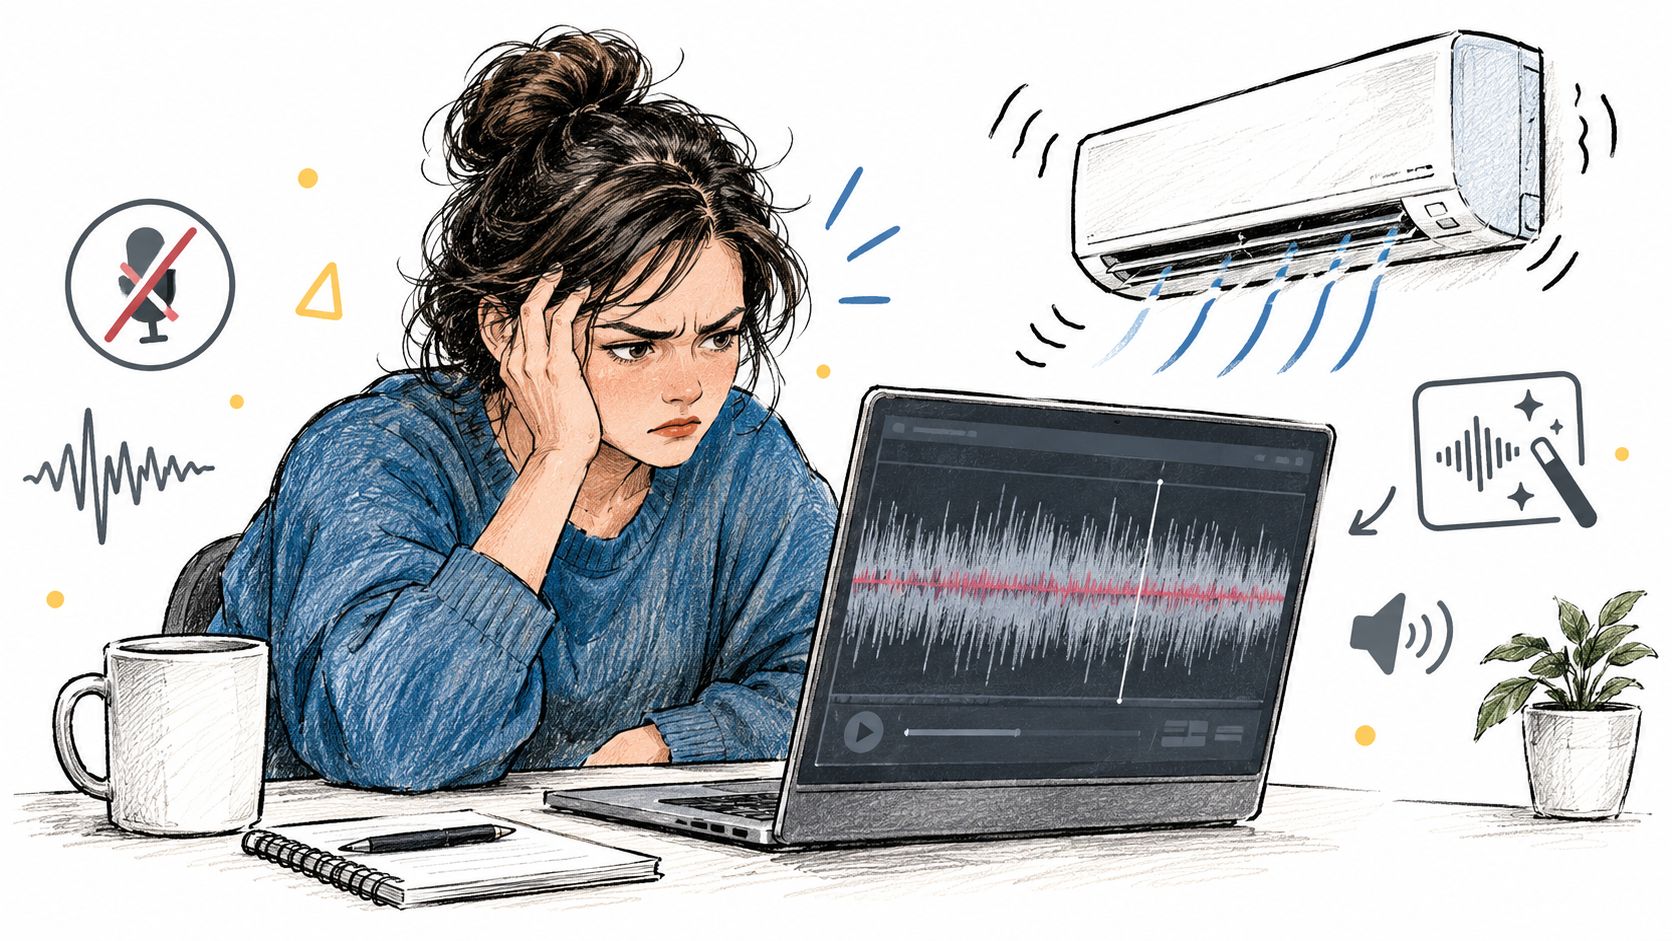
An air conditioner hums through an interview. A chair scrapes the floor. Someone starts typing beside the microphone. The waveform looks cleaner after noise reduction, but the speaker now sounds thin, metallic, and oddly detached.
That is why the usual advice about finding the best software to remove background noise from video is incomplete. The quietest background isn't automatically the best result. Strong processing can damage consonants, flatten emotional detail, erase believable room tone, or create watery artifacts that distract more than the original noise.
The right target is clear, intelligible dialogue that still sounds like a person in a real space. Traditional editors remain excellent for steady hum, rumble, and hiss. AI tools can help with difficult speech and source-specific sounds, but only when you judge what they remove and what they damage. The recommendations below focus on that trade-off, then turn it into practical testing and editing workflows.
Why the Quietest Option Is Not Always the Best Choice
I once cleaned an interview recorded beside a loud air conditioner. The first pass was satisfying. The fan nearly disappeared, the waveform looked impressively controlled, and the silence between sentences seemed pristine.
Then the speaker started talking.
Hard consonants had lost their edge. Quiet syllables sounded smeared. The room had no sense of space, so every pause felt unnaturally empty. The recording was technically quieter, but the interview was less comfortable to watch.
That failure is common because noise removal tools optimize different things. Some reduce a broad range of frequencies. Some enhance speech. Others try to separate a described sound from everything else. Each approach can work, but none should be judged by the background alone.
The waveform is not the final judge
A clean-looking waveform doesn't tell you whether the listener can understand every word. It also doesn't reveal whether the speaker's breath, vocal texture, or room character has been stripped away.
Aggressive processing can introduce musical noise, distortion, and robotic movement in the high frequencies. It can also remove parts of speech when the unwanted sound overlaps the voice. A mild layer of fan noise may be less damaging than a processing artifact that follows every syllable.
Practical rule: If you notice the processing before you notice the speaker, you've gone too far.
A sensible cleanup decision depends on the recording:
- Interview beside an air conditioner: Reduce the steady hum, then preserve enough room tone to avoid a vacuum-like background.
- Outdoor dialogue with traffic: Improve speech focus without trying to erase every passing vehicle.
- Podcast with keyboard clicks: Target the clicks separately instead of applying broad reduction to the whole voice track.
- Music performance with applause: Protect the music first. Removing applause from overlapping frequencies can damage instruments and vocals.
- Two people speaking at once: Expect a separation problem, not a simple noise-floor problem.
Traditional editing software is usually the fastest route for stationary noise. Adobe Premiere Pro, for example, combines targeted effects such as Reduce Rumble, DeHum, and Reduce Noise with Enhance Speech, which includes a Mix Amount control for blending processed dialogue with the original. That blend is valuable because natural room tone often matters as much as raw suppression. Adobe's Enhance Speech documentation describes this timeline workflow and its controls.
AI-powered separation takes a different path. Instead of assuming the unwanted sound is generic noise, a tool can attempt to identify a target such as barking, applause, or keyboard typing. That can be more useful when the unwanted sound changes over time or overlaps the voice, but it also requires careful verification.
The best choice isn't the one that makes the silence deepest. It's the one that leaves the dialogue easy to understand, emotionally credible, and free from distracting artifacts.
How Modern Noise Removal Actually Works
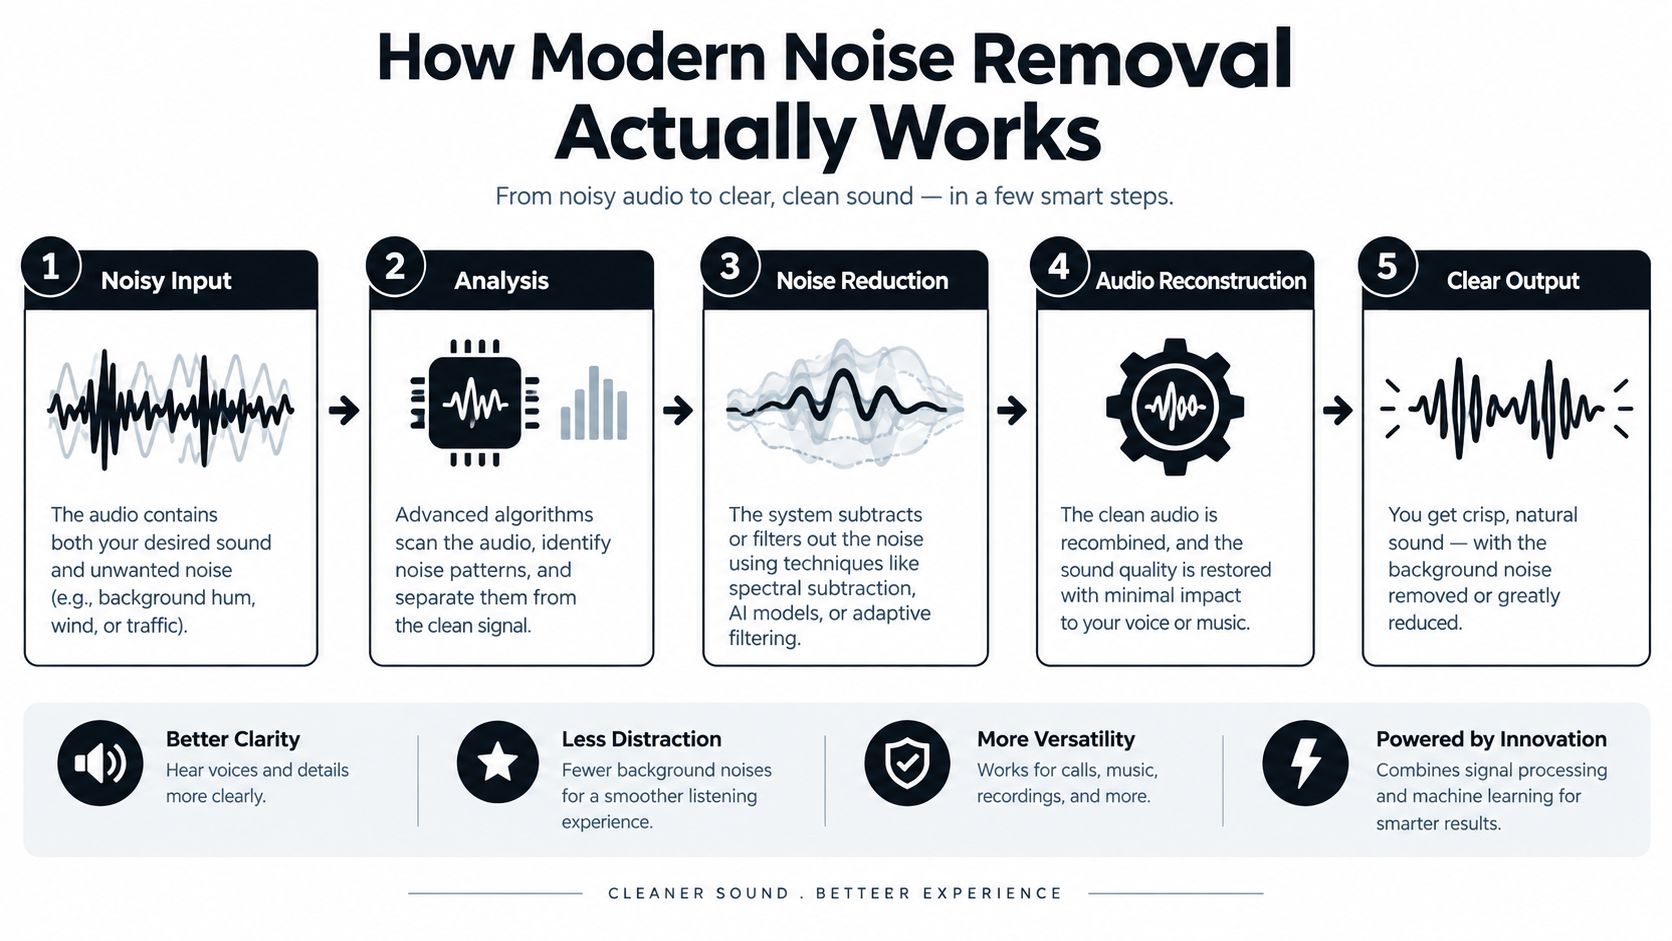
Most noise removal begins with a simple problem. The software receives a recording containing a desired signal, such as speech, and unwanted sound mixed into the same track. It has to estimate which parts belong to the noise and reduce them without weakening the voice.
Classical systems handle this by dividing the audio into short overlapping frames, converting each frame into frequency components, estimating the noise floor, and applying frequency-dependent attenuation. Wiener filtering, introduced in 1977, uses statistical estimates of clean speech and noise to minimize mean-square error. Practical spectral subtraction followed in 1979, estimating the noise spectrum during speech-absent intervals and subtracting it from the recording. These foundations are described in this overview of modern noise-reduction methods.
Why steady noise is easier
A fan, air conditioner, electrical hum, or computer noise is comparatively predictable. The software can estimate its pattern and reduce the affected frequencies while leaving much of the speech intact.
The method becomes less reliable when the background changes quickly. Crowd chatter, applause, barking, keyboard clicks, and passing traffic don't maintain one stable profile. If the software estimates the noise incorrectly, it may leave residue, remove speech cues, or create a swirly, watery texture.
This gives you a practical buying criterion. Look for software that manages noise estimation, voice activity, speech preservation, and artifact control intelligently. A global volume reduction is not noise removal. It only makes the entire track quieter.
Where deep learning fits
Deep-learning noise suppression became a dominant research direction around 2014, complementing rather than replacing classical signal processing. Modern systems can learn patterns associated with speech and unwanted sound, which helps them respond to changing conditions more flexibly than a fixed noise profile.
That flexibility has a cost. A model can produce audio that sounds cleaner to a person while damaging cues needed by speech-recognition systems. Recent testing across 40 configurations, covering 4 recognition models and 10 noise conditions, found that enhanced audio produced an absolute semantic word-error-rate increase ranging from 1.1% to 46.6% compared with the original noisy audio, as summarized by the IEEE speech-enhancement overview. This doesn't mean enhancement is generally bad for viewers. It means aggressive processing can remove information that another listener or system needs.
The same principle applies to image work. If you're also repairing stills from a shoot, a practical guide to improve photo clarity and consistency can help you think about noise as a quality trade-off rather than a defect to erase at any cost.
How to Evaluate Noise Removal Software Fairly
Don't compare tools by opening one random clip, turning the reduction knob to maximum, and choosing the quietest preview. Use the same difficult material in every trial, then score what changed.
Start with a short section containing clear speech and a representative background. Keep the original untouched. Export a mild version, a stronger version, and the processed output from a competing tool. Match loudness as closely as you can before listening, because louder audio often sounds subjectively better even when it isn't clearer.
Use three separate judgments
A useful framework comes from DNSMOS P.835-style evaluation. It separates quality into three scores:
- SIG: Speech quality, including clarity and vocal integrity.
- BAK: Background quality, including how acceptable the remaining noise sounds.
- OVRL: Overall quality, combining the listener's impression of the result.
Published validation reports strong correlation with human ratings, with Pearson correlations of 0.94 for SIG and 0.98 for both BAK and OVRL, according to the SpeechBrain SepFormer benchmark documentation. You don't need a formal lab to borrow the framework. Rate each version separately instead of allowing a quieter background to inflate your opinion of speech quality.
Build a difficult test reel
Your test should include more than a clean sentence. Check:
- Low signal-to-noise material: Does the voice remain understandable when the background is close to the dialogue?
- Overlapping voices: Does the main speaker survive when another person talks nearby?
- Music and applause: Does the tool protect the intended performance?
- Reverberation: Does enhancement make the voice dry and artificial?
- Sudden events: Listen for barking, clicks, doors, beeps, and passing vehicles.
- Lip-sync dialogue: Confirm that processing hasn't introduced timing or export problems.
Listen on headphones, laptop speakers, and the setup your audience is likely to use. Watch for robotic vowels, watery consonants, metallic sibilance, pumping room tone, and clipped word endings. A tool that sounds impressive in headphones can expose distracting modulation on small speakers.
The fairest comparison is not “Which file has less noise?” It is “Which file lets me follow the speaker without noticing the repair?”
If a vendor publishes no standardized measurements, that isn't automatically a reason to reject the software. Run the same test yourself. Keep the original and processed files side by side, and make the final decision from comprehension and naturalness, not from a dramatic visual change in the waveform.
Comparing the Main Categories of Noise Removal Tools
The market makes more sense when you compare tool categories, not long lists of nearly identical presets. Different tools solve different acoustic problems.
| Tool category | Best for | Key limitation | Typical cost model |
|---|---|---|---|
| Timeline editors with AI speech enhancement | Editors already cutting video in a professional timeline | Less specialized for unusual sound targets | Subscription or bundled editor license |
| Dedicated audio-restoration suites | Detailed repair, spectral editing, and difficult artifacts | Steeper learning curve and more manual work | Paid software license or subscription |
| Automatic one-click enhancers | Fast voice cleanup for routine recordings | Limited control over target selection and artifacts | Subscription, usage tier, or free plan with limits |
| AI source-separation platforms | Described sounds such as applause, barking, or keyboard typing | Results depend on scene complexity and prompt accuracy | Free tier, subscription, or usage-based access |
Timeline editors
Adobe Premiere Pro is the practical choice when the footage already lives in a Premiere project. Enhance Speech lets you process dialogue in the timeline and adjust Mix Amount, while DeHum, Reduce Rumble, and Reduce Noise handle more specific problems. I prefer a targeted effect before broad enhancement because it avoids asking one model to solve every defect at once.
Restoration suites
Dedicated tools are strongest when you need surgical control. Spectral views, repair selections, de-clicking, de-reverberation, and noise-profile workflows let an experienced editor treat different problems independently. They take longer, but that time pays off when a voice sits beside a difficult transient or a recording contains several unrelated defects.
One-click enhancers
Automatic tools are useful for speed. They can rescue a talking-head clip or a remote interview without requiring the editor to understand every parameter. Their weakness is consistency. They may sound excellent on one speaker and overprocessed on another, so always audition the result before applying it across a project.
Source separation
Source-separation platforms are the most interesting option when “background noise” isn't really noise. A prompt such as “remove keyboard typing” describes a target more precisely than a generic reduction slider. For broader post-production terminology and workflow considerations, see this audio post-production software guide.
The same principle appears in visual restoration. Editors who work with photographs may find RevelRaw for cleaner photos useful because it frames noise reduction around preserving detail, not just maximizing smoothness.
Step-by-Step Workflows for Clean Audio
A reliable cleanup starts with diagnosis. Listen before touching a control, identify the dominant problem, and process the narrowest problem first.
Workflow one with a timeline editor
- Duplicate the original audio. Keep an untouched version in the project so every decision remains reversible.
- Fix low-frequency problems first. Use Reduce Rumble for handling noise, microphone bumps, or unwanted low-end energy.
- Treat electrical interference. Apply DeHum when the recording contains a consistent electrical tone. Don't use broad reduction if a focused correction solves the problem.
- Reduce steady residual noise. Capture or estimate the noise profile where appropriate, then use Reduce Noise conservatively.
- Apply speech enhancement. Select the dialogue clip, run Enhance Speech, and lower Mix Amount until room tone and vocal texture return.
- A/B the result at matched loudness. Check consonants, breaths, pauses, and emotional emphasis before committing.
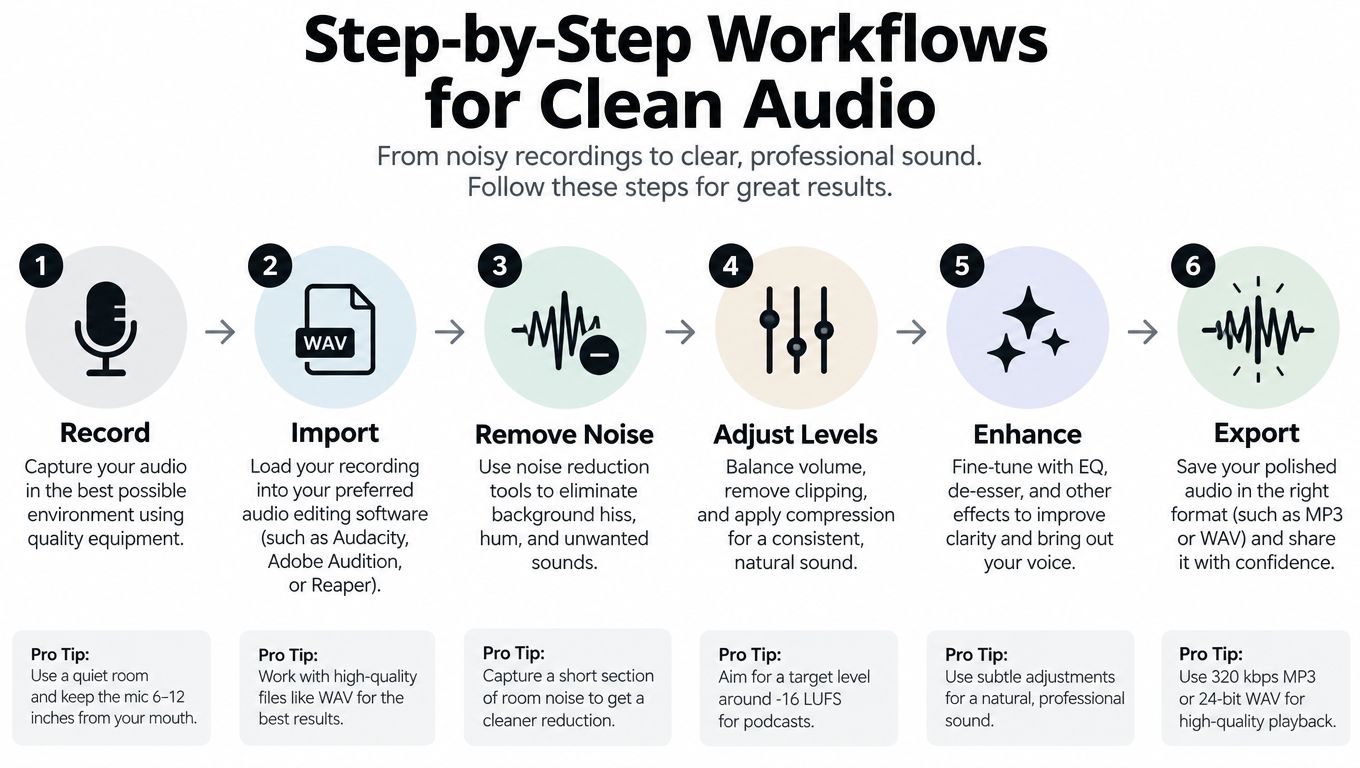
This two-stage order matters. A targeted hum or rumble correction removes a known problem before speech enhancement tries to interpret the remaining track. The final blend should sound like the same person recorded in the same space, only easier to follow.
Workflow two with Isolate Audio
For a non-generic sound, use a source-focused workflow:
- Upload the video file. The platform supports common video formats including MP4 and WebM, along with common audio formats.
- Describe the unwanted sound in plain English, such as “air conditioning hum,” “keyboard typing,” or “dog barking.”
- Choose a quality preset. Use a balanced setting for a quick review and a higher-quality setting when the clip is important.
- Use Precision Mode when the unwanted source overlaps dialogue, music, or another competing sound.
- Download the cleaned remainder and the isolated target.
- Listen to the isolated track. If it contains large pieces of the speaker or music, the separation needs a more careful prompt or a different approach.
The isolated output is a verification tool, not just an extra download. It tells you whether the software recognized the sound you intended to remove or just carved away a wider portion of the mix. If you need to rebuild a damaged line rather than clean it, compare the workflow with automated dialogue replacement.
When to Use Isolate Audio and When to Use Something Else
Choose the tool based on the unwanted sound, not the popularity of the software.
Dialogue beside steady noise
For an interview with an air conditioner, fan, or electrical hum, start with a timeline editor. Premiere Pro's Enhance Speech is useful when the main problem is speech intelligibility and you want a Mix Amount control. A conventional DeHum or Reduce Rumble pass may solve the specific problem with less risk than a full separation process.
A dedicated restoration suite is preferable when the recording also contains clicks, clipping, mouth noise, or isolated interruptions. It gives you more control over each defect, which matters when a single automatic pass produces a voice that sounds polished but false.
A described sound in the background
Use a target-specific approach when the unwanted event isn't a stable noise floor. “Remove keyboard typing,” “reduce crowd chatter,” and “keep the music but remove applause” are meaningful editing instructions, not just intensity settings.
Isolate Audio fits as one option. It lets you upload a video, describe a sound in natural language, and download the isolated target alongside the remaining audio. That makes it possible to inspect what was removed instead of trusting a single processed track. For a broader discussion of isolating specific sounds in spoken content, this guide to isolating sounds for podcasters offers useful context.
Competing speakers and music
Overlapping speech is difficult because the target and interference share time and frequency. Speech-enhancement results generally improve as signal-to-noise ratio rises, but competing speech remains especially difficult in adverse conditions. In one source-separation pipeline for cochlear-implant listeners, separating the target from competing sources improved word recognition by roughly 20% for female target voices and 40% for male target voices, as reported in this Interspeech research paper. Those figures are research results, not a promise for every video tool.
For a music performance, don't remove applause or crowd sound blindly. The ambience may be part of the event's identity. If the audience noise masks a spoken introduction, isolate or reduce the specific event and preserve the music bed rather than applying maximum suppression to the entire recording.
Don't use a target-specific tool for a simple stationary hum unless you need another reason to do so. A focused editor effect is faster, easier to inspect, and usually sufficient.
How Much Noise Reduction Is Enough
The tipping point arrives when the cleaner waveform costs you comprehension. You hear fewer background sounds, but consonants lose definition, vowels acquire a synthetic edge, and the speaker no longer feels connected to the room.
Recent perceptual work has emphasized this trade-off. One 2025 evaluation found that listeners significantly preferred milder deep-learning models because they produced fewer artifacts and less distortion, while another 2025 study noted that conventional spectral subtraction can generate musical-noise artifacts when noise estimates remain static. The useful conclusion isn't that modern AI fails. It's that stronger suppression isn't the same as better listening.
Use a situation-based rule
- Natural interview dialogue: Accept some room tone if it preserves vocal texture and emotional detail.
- Podcast narration: Push clarity further, but listen for sibilance, breath damage, and unnatural pauses.
- Outdoor reporting: Reduce distractions enough for comprehension, not enough to pretend the scene was recorded in a studio.
- Music and live events: Protect the performance and atmosphere. Remove only the sound that interferes.
- Overlapping sources: Use precision processing only when the unwanted sound overlaps the target, then inspect the isolated result.
Signal-to-noise ratio is a useful way to describe why one recording can tolerate more cleanup than another. This signal-to-noise ratio guide provides the terminology, but your ears still decide whether the final clip works.
Always A/B the mild setting against the strong setting at matched loudness. If the stronger version sounds cleaner for a moment but makes you work harder to understand the speaker, reject it. The winning file is the one that keeps attention on the message, not the one with the quietest background.
Run one difficult clip through two different tools today. Score speech quality, background quality, and overall naturalness, then choose the result that preserves intelligible dialogue, believable room tone, and the intended sound of the scene.
Isolate Audio lets you upload video, describe a specific unwanted sound such as hum, barking, applause, or keyboard typing, and download both the isolated sound and the remaining track for checking. Try your hardest clip through Isolate Audio, compare the mild and precision results, and keep the version that cleans the recording without damaging the voice.