Extract Audio From Video: A Creator's Guide to Perfect Audio
Whether you're a podcaster grabbing an interview clip, a musician sampling a unique sound, or a video editor needing to clean up some dialogue, knowing how to extract audio from video is a core skill. You've got options ranging from simple online tools and free editors like Audacity to powerhouse software like Adobe Premiere Pro. The trick is picking the right one for the job.
Which Audio Extraction Tool Is Best for You
The best way to separate audio from video really boils down to three things: what you're trying to accomplish, how comfortable you are with technical tools, and the final quality you need. There’s no single "best" tool, just the right tool for your specific task.
For example, if you just need a quick MP3 from a video file, a simple online converter is your best friend. But if you’re a filmmaker who needs to export a high-fidelity WAV file for a sound mixer, you’ll want to stick with your professional video editor.
Here’s a quick rundown to help you decide.
| Method | Best For | Technical Skill | Key Advantage |
|---|---|---|---|
| Online Converters | Quick, one-off MP3 or WAV conversions. | Beginner | Speed and simplicity. No software installation needed. |
| Audacity | Editing, trimming, or applying effects to extracted audio. | Beginner to Intermediate | Free, powerful, and focused entirely on audio editing. |
| Video Editors | Integrating audio into an existing video workflow. | Intermediate to Advanced | High-quality exports and seamless workflow control. |
| FFmpeg | Batch processing, automation, and precise format control. | Advanced | Unmatched power and flexibility for technical users. |
Ultimately, your choice depends on balancing speed, control, and features. Command-line tools like FFmpeg give you ultimate precision but have a steeper learning curve, whereas online converters trade control for convenience.
Think About Your End Goal
It helps to think of it like picking a vehicle. You wouldn't take a race car on a camping trip or use a moving truck to grab groceries. The same idea applies here.
- Quick and Dirty Jobs: An online audio extractor is perfect when you just need the sound, no questions asked.
- Editing and Finessing: Professional NLEs or dedicated audio software are the way to go. They keep the extraction process right inside the ecosystem you're already working in.
- Power and Automation: For scripting, batch jobs, or very specific technical needs, nothing beats a command-line tool.
This decision tree can help you visualize which path makes the most sense based on what you’re trying to achieve.

As the chart shows, your goal—whether it's a simple conversion, detailed editing, or isolating specific sounds—points you directly to the best software for the task.
Going Beyond Simple Extraction
But what if you don't need the entire audio track? Sometimes you just want the vocals from a song, the dialogue from a noisy interview, or a specific sound effect buried in the mix.
This is where traditional extraction tools hit a wall. Modern AI-powered tools are built for this exact scenario, letting you isolate individual stems instead of just ripping the whole audio file. Understanding these different use cases for audio isolation can completely change your workflow and save a ton of time.
Getting this first step right—choosing the correct method—is half the battle in achieving a clean, professional-sounding result.
Getting Your Hands Dirty with FFmpeg
If you're someone who values precision, wants to automate repetitive tasks, and needs total control over your media, then FFmpeg is your new best friend. It’s a powerful, free, and open-source command-line tool that can chew through just about any audio or video format you can imagine.
Sure, it doesn't have a flashy user interface. But its real strength is its raw power—the ability to perform incredibly complex tasks with a single, clean command. If you’re a developer, a technical video editor, or just someone who loves building efficient workflows, learning to extract audio from video with FFmpeg is a game-changer. It’s the engine that powers countless media apps, so learning it gives you direct access to its full potential.
Let's walk through how to get started, from the simplest extraction to a few more advanced tricks of the trade.
The Go-To Command for Quick Audio Rips
Let's start with the most common task: you have a video file, say interview.mp4, and you just need the audio as a separate MP3 file. The command for this is surprisingly simple.
Fire up your terminal (or Command Prompt on Windows) and type this in:
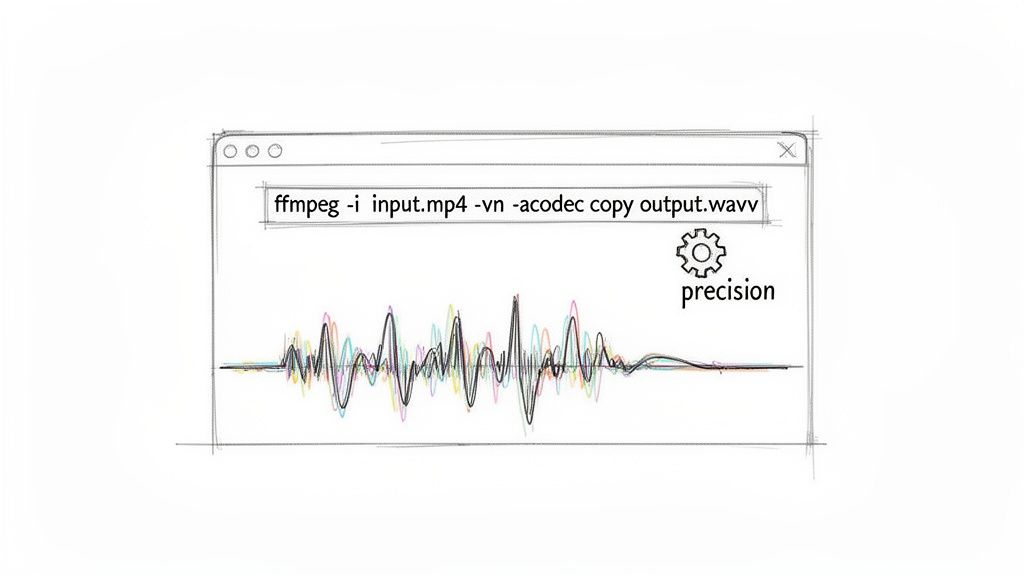
ffmpeg -i input.mp4 -vn -ab 192k output.mp3
It looks a bit cryptic at first, but each part has a specific job:
ffmpeg: This just tells your computer to run the FFmpeg program.-i input.mp4: The-iflag means "input." You follow it with the name of your source video file.-vn: This is the magic bit. It tells FFmpeg to completely ignore the video track. No video.-ab 192k: This sets the audio bitrate to 192 kilobits per second. For most MP3s, this is a great sweet spot between quality and file size.output.mp3: And finally, this is what you want to name your new audio file.
My Advice: When you're just getting started, make life easier for yourself. Put your video file in the exact same folder you're running the command from. It saves you from typing out long, complicated file paths.
The demand for this kind of audio separation is bigger than you might think. The market for hardware-based HDMI Audio Extractors was already valued at USD 150 million in 2023 and is on track to double by 2033. This reflects a huge and growing need in professional settings, which lines up with the growth of the larger Professional Audio Market as a whole. You can dive deeper into these trends with insights from Verified Market Reports.
A Few Advanced FFmpeg Tricks
Once you're comfortable with the basic command, you can start adding a few more parameters to handle more specific jobs.
Need Pristine, Lossless Audio?
If you're working on a music track or a professional voiceover, MP3 compression is the last thing you want. Quality is everything. In that case, you can extract the audio into a lossless format like WAV to preserve every single detail.
The command looks like this:
ffmpeg -i source_video.mov -vn -acodec pcm_s16le output_audio.wav
Here, the -acodec pcm_s16le part specifies the standard, uncompressed audio codec used for WAV files. The result is a perfect, 1:1 copy of the original audio stream.
How to Grab Just a Small Snippet
What if you only need a specific soundbite? Maybe a 30-second quote from the middle of a long interview. You don't need to open a full-blown editor for that. You can tell FFmpeg to do the work for you.
Use the -ss flag to set the start time and the -t flag to set the duration. To grab a 30-second clip starting at the one-minute mark, your command would be:
ffmpeg -i presentation.mp4 -ss 00:01:00 -t 00:00:30 -vn output_clip.mp3
This is incredibly handy for quickly creating audio samples, grabbing key bits of dialogue for a podcast, or pulling sound effects from video footage without ever leaving the command line.
Using a Free Editor Like Audacity for Quick Extractions
While command-line tools like FFmpeg are powerful, let's be honest—they aren't for everyone. If you'd rather work with a visual interface but don't want to shell out for professional software, free audio editors are the perfect middle ground. Audacity has been a favorite in the open-source community for years, and for good reason. It offers a dead-simple way to extract audio from a video and then get right to work on cleaning it up.
The real advantage of using an editor like Audacity is that pulling the audio is just the beginning. You’re not just left with a raw audio file; you're already inside a capable editing suite where you can start trimming, mixing, and enhancing the sound. This makes it a fantastic all-in-one solution for podcasters, musicians, or anyone creating content on a tight budget.
The One-Time Setup You’ll Need
Before you start dragging in video files, Audacity needs a little help. Out of the box, it’s a dedicated audio tool and doesn't know what to do with video containers like MP4 or MOV. To fix this, you need to install the FFmpeg library. Yes, that’s the same engine we talked about for the command line, but this time it just works quietly in the background for Audacity.
Don't worry, this is a simple, one-time setup:
- Grab FFmpeg: Head over to the official Audacity support page for FFmpeg installation. They provide trusted, direct links for Windows, Mac, and Linux, so you know you're getting the right version.
- Install the Library: Run the installer. It’s a pretty standard "next, next, finish" process.
- Point Audacity to FFmpeg: The very first time you try to import a video file, Audacity will pop up a window asking where to find FFmpeg. Just point it to the folder where you installed it, and Audacity will remember that location forever.
Once that’s done, you'll never have to think about it again. Audacity will now handle video imports seamlessly.
This is the clean, function-first interface you'll be working with inside Audacity. It's all about the waveform.
The Simple Drag-and-Drop Workflow
With the setup out of the way, getting the audio from your video is ridiculously easy. Forget typing commands. Just find your video file, drag it from the folder, and drop it right onto the Audacity window.
That’s it. Audacity automatically strips the video away and presents the audio track as a visual waveform. You’ll see the peaks and valleys of the sound, making it easy to spot exactly what’s happening.
From here, you have two options: export it or edit it.
- To Save the Audio: Go to
File > Exportand pick your format. MP3 is great for general use, giving you a good balance of quality and file size. If you need full, uncompressed quality for more professional work, go with WAV. - To Edit First: You can start working on the waveform immediately. Use the selection tool to highlight and delete ums, ahs, and dead air. Apply noise reduction to get rid of background hum. Or, level out the volume to make everything consistent.
Pro Tip: Before I export anything from Audacity, I always run the 'Normalize' effect (found under the 'Effect' menu). Setting it to a peak amplitude of -1.0 dB makes the audio consistently loud without any digital clipping or distortion. It’s a five-second step that makes a huge difference in the final result.
This workflow is a lifesaver for podcasters who get interview recordings from video calls. You can quickly pull the audio, chop out the pre-show chatter, and even apply some light compression to even out the speakers' voices—all within the same free app. It neatly combines extraction and editing into one efficient process.
Handling Audio Directly in Your Video Editor
If you're already working in a professional video editor, bouncing out to another app just to rip an audio track is a serious workflow bottleneck. The smartest move is to handle it right inside your NLE, whether that's Adobe Premiere Pro or DaVinci Resolve. This keeps your entire project—video, audio, effects, and all—under one roof.
Doing it this way isn't just about saving a few clicks. It's about preserving quality and sync. When you export directly from your timeline, you eliminate the risk of audio drift or quality loss that can sneak in when you pass a file through some random third-party tool. You're working from the source, from start to finish.
Unlinking and Exporting in Adobe Premiere Pro
Premiere Pro gives you a couple of solid, no-fuss ways to separate and export your audio. The most common approach is just isolating the audio tracks you need and exporting them.
When you first drop a video clip onto the timeline, its video and audio components are locked together. They move as one. The first thing you need to do is break that connection.
- Unlink: Right-click the clip on your timeline and hit Unlink. Simple. Now the audio and video are independent, and you can move, trim, or delete them separately.
- Isolate: With the clips unlinked, you can just delete the video track entirely, leaving only the audio you want.
- Export: Head up to
File > Export > Media. In the settings window that pops up, use the format dropdown to pick an audio format. I'd recommend WAV for uncompressed quality or MP3 if you need a smaller, more portable file. The key here is to uncheck the "Export Video" box. Then, just hit Export.
This method spits out a clean audio file that's perfectly synced with your original video sequence.
Another great trick is using 'Render and Replace'. This is perfect if you've already applied some effects to an audio clip on your timeline and want to "bake" them into a brand new file. Just right-click the audio clip, select Render and Replace, and Premiere will instantly create a new WAV file with those effects applied, dropping it right back into your timeline for you.
Using the Fairlight Page in DaVinci Resolve
DaVinci Resolve is famous for its all-in-one approach, and its dedicated audio page, Fairlight, makes audio extraction a breeze.
You can follow a similar path as Premiere on the Edit page: add your clip, right-click, and uncheck "Link Clips" to separate them. But the real magic happens over on the Deliver page.
Here’s the quick workflow for an audio-only export:
- Jump over to the Deliver page.
- In the Render Settings panel, you'll find a bunch of presets. Scroll down to the "Audio" section and pick one, or just set it up yourself.
- Choose your format (like WAV or AAC) and codec.
- This is the most important part: make sure the "Export Video" checkbox is turned off.
- Add the job to your Render Queue and hit Start Render.
The demand for this kind of integrated workflow is a huge factor in the growth of the Audio Extraction Tool Market, which hit a value of USD 450 million in 2024. Industry experts are forecasting an 8.2% compound annual growth rate through 2033, driven largely by video professionals who need precise, high-quality audio tools built directly into their editing software. You can discover more insights about this expanding market and how it fits into the larger audio-video equipment industry.
The real power of Resolve, though, is how seamlessly it connects to Fairlight. Once you've unlinked your audio, you can flip over to the Fairlight page and use its professional-grade mixing console to clean up dialogue, add effects, or master the entire track before you even think about exporting. This tight integration is a massive time-saver, cutting out the need to round-trip your audio to a separate DAW like Pro Tools or Audition. It's a full-blown audio post-production suite right inside your video editor.
Isolating Specific Sounds with AI Audio Tools
The methods we've covered so far are great for one fundamental job: ripping the entire audio track from a video. But what happens when you don't want the whole thing?
What if you just need to lift the dialogue from a noisy street scene, grab a clean guitar solo for a remix, or sample the sound of footsteps for a sound design project?
This is where the traditional tools hit a wall. They can pull the audio out, but they have no idea what’s inside that audio. For that, we need a much smarter approach—one powered by artificial intelligence.
Modern AI audio tools are a massive leap forward. Instead of just extracting a file, they can actually listen to a complex soundscape, identify individual elements within it, and surgically remove only the parts you need. The best part? The most advanced platforms let you do this with simple, natural language prompts.
Moving Beyond Basic Audio Extraction
Imagine you have a video of a live band. Using FFmpeg or Premiere, you get one output: the entire concert, warts and all. With an AI tool, you can just type "isolate the bass guitar" and get a clean track of only the bassline. That's a game-changer.
This isn't just a niche feature; it's driving a huge shift in the industry. The market for AI Audio Processing Software, the tech behind these tools, shot up from USD 3.8 billion in 2023 and is projected to hit USD 18 billion by 2033. It's clear that creators are hungry for more granular control over their sound. You can dig into the numbers and trends in this detailed market report.
This shift takes us from simple extraction to true isolation. It's the difference between taking the whole cake and being able to perfectly slice out just the layer of frosting you want.
How AI Understands Your Audio Needs
So, how does it work? The core technology relies on models trained on colossal libraries of sound. These models have learned to recognize the distinct sonic fingerprints of everything from human speech and musical instruments to environmental noise like wind or traffic.
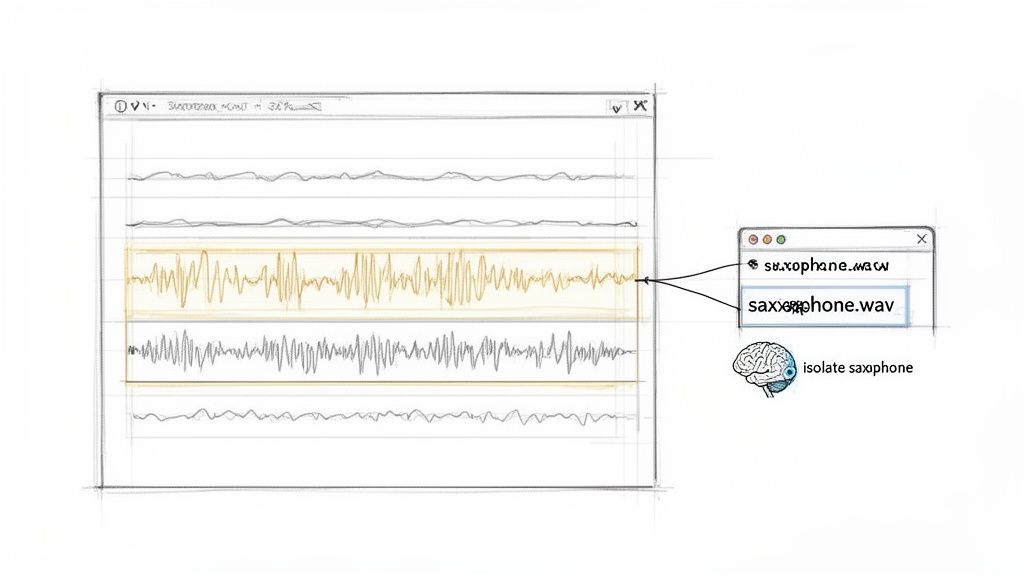
When you give it a prompt like "extract the lead vocal," the AI gets to work:
- It Analyzes the Audio: First, it breaks down the entire frequency spectrum of the audio track from your video.
- It Identifies the Target: Next, it matches the sonic patterns in the file to its internal understanding of what a "lead vocal" sounds like.
- It Separates the Sound: Finally, the tool intelligently masks and removes everything that isn't the target sound, creating a brand new, isolated audio file.
This process is a lifesaver for all kinds of creative work, especially for musicians trying to deconstruct or sample existing tracks. The ability to grab just a drum loop or a synth melody opens up a universe of possibilities, as you can see in these practical audio isolation use cases for musicians.
A Real-World Scenario: A documentary filmmaker has an interview clip shot on a busy city street. The dialogue is perfect, but a passing siren nearly ruins a key moment. Instead of fussing with EQ and risking damage to the vocal quality, they can just upload the video to an AI tool and type, "remove the siren sound." The tool delivers the clean dialogue, minus the distraction.
A Practical Workflow for AI Sound Isolation
Let's walk through a common situation. Say you have a video of a live acoustic performance and you want to create a backing track by removing the singer's voice.
First, you’d upload your video file (like concert.mp4) directly to an AI audio platform. These are usually cloud-based, so you don't have to install any software.
Next, it's time to write your prompt. Be specific! Instead of something vague like "remove singer," a much better prompt would be "isolate the acoustic guitar and drums." This tells the AI exactly what to keep. The tool will process the file and usually give you two outputs: one with just the guitar and drums, and another with everything else (in this case, the vocals you wanted to remove).
Finally, you just choose your quality and format. For a high-fidelity backing track, you'll want to download the isolated instruments as a lossless WAV file. If you’re just making a quick reference track, a high-bitrate MP3 will do the job. This entire workflow turns a complex audio engineering task into a simple process anyone can handle in minutes.
Got Questions About Extracting Audio?
When you first start pulling audio from video files, a bunch of questions always come up. It's not just about knowing which button to click; it's about understanding the why behind your choices. I've been there, and I’ve heard these same questions from countless creators.
This section is all about tackling those common hurdles head-on. Think of it as a quick reference guide to help you sidestep the usual pitfalls and get your workflow dialed in.
What’s the Best Audio Format to Use?
This is easily the question I get asked most often, and the honest answer is: it depends entirely on what you're doing with the audio next. The right format is always a balancing act between pure quality, file size, and compatibility.
WAV (Waveform Audio File Format): For anything that requires pristine quality, WAV is the king. It’s an uncompressed format, meaning it keeps every single bit of the original audio data. If you’re a musician pulling a sample, a filmmaker sending audio out for professional mixing, or a podcaster doing serious cleanup, always export to WAV. The files are beefy, but the quality is non-negotiable for professional work.
MP3 (MPEG Audio Layer III): This is the trusty workhorse of the internet for a reason. MP3s use smart compression to shrink file sizes way down, making them perfect for sharing, streaming, or just saving space. The trade-off is a slight, often unnoticeable, loss in quality. Use MP3s for sending quick previews, final podcast episodes, or anything destined for a platform like Spotify. A bitrate of 192kbps or higher is a solid baseline for good quality.
AAC (Advanced Audio Coding): You can think of AAC as the modern, more efficient successor to MP3. It generally sounds better than an MP3 at the same bitrate, which is why it’s the format of choice for giants like YouTube and Apple Music. It's a fantastic all-around choice when you need that perfect blend of manageable file size and great sound.
My Rule of Thumb: Always start with a WAV file for editing and production. It’s your lossless master copy. When you’re ready to share, you can create a high-quality MP3 or AAC from it. You can always compress a high-quality file down, but you can never add quality back once it's gone.
Will I Lose Audio Quality When I Extract It?
That’s a great question, and the answer is thankfully straightforward: not if you do it right.
If you stick with professional-grade tools like FFmpeg, Adobe Premiere Pro, or DaVinci Resolve and export your audio as a lossless WAV file, you will experience zero quality loss. You're simply making a perfect, bit-for-bit copy of the original audio stream from the video.
However, you can degrade the quality if you're not careful. This usually happens in a couple of ways:
- Choosing a Lossy Format: Exporting directly to a compressed format like MP3 inherently throws away some audio data.
- Re-compressing a Compressed File: Every time you re-save an MP3 as another MP3, you're losing a little more quality. It’s like making a photocopy of a photocopy—it just gets fuzzier.
- Using Sketchy Online Tools: Some free online converters cut corners to save on their server costs, often processing your audio at a low bitrate without telling you.
The safest workflow is always to extract to WAV first. That way, you have a pristine master to work from.
Is It Legal to Use Audio I Extract?
This one is incredibly important. Just because you can rip the audio from a video doesn't mean you have the legal right to use it. Copyright law is the key factor here.
Whether it’s legal or not boils down to where the video came from and what you plan to do with the audio.
- Your Own Original Content: If you shot the video and recorded the audio, you own it. Go wild.
- Public Domain & Creative Commons: Material in the public domain or under a Creative Commons license is generally fair game, but you must follow the specific terms of the license (e.g., giving credit to the creator).
- Copyrighted Material: Here’s the big one. Ripping the audio from a Hollywood movie, a hit song on YouTube, or a TV show to use in your own project is almost always a clear case of copyright infringement.
When in doubt, always assume the audio is protected. If you want to dig deeper into creative workflows and using audio ethically, these articles on audio manipulation are a great resource. My best advice? Stick to creating your own content or find properly licensed material.
How Do I Extract Just One Specific Sound?
So what if you don't want the whole audio track? What if you just need the dialogue without the background music, or you want to sample a single drum hit from a song?
Traditional extraction tools can’t help here; they just rip the entire audio track as a single file. They can't distinguish between a voice, a car horn, and a guitar riff all happening at the same time.
This is where modern AI tools have completely changed the game. Using a process called audio isolation or stem separation, these tools can analyze a mixed audio track and intelligently identify the individual elements. You can then literally ask the AI to "isolate the vocals" or "remove the wind," and it will pull out just that sound for you. It’s a powerful technique for cleaning up dialogue, creating remixes, or grabbing sound effects in a way that felt like magic just a few years ago.
Ready to go beyond basic extraction and pinpoint any sound with surgical precision? Isolate Audio uses advanced AI that understands plain English, allowing you to pull specific sounds from any audio or video file. Whether you're cleaning up an interview, sampling an instrument, or removing annoying background noise, our tool gives you the control you need. Try it for free today at Isolate Audio.
Article created using Outrank