How to Remove Background Sound from Audio Fast and Clean
You've probably got a file open right now that should have been usable on the first pass. The voice is good. The take is good. Then you hear the air conditioner, the laptop fan, the street outside, or a wash of room noise sitting under every word.
That's the point where a lot of people overcorrect. They slam a noise remover on the track, kill the background, and end up with a voice that sounds phasey, watery, or oddly hollow. Clean audio isn't just “less noise.” It's the version that still serves the job, whether that job is a podcast, a documentary interview, a social clip, a transcription workflow, or a recording where some real-world ambience should stay in.
Why Background Sound Ruins Great Recordings
Bad background sound rarely destroys a recording all at once. It chips away at it. Listeners lean in harder, consonants blur, pauses feel messy, and a strong performance starts sounding amateur even when the speaker did everything right.
I run into this most with spoken-word audio. A guest records a sharp interview from home, but there's HVAC wash under the whole take. A creator films a product demo and the room adds a constant hiss. A field clip has useful dialogue, but traffic lives in the same space as the voice. These are different problems, and they need different levels of cleanup.
For teams producing regular media, that difference matters more than ever. If you're planning broader audio and video productions 2026, audio cleanup can't be treated as an afterthought. It changes edit speed, perceived quality, and how much of a take you can keep.
What clean audio actually means
A lot of people think “clean” means silent background. In practice, clean means intelligible, natural, and fit for purpose. Sometimes that includes a little room tone. Sometimes it means aggressive suppression because the voice must cut through. Sometimes it means leaving more ambience because the recording needs to feel real.
Practical rule: If the cleanup makes the speaker sound less believable, you probably went too far.
This isn't just a taste issue. Audio noise reduction has been treated as a measurable signal-processing problem for decades. The ITU documented formal test ranges for acoustic enhancement devices in Recommendation P.330, including evaluations across signal-to-noise ratios from -3 dB to 30 dB, and later ITU-T Recommendation G.160 referenced performance criteria including 12 dB and 20 dB thresholds in voice enhancement testing (ITU Recommendation P.330).
That history matters because it keeps you honest. Good cleanup isn't magic. It's a trade-off between reducing unwanted sound and keeping speech intact.
Set the goal before touching the tool
Before you remove anything, decide what success sounds like:
- Podcast or interview: prioritize speech clarity and natural tone.
- Video for social or marketing: prioritize clarity first, then speed.
- Transcription or ASR workflow: don't assume heavier denoising helps.
- Documentary or field recording: preserve some environment unless it blocks the subject.
That one decision will save you from most bad edits.
Know Your Noise Before You Remove It
The fastest way to ruin a file is to treat every noise as if it's the same. It isn't. A steady hiss behaves differently from a power hum, and both behave differently from crowd chatter or shifting street noise.
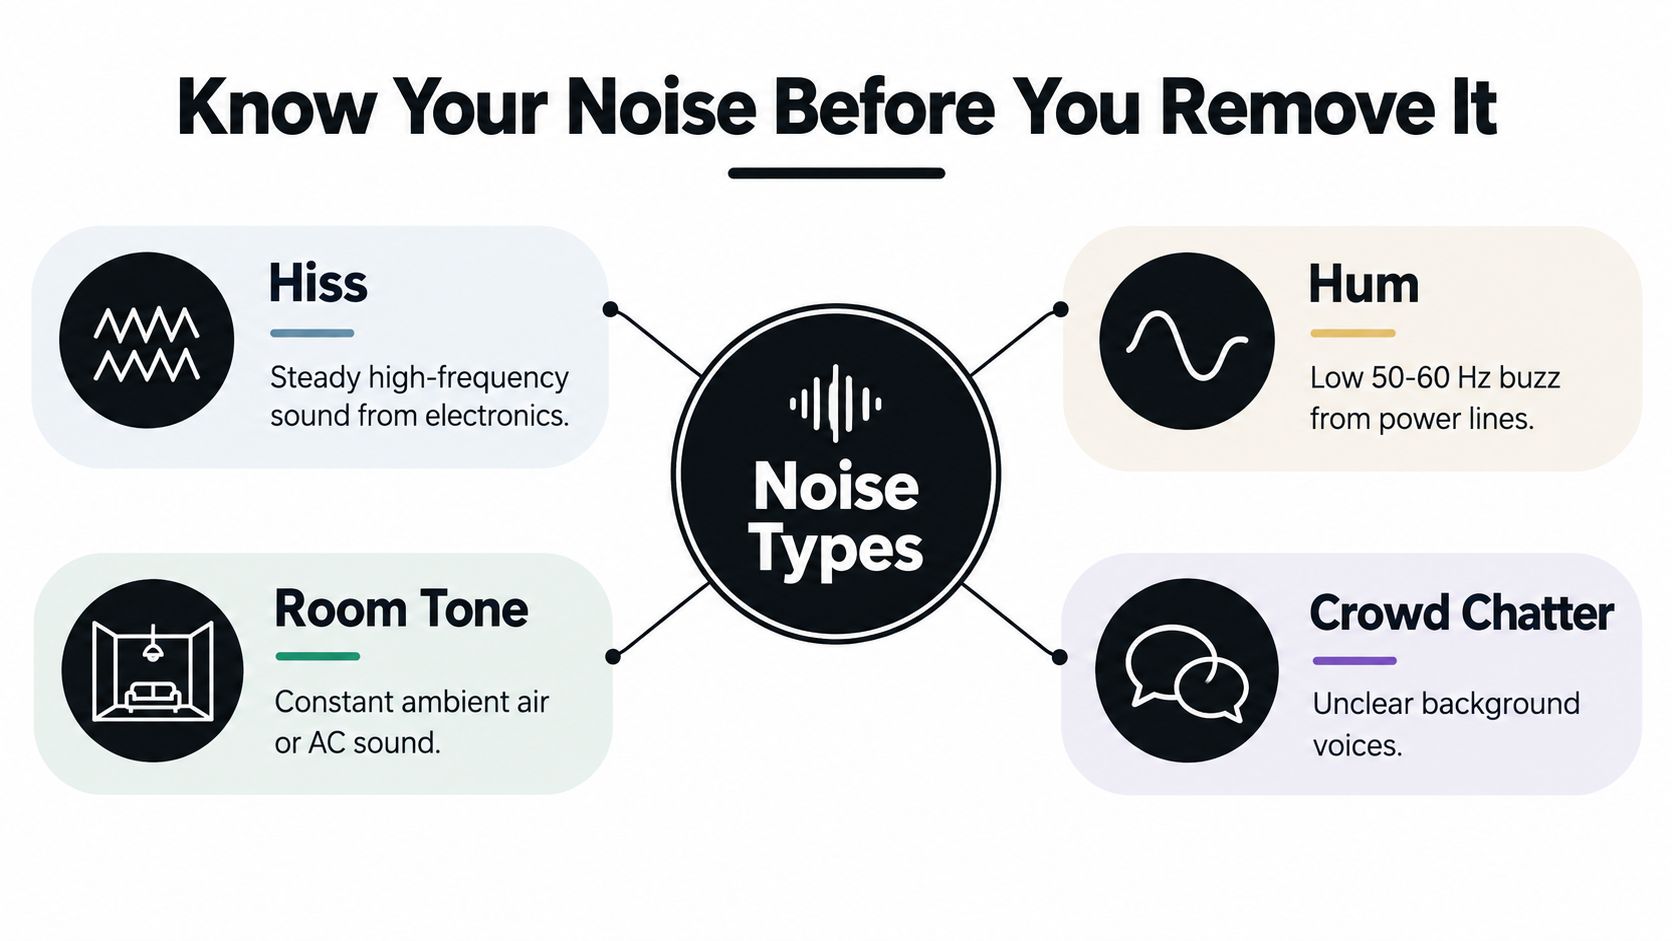
The four noise types that matter most
- Hiss: Broadband, high-frequency noise. You'll hear it from cheap preamps, noisy gain staging, or poor recordings lifted too far in post.
- Hum: Low electrical buzz, often tied to mains power and harmonics. This usually needs targeted removal, not broad denoising.
- Room tone: Constant environmental sound like HVAC, distant ventilation, or the static character of a room. This often responds well to gentle reduction.
- Crowd chatter: Variable, speech-like background. This is harder because it overlaps with the same frequencies and textures as the voice you want to keep.
Listen for whether the noise stays put
The first question I ask is simple: is the noise stationary or non-stationary?
Stationary noise stays fairly consistent over time. Think fan noise, air conditioning, or stable hiss. Non-stationary noise changes constantly. Think dishes clattering in another room, traffic swells, or background conversations. One-click fixes struggle more when the noise keeps changing.
A lot of this comes down to signal-to-noise ratio, or how loud the wanted sound is compared with the unwanted sound. If you want a plain-English refresher, this guide on signal-to-noise ratio is useful.
If the voice is only barely louder than the background, there's no setting that will remove the noise for free. You'll always be trading something away.
Diagnose before you process
Use this quick listening pass before you touch any controls:
- Find a silent gap. Not true silence, just a section where the speaker stops. What remains tells you the bed of noise.
- Check the start and end of words. If consonants already feel weak, aggressive processing will make them disappear first.
- Listen on headphones and small speakers. Hum often jumps out on speakers. Metallic artifacts jump out on headphones.
- Mark the changing sections. A file with a stable room bed and two loud interruptions shouldn't get one global setting.
Why one-click rarely works on every file
Peer-reviewed comparisons of speech-enhancement methods have shown that several statistical algorithms, including MMSE-SPU and logMMSE variants, reduced noise distortion across most tested conditions, but not uniformly across every noise scenario (peer-reviewed comparison of speech enhancement methods). That matches real editing life. A method that works nicely on HVAC can fall apart on café chatter.
That's why diagnosis comes first. If you know the noise type, you'll know whether to subtract it, isolate around it, or leave some of it alone.
How to Remove Background Sound With Isolate Audio
A common failure case goes like this. The interview is usable, the speaker is clear enough, but there is HVAC rumble, keyboard noise, and a bit of hallway spill all living in the same track. A basic noise print can reduce some of it, but the voice starts sounding papery before the distractions are gone. That is the kind of file where Isolate Audio's prompt-based source separation earns its keep.

Set the goal before you process
Use-case decides how far to push cleanup.
If the audio is for final listening, keep some room tone if it helps the voice feel real. If the goal is transcription, accept a drier result if it improves word recognition. If the ambience matters, such as a street interview or event recap, remove distractions selectively and leave the environment intact.
I skip heavy denoising when the background is part of the story or when the voice is already thin. In those cases, a light reduction often sounds better than a technically cleaner but hollow track.
Upload the cleanest source you have, then write a specific prompt
The tool accepts common audio and video formats including MP3, WAV, FLAC, M4A, OGG, MP4, and WebM. I upload the highest-quality source available, because codec smear and clipping make separation less reliable.
Prompt wording matters. Short, concrete prompts work better than vague ones. Useful examples include:
- air conditioner hum behind speech
- office chatter under interview
- wind noise around voice
- crowd cheering behind announcer
- computer fan noise under podcast vocal
Describe the unwanted layer if you want cleaner speech. Describe the wanted layer if you need to pull out an effect or environment.
Check both outputs, not just the cleaned file
The useful part of this workflow is that you get the isolated element and the remainder. For speech cleanup, the remainder is usually the track to keep. The isolated layer is your audit trail.
Listen to that removed layer on its own. If you hear chunks of consonants, breaths, or the upper edge of the voice, the model took too much. Change the prompt, try another preset, or keep a little of the original under the cleaned track.
That simple A/B check prevents a lot of over-cleaning.
Pick the preset based on overlap and importance
The available presets are Best, Balanced, and Fast.
- Fast works for previews and batch triage.
- Balanced is the default I would try for most podcast and video dialogue.
- Best is for important clips where the background overlaps the voice enough that small artifacts will matter.
If the voice and noise are tightly intertwined, try Precision Mode next. That setting is useful on files where normal broadband cleanup starts shaving off syllables.
A related visual workflow exists in product shoots and composites. Teams that also remove background of products will recognize the same basic isolation logic, even though the medium is different.
Verify the result like an editor, not a checkbox
Do a short A/B pass on phrases with sharp consonants and held vowels. Listen for four things:
- Speech clarity. Are T, K, S, and F still intact?
- Naturalness. Did the voice lose depth or room realism?
- Residual distraction. Is the remaining noise less annoying, even if it is not fully gone?
- Intelligibility under stress. Can you still understand every word on laptop speakers and headphones?
This is the practical version of PESQ and STOI thinking. One asks whether the result still sounds like plausible speech quality. The other asks whether the words stayed understandable. You do not need formal scoring to use the idea. If the track sounds cleaner but words get softer or stranger, the cleanup went too far.
A quick visual walkthrough helps if you prefer seeing the interface in action:
Know when to stop
Good background removal is rarely total removal. The win is better listening, better transcription, or cleaner separation for the job at hand.
If a pass removes the distraction and the voice still sounds believable, stop there. Chasing a perfectly dead background often creates metallic tails, pumping, and missing consonants that are harder to ignore than the original noise.
Other Proven Ways to Clean Audio Without Isolate Audio
Not every file needs AI separation. Some clips clean up faster with classic tools, and some need a hybrid approach. I still use old-school processing all the time because it's predictable when the noise is simple.
One useful reference if you want a broader roundup is this guide to audio noise removal software. It's worth comparing categories before you commit to one workflow for every project.
What the classic methods still do well
Noise profile reduction works best on steady backgrounds. If the room noise is consistent, a light pass can take the edge off without changing the voice too much.
EQ and notch filtering are ideal for hum and narrow tonal problems. If there's a specific low buzz, I'll usually try targeted EQ before any intelligent denoising.
Gates and expanders can help in pauses, but they don't clean speech while the person is talking. Used badly, they make the noise disappear between phrases and jump back in on every word, which is often more distracting than the original problem.
Spectral editing is the slow, surgical option. It's excellent for isolated interruptions like a cough, a clink, or a horn in a gap. It's not the method I want for an hour-long interview unless only a few moments are damaged.
Choosing the Right Background Sound Removal Method
| Method | Best For | Trade Off |
|---|---|---|
| AI source separation | Overlapping chatter, mixed ambience, hard-to-define distractions | Can remove parts of the voice if pushed too hard |
| Noise profile reduction | Steady hiss, fan noise, HVAC wash | Can create watery or swirly artifacts |
| EQ or notch filter | Hum, buzz, tonal problems | Won't solve broad or shifting noise |
| Gate or expander | Cleaning pauses between phrases | Doesn't fix noise under active speech |
| Spectral editing | Short, isolated interruptions | Slow on long-form content |
Where neural enhancement pulls ahead
Benchmark data in one comparative study showed a noisy baseline at 1.95 PESQ and 0.72 STOI, while classical masking or direct filtering improved PESQ substantially and pushed STOI to roughly 78 to 80 percent, and the strongest deep model reached 91 percent STOI with similar PESQ gains (comparative study in IJERD). In other words, modern neural methods can recover clarity classical filtering often misses, especially when the noise conditions are rough.
That still doesn't mean neural is always the right answer. If your issue is a plain hum, I'd rather fix the hum directly than run the whole voice through a more complex process.
The cleanest result often comes from two gentle moves, not one aggressive one.
If you work across audio and visual campaigns, the same broader production judgment shows up in adjacent creative systems. Teams shaping identity assets through brand design in Crowbert face a similar choice between fast automation and manual control. Audio cleanup is no different. The method should match the asset.
Fine Tuning Quality and Avoiding Common Artifacts
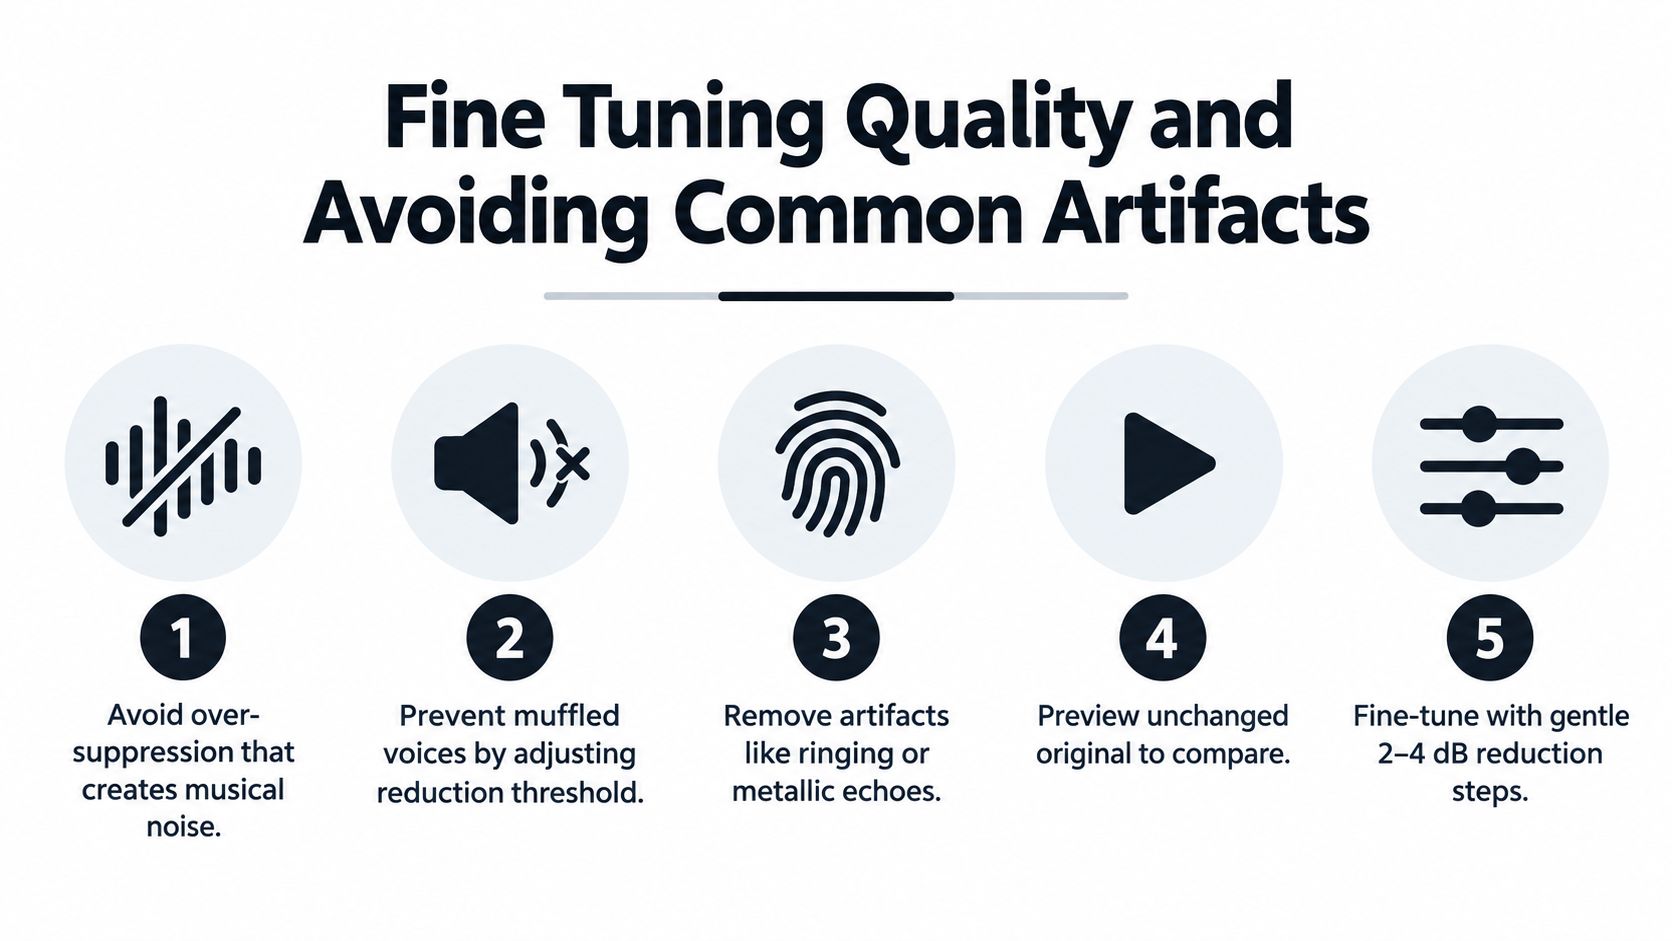
Most bad denoising decisions come from chasing the lowest noise floor instead of the most believable result. The common failures are easy to recognize once you know them: musical noise, muffled speech, metallic reverb tails, and voices that sound detached from the room they were recorded in.
Think in quality and intelligibility
A practical way to judge cleanup is to borrow the logic behind PESQ and STOI. PESQ is commonly reported on a -0.5 to 4.5 scale, where higher means better perceived quality, and STOI ranges from 0 to 1 or 0 to 100 depending on implementation, where higher means speech is easier to understand (speech-enhancement metric guide).
You don't need to calculate those scores on every podcast edit. You do need to think like they do:
- Quality question: does this sound natural?
- Intelligibility question: are the words easier to understand?
Those are not always the same thing.
When not to denoise harder
There's an important trade-off people miss. A future-dated systematic study reported in 2026 found that speech enhancement preprocessing worsened modern ASR performance in all 40 tested configurations, with semantic word error rates rising by 1.1% to 46.6% compared with the original noisy audio (2026 ASR study preprint). So if your real goal is transcription, subtitle timing, or machine analysis, the prettiest waveform may be the wrong target.
A separate 2026 clinical study summary also showed that low-latency deep-learning noise reduction produced significant speech reception threshold benefits for hearing-impaired listeners and cochlear implant users, while causing a small but statistically significant degradation for normal-hearing listeners. Related 2025 to 2026 work in that summary reported results up to 10.3 dB speech-reception-threshold gains in noisy-reverberant conditions and 40 to 70 percent predicted intelligibility in favorable low-reverberation scenarios, depending on conditions and personalization (Frontiers clinical overview).
That's the world lesson: best cleanup depends on who will listen, what the audio is for, and where it will be used.
A simple fine-tuning routine
I use a short check before export:
- Compare against the original at matched loudness. Louder nearly always sounds “better,” even when it isn't.
- Listen for S sounds and breath tails. They reveal over-processing fast.
- Play a short section for someone else. Ask what words they missed, not whether they “liked” it.
- Keep some room if the project needs realism. A dead-silent background can sound fake in interviews and documentaries.
Leave a little air in the recording if removing it would also remove the sense of place.
Exporting and Reusing Clean Audio With Confidence
A file can sound clean today and still create problems later. The usual failure point is export. Someone needs a new cut for YouTube, a transcript for captions, or a version with more room tone left in, and the only file on hand is a heavily processed MP3.
Keep options open.
For any recording that may be reused, save three versions:
- Original source with no processing
- Cleaned master at the highest practical quality
- Delivery copy for the platform or editor that needs it
That split matters because background removal is a use-case decision, not a one-time improvement. The version that sounds best for casual listening may not be the best one for transcription. A slightly noisier file often keeps consonants, breaths, and word endings more intact, which can help speech-to-text and dialogue editing. For interviews, documentaries, and field recordings, leaving some natural ambience can also sound more believable than a stripped, airless background.
A final export checklist
- Name files by purpose and version:
episode12_clean_master,episode12_transcript_friendly,episode12_publish_mix - Note the cleanup intent: listening quality, transcription accuracy, or natural ambience
- Check endings and pauses: artifacts often show up in fades, breaths, and room tails
- Test on two systems: headphones catch hiss and chirping, small speakers reveal whether speech still reads clearly
- Save the settings used: plugin presets, reduction amounts, and any manual edits
I also recommend a quick verification pass before sending anything out. Match loudness against the original, then compare short sections with fresh ears. If the cleaned file sounds clearer but words start losing edges, S sounds smear, or the room pumps in and out, the denoising went too far. That is the practical version of PESQ and STOI thinking. Judge both perceived quality and intelligibility, not just how quiet the background became.
If you process recurring work such as podcasts, courses, interviews, or research recordings, build separate export standards for each one. Consistency beats chasing a perfectly silent background on every clip.
If you need a prompt-based way to separate a voice from specific unwanted sounds or pull out individual layers for alternate exports, Isolate Audio can fit into that handoff step. Use it to create comparison versions, then keep the original, the cleaned master, and the purpose-built export so you can revisit the decision without starting over.