Background Noise Removal from Audio: A Complete Guide
You finish the edit, hit play, and hear it right away, a low hum under the voice, a bit of room echo, maybe a laptop fan or a dog barking in the wrong half-second. The take sounded fine in the room, but now the recording has the kind of background clutter that makes a good voice feel amateur. That's the job of background noise removal from audio, not to make everything silent, but to get the recording back to something people can listen to without flinching.
The mistake audio workers make is treating denoising like a single strength slider. That usually ends with one of two failures, either the noise is still obvious, or the voice turns hollow, watery, or metallic. A better way to think about cleanup is as a three-output problem, you want a cleaner signal, preserved voice quality, and no processing artifacts. If one of those drops out, the result can be worse than the original.
What Background Noise Removal Really Means
The first thing I listen for is whether the noise is steady or whether it moves around with the room and the speaker. A constant hiss, hum, or fan noise behaves very differently from a cough, a chair squeak, or traffic passing outside the window. That distinction matters because different tools solve different problems, and reaching for the wrong one is what gets people into trouble.
The three things you're balancing
Clean audio is not the same thing as silent audio. A track can lose its noise floor and still sound unnatural if the denoiser chews up consonants, breath cues, or room tone. Meters help, but the best cleanup decisions are made by ear, listening for what disappears along with the noise.
Practical rule: if the voice gets thinner faster than the noise gets quieter, back off.
A useful mental model has three outputs. Cleaner signal means the unwanted sound is reduced. Preserved voice quality means the speaker still sounds like themselves. No artifacts means the processor didn't add chirps, pumping, musical tones, or that under-water texture you hear when a reduction setting is too aggressive. Every tool you'll touch, from a noise gate to AI separation to manual spectral editing, trades these three against each other differently, and knowing which output a tool sacrifices tells you when to use it.
The history of the field points to the same idea. Spectral subtraction, introduced by Steven Boll in 1979, framed noise reduction as a signal-estimation problem rather than a simple volume cut, and modern reviews still treat it as the first practical frequency-domain noise-suppression technique (MDPI review on spectral subtraction). That framing remains the core lesson for editors today. The goal is to separate what matters from what doesn't, and to leave the rest of the world audible but harmless.
Preparation Before You Touch the File
Before any denoiser runs, I want the file standardized and the damage mapped. A messy import can make even a decent tool behave badly, especially if the recording has wildly different loudness across sections or a few clipped peaks that throw off the noise model. That's why prep saves time later.
Standardize first, process second
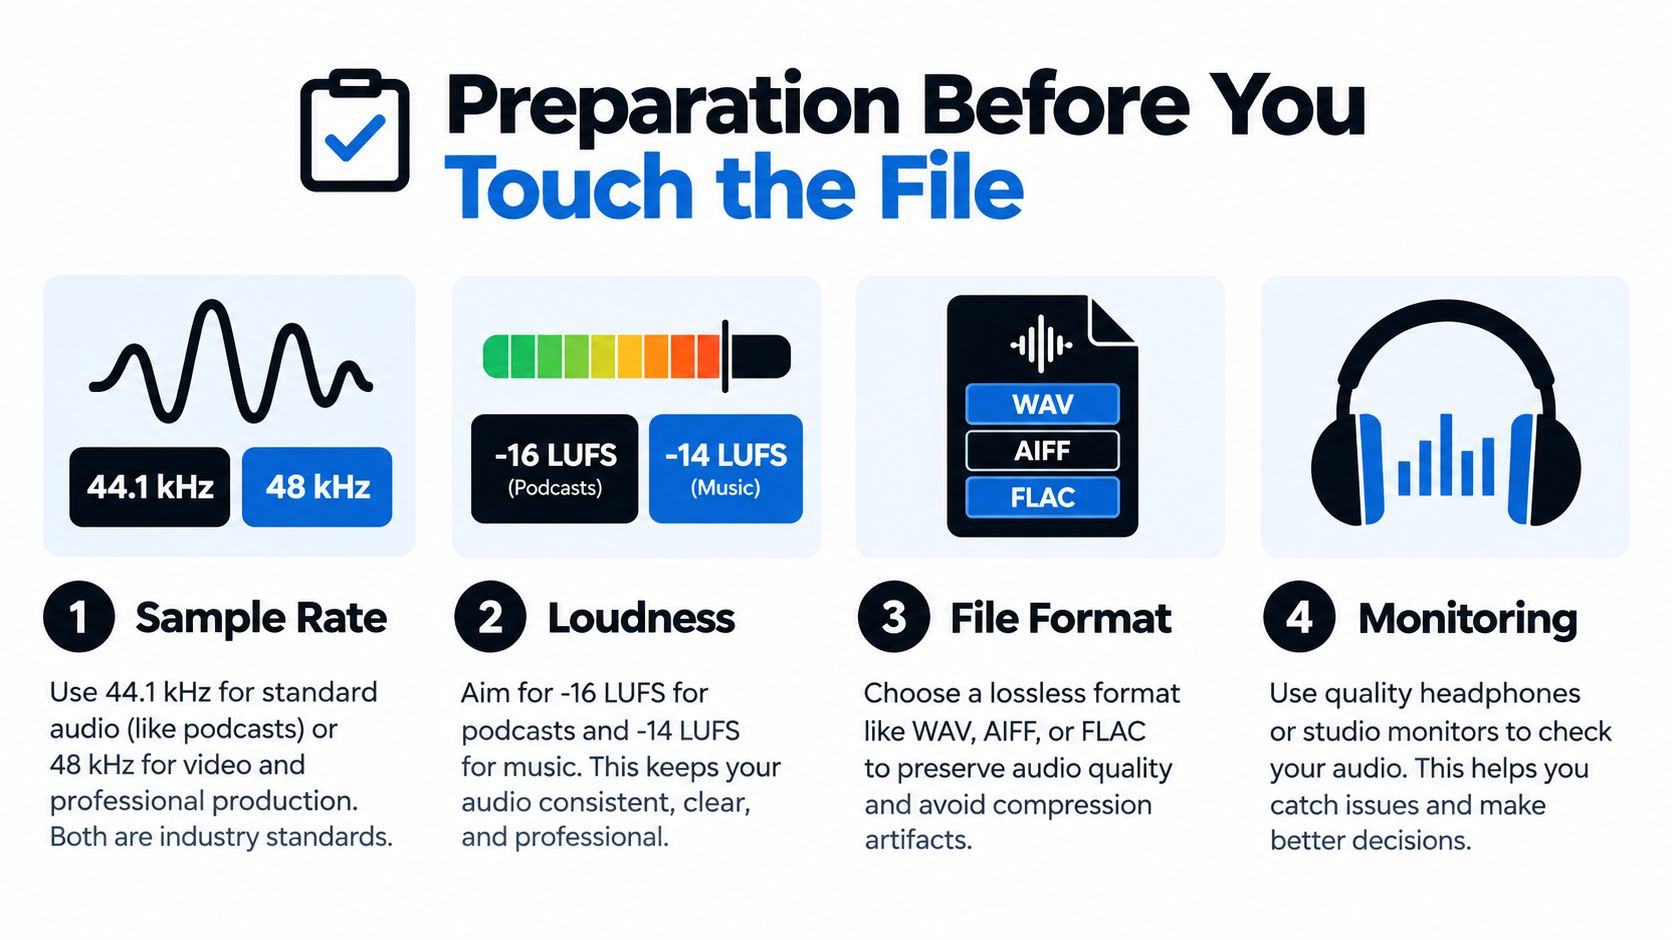
Start by converting the file to a consistent working format and sample rate. In practice, that means keeping the audio in a clean editable format such as WAV, AIFF, or FLAC, then matching the project to the rest of the session instead of letting every clip live in its own little universe. If you're cleaning dialogue, you also want the loudness to feel consistent before you start pushing reduction harder.
For podcasts, a common target is -16 LUFS, and for streaming music, -14 LUFS is a familiar target in many workflows. Those numbers don't remove noise by themselves, but they help you judge whether the cleaned file is sitting where it should in the final mix. They also stop you from mistaking “quieter” for “better.”
Next, listen through the whole file once on headphones and once on laptop speakers. Headphones tell you about hiss, hum, and tiny artifacts. Laptop speakers tell you whether the voice still reads clearly after the cleanup. Mark the bad spots on the timeline, because a barking dog in one section and HVAC rumble in another rarely need the same fix.
Keep the original untouched. If a reduction pass goes too far, you'll want the clean source ready for a more conservative redo.
The last prep move is simple but easy to skip, trim headroom so transients don't make a noise model overreact. A slammed peak can make a tool chase the wrong thing, and then you're repairing the repair. That's wasted time, especially when the problem is only in a few regions, not the whole file.
Choosing the Right Noise Reduction Approach
Most bad cleanup starts with the wrong tool. A noise gate, a spectral editor, and an AI separator can all remove unwanted sound, but they solve different jobs and they fail in different ways. Line them up against the same recording and the choice gets much clearer.
| Scenario | Best approach | Why it works |
|---|---|---|
| Speech pauses with room tone between lines | Noise gate | It can mute low-level background sound only when nobody is speaking. |
| Fixed hum, buzz, or a tonal machine noise | Spectral editor | You can target the exact band instead of flattening the whole take. |
| Speech mixed with music, crowds, or overlapping noise | AI separation | It can pull apart elements that overlap in time and frequency. |
Gates, spectral tools, and AI do not overlap perfectly
A noise gate is great when there's obvious silence between phrases. It's also the wrong answer for a singer, a violin, or any performance where quiet detail matters. The gate doesn't know what's musically important, it only knows whether the level fell below a threshold.
A spectral editor gives surgical control. If you can see the problem in the spectrogram, you can often treat just that part of the file instead of applying a broad reduction. That's why a lot of editors still reach for it on a single hum, a click, or a squeak that stands out in an otherwise good take. For mic-specific examples of this kind of issue, the practical breakdown in gaming mic echo solutions is a useful reference point.
AI separation fits where the problem overlaps in time and frequency. If a voice sits inside music, traffic, crowd noise, or room reflections, a gate won't help and a spectral brush may only scratch the surface. The separator estimates what belongs to the voice and what belongs to everything else, then rebuilds the target from that estimate rather than lowering the whole mix together.
Here's the decision rule I use. If the noise disappears in silence, use a gate. If you can see the noise as a band or line, use spectral editing. If the unwanted sound overlaps the target throughout the take, use AI separation.
Using AI Separation for Difficult Mixes
A difficult mix is where AI separation earns its keep. A voice buried under music, room tone, and stray noise is usually too entangled for a simple subtractive pass, and that's where natural-language separation is more practical than trying to draw every problem by hand. Isolate Audio is one option built for that workflow, and its AI stem separation guide shows the same core approach from a stem-focused angle.
A clean workflow for overlapping sources
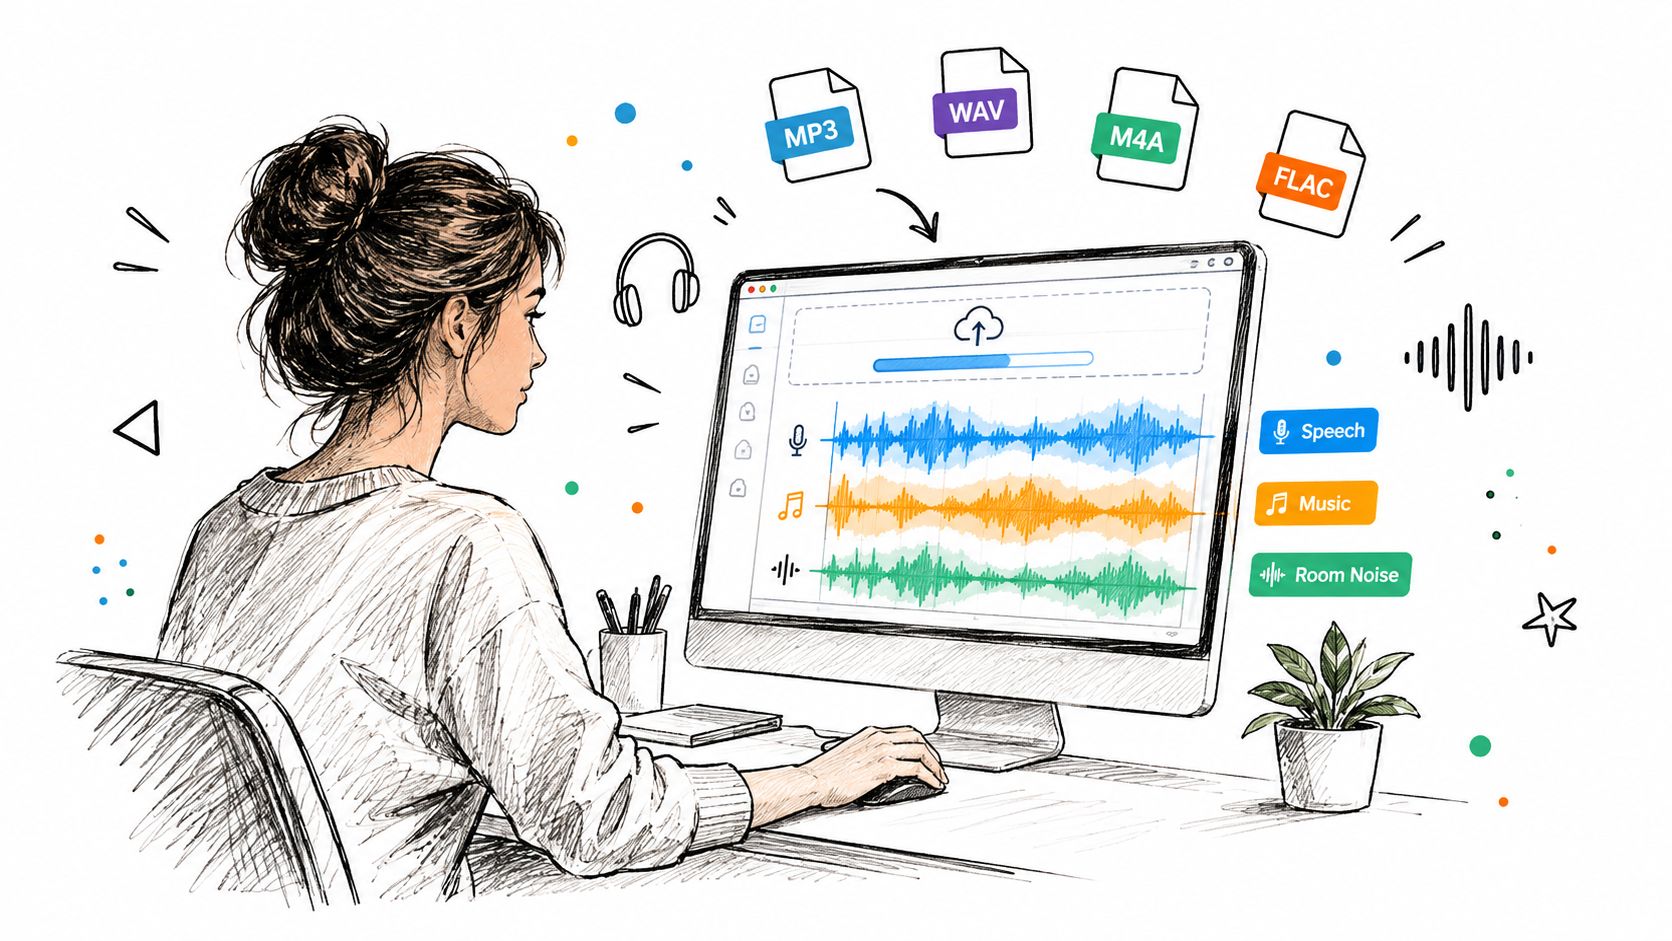
Upload the file in a supported format such as MP3, WAV, FLAC, M4A, OGG, MP4, or WebM. Then describe the target plainly, something like male narrator only or remove background noise, keep the voice. The point is to tell the system what to preserve, not to write a technical spec.
Preset choice matters more than people expect. Best is the cautious option when the material is messy and you can afford the extra time. Balanced is the default I'd reach for on normal dialogue cleanup. Fast is useful when you just need a quick preview and don't want to wait for a deeper pass.
Precision Mode earns its time on overlapping sources, low-SNR recordings, and busy beds where the voice and the unwanted material are tangled together. In cleaner files, it can be overkill. In ugly real-world recordings, it often prevents the sort of partial separation that sounds technically impressive and emotionally wrong.
Listen for whether the speaker still sounds like the same person after separation. If the voice changes character, the result isn't a win.
The most important check after export is by ear. A result that looks clean on paper can still carry residual hum, unstable gating, or a faint musical shimmer on transients. That's where objective metrics help, but they don't tell the whole story. In a 2025 systematic review of 47 speech-enhancement studies, PESQ was reported in roughly 64 percent of cases, which shows how often teams lean on perceptual quality as one part of evaluation rather than treating any single metric as enough (systematic review of speech-enhancement metrics).
If you're comparing tools for a creator workflow, this is also where a broader service like AiHeadshots Studio Pod headshots may sit alongside cleanup tools in a production stack, especially when teams are moving assets through fast content pipelines. The audio lesson is the same either way, don't trust the first pass blindly.
Manual Spectral Editing When You Need Precision
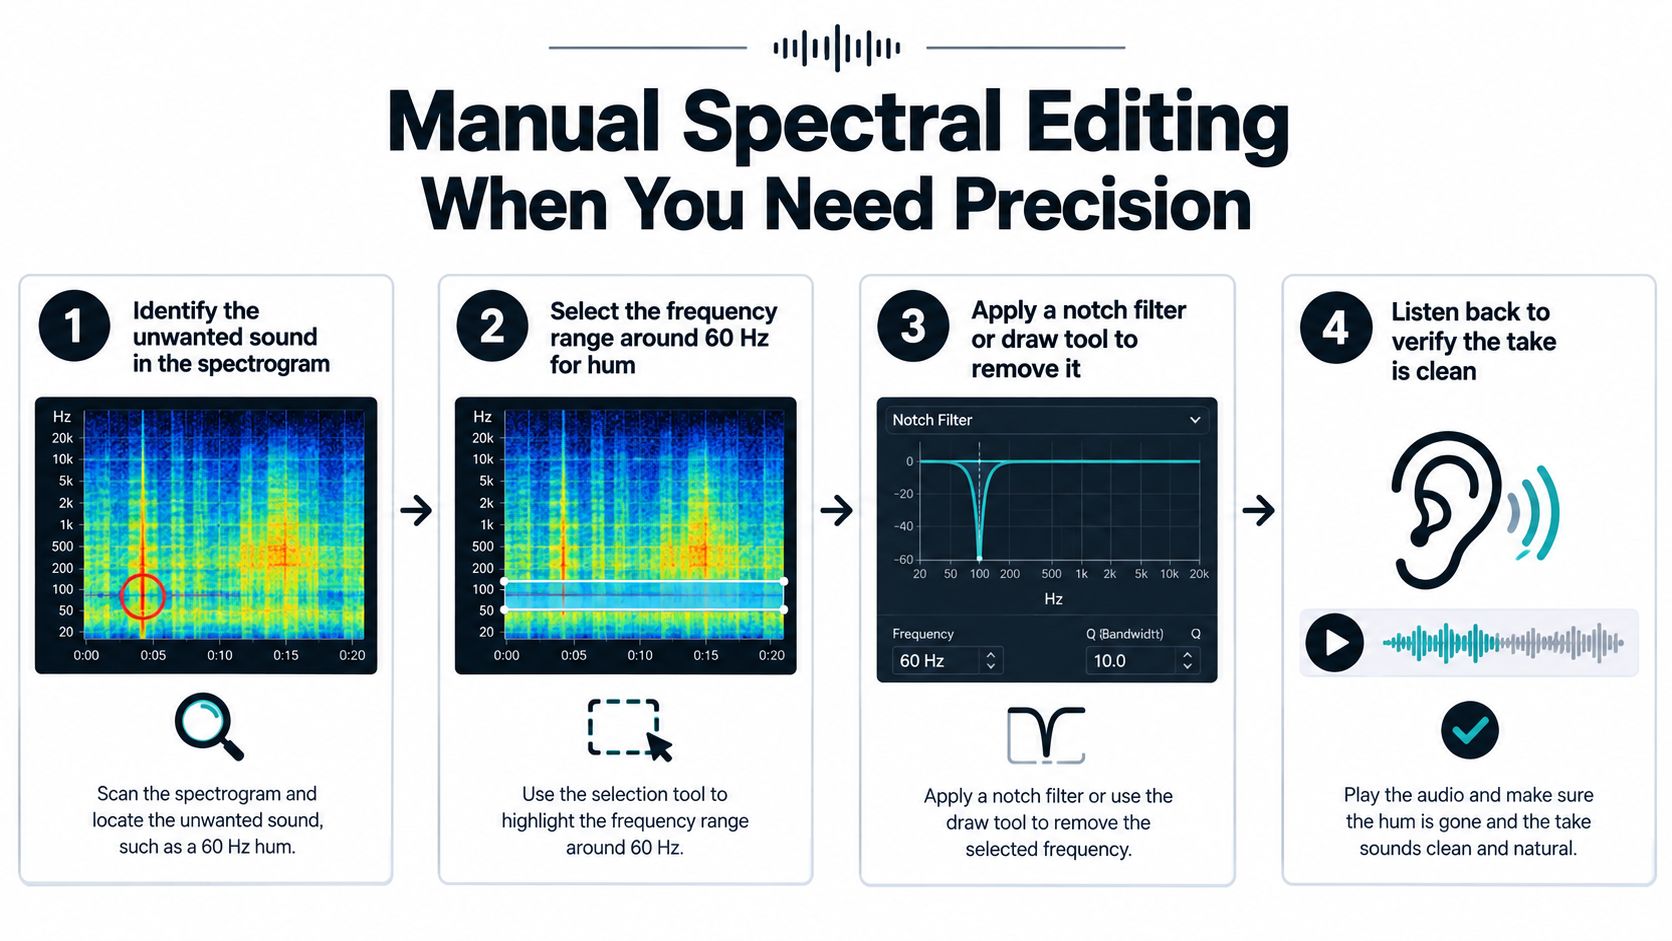
When the problem is specific, manual spectral editing still beats broad reduction. A 60 Hz hum, a single dog bark, a chair squeak, or a keyboard clack often needs a targeted move instead of a global processor. That's especially true when the rest of the recording is already good and you only want to rescue one ugly moment.
Read the spectrogram before you start cutting
Zoom into a quiet section and look for the pattern. Tonal noise usually shows up as a line or a narrow band. Broadband noise looks more like a smear across a wider area. That visual difference tells you whether a notch-style move or a broader spectral repair is more sensible.
Select the offending band with a brush, lasso, or frequency tool. Don't delete it outright unless the artifact is isolated and the take can survive the cut. A safer move is to attenuate by a moderate amount and then re-render, because a hard removal can leave a hole that sounds more obvious than the noise did.
A common mistake is to keep pushing the same setting across the whole file. That's how editors damage good sections in order to rescue one bad stretch. The better habit is to process difficult regions separately, then compare the result against the untouched material.
Conventional spectral subtraction can create musical noise when the noise estimate is too static, which is why conservative settings and dynamic estimation matter in real recordings (2025 spectral-noise paper on musical noise). That same warning applies to manual work. The more aggressive the edit, the more likely you are to hear chirping, warbling, or metallic residue afterward.
If you can hear the repair before you hear the problem, the fix is too loud.
A dedicated restoration tool can help here too, especially if you're pairing spectral work with a broader cleanup pass. The practical notes in audio restoration techniques are worth comparing against your DAW workflow if you're balancing surgical edits with faster batch cleanup.
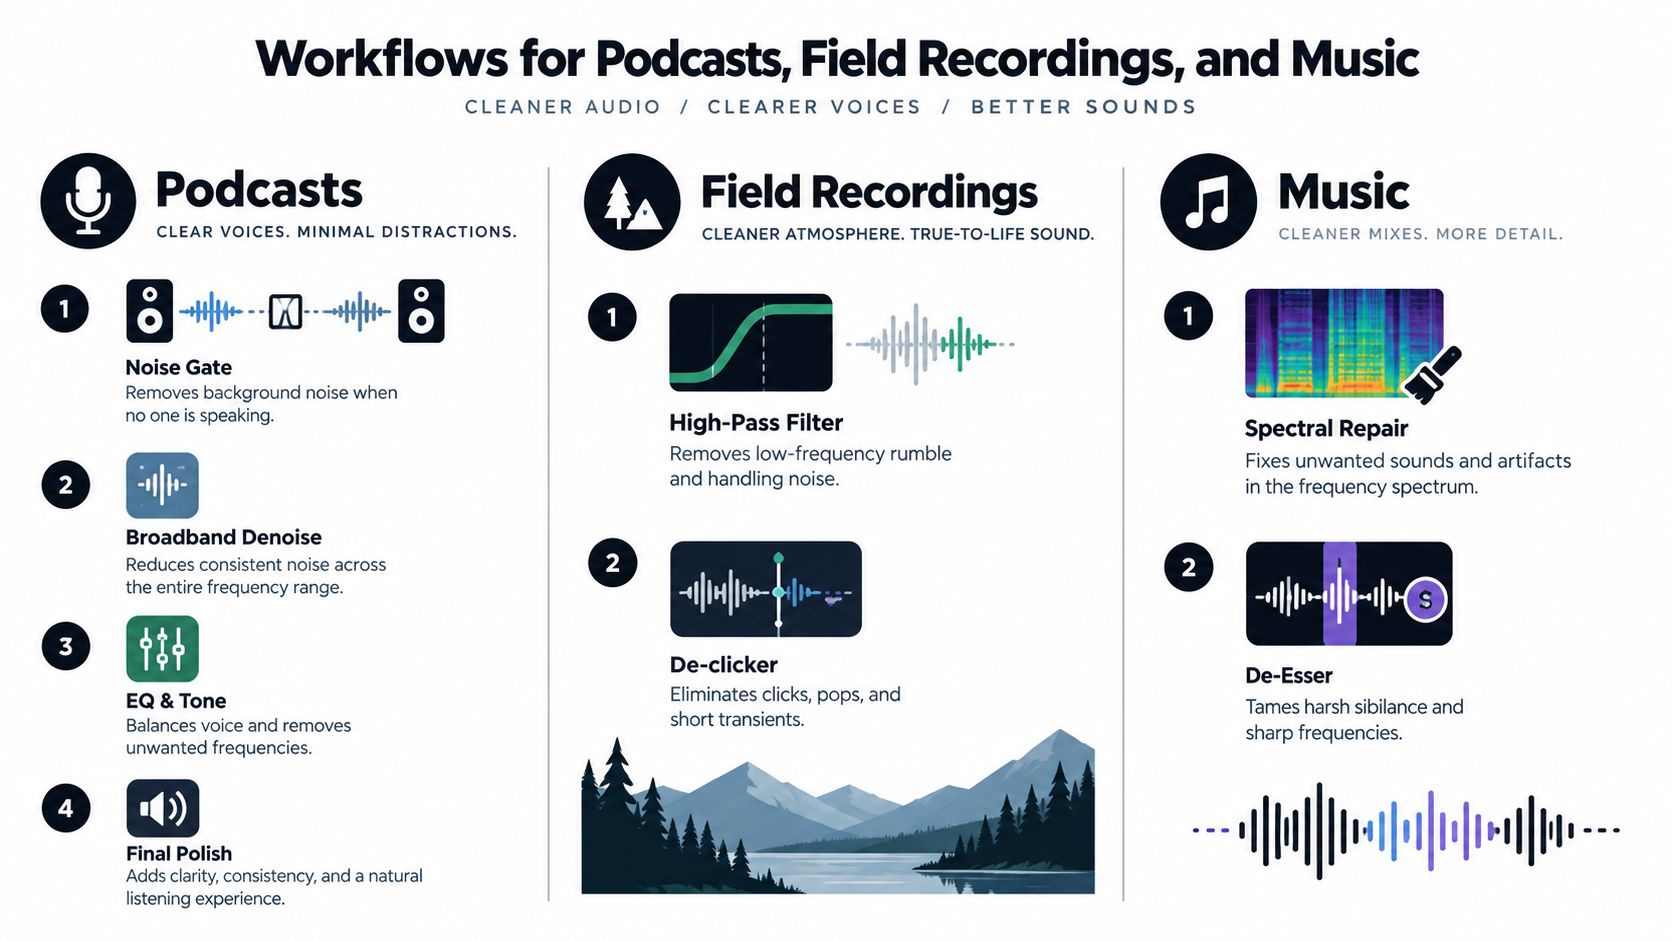
Workflows for Podcasts, Field Recordings, and Music
The source material changes the rules. What sounds like a perfect cleanup on a podcast can wreck a field recording, and what works on spoken-word dialogue can flatten a musical take. The trick is not choosing one universal setting, it's choosing the least damaging path for the job in front of you.
Podcasts need restraint, not punishment
For podcasts, I usually start between speakers. A noise gate can clean dead air, then a gentle denoise pass can tidy the host's room tone, and then the final loudness pass can bring the episode into shape. That sequence keeps the edit natural because it doesn't ask one processor to solve every problem at once.
The internal workflow guide in podcast production workflow lines up with that kind of staged cleanup. The key is to protect the voice first, then trim the leftovers, not the other way around.
Field recordings reward patience
With field audio, a little background often belongs there. Wind, insects, distant traffic, and natural ambience can be part of the scene, and stripping them too hard can make the recording feel fake. Modern enhancement systems can improve noise scores while still leaving speech quality worse than the original noisy file, which is why leaving some steady noise is often better than over-suppression (Interspeech 2025 research on enhancement trade-offs).
Music needs less sterilizing than people expect
Music cleanup is where people overdo it fastest. A vocal take with headphone bleed, a room recording with a little extra air, or a location take with subtle ambience can all survive better with light correction than with a hard wipe. Drums, strings, and breath details often matter more than pristine silence.
For any of these workflows, the question isn't "Can I remove it?" The true question is "What part of the performance gets damaged if I do?"
Verification Habits and Your Cleanup Checklist
Verification is where most cleanup projects are won or lost. The best editors don't trust one listen in one room, because artifacts hide differently on headphones, laptop speakers, and car systems. They also don't collapse everything into one vague opinion about whether the file sounds “better.”
In the INTERSPEECH Deep Noise Suppression Challenge, the best overall-quality score was only about 3.78 on a 5-point scale, and all but the top two teams performed worse than the noisy input on speech quality (challenge report). That result is blunt, but useful. A file can look improved and still fail the ear test.
Use three passes, not one
First, listen for speech quality. Does the voice still sound natural and stable. Second, listen for background intrusiveness. Is the noise still distracting, even if it's lower. Third, judge overall quality. That last pass catches the trade-off between cleanliness and realism.
A short checklist keeps the process honest.
- Standardize the file: Set a consistent working format and loudness before processing.
- Pick the right method: Use a gate, spectral editing, or AI separation based on the noise type.
- Start conservatively: Run a light pass before touching stronger settings.
- Check for artifacts: Listen for musical noise, pumping, coloration, and clipped transients.
- Increase only when needed: Push further only if the residual noise is more damaging than the distortion.
- Archive the original: Keep a clean source so you can redo the job with better judgment later.
Test the file on the playback systems your audience uses. Headphones expose the smallest flaws, laptop speakers expose bad midrange decisions, and a car test often reveals whether the voice still cuts through in real listening conditions. If the track survives those three, it's probably ready.
If you're cleaning a handful of files, slow manual judgment is enough. If you're processing interviews, creator uploads, or mixed media at scale, Isolate Audio gives you a way to upload a file, describe the target in plain language, and separate the unwanted material from the rest of the recording. Visit Isolate Audio and use the same cleanup logic across more files without turning every rescue into a one-off fight.