
Background Noise Removal Video: A Practical 2026 Guide
You've reached the part of the edit where the picture looks fine, the interview is compelling, and the audio makes the entire video feel unusable. A fan drones beneath every sentence, traffic rises whenever the guest makes an important point, or a faint electrical buzz becomes obvious only after you add compression. You can often rescue the recording, but the fastest route isn't a bigger noise-reduction setting. It's a more deliberate decision about which sound to remove and which sound to protect.
Good background noise removal for video should leave the audience focused on the speaker, not on the repair. That means identifying the noise, isolating it where possible, processing only the sections that need help, and checking the result on ordinary playback devices. The cleaner track isn't automatically the better track. The better track preserves intelligibility, timing, breath, room tone, and the character of the voice.
The Moment Your Footage Sounds Unusable
The waveform looks respectable on the review monitor. Nothing appears clipped, the dialogue sits at a workable level, and the camera footage cuts together neatly. Then playback starts. A constant HVAC drone sits under the guest's opening sentence, a lawnmower leaks through the closed window, and an LED panel adds a thin electrical hum that becomes impossible to ignore once the speaker pauses.
That situation feels worse than a visibly damaged recording because the problem hides in plain sight. Loud background noise is easy to notice, but structural noise needs closer listening. A low hum occupies a narrow and persistent part of the spectrum. Hiss spreads more broadly across the high frequencies. Rumble gathers in the low end and can compete with the body of a voice. Wind changes shape from moment to moment, while a refrigerator or air conditioner can sound stable until the speaker stops talking.
Those differences matter because one broad noise-reduction pass treats every problem as if it were the same. It may reduce the HVAC, but also shave off consonants. It may lower the hiss, but leave the hum untouched. It may make the lawnmower quieter while creating a watery texture around the words.
Practical rule: Listen once with the picture turned off. Name the unwanted sound before you reach for a processor.
Noise reduction has a long history of balancing suppression against fidelity. Dolby's early systems, developed from analog audio engineering, established measurable improvements in signal-to-noise performance, typically around 10 dB, with some professional implementations cited at 10 to 15 dB in the historical record (background on noise reduction history). The lesson still applies to digital video: a cleaner signal has value, but the method must preserve the material people came to hear.
A structured workflow starts with a simple question: what must remain untouched? In a talking-head interview, that may be breath, room tone, and the small changes in vocal texture between phrases. In a field report, it may include enough location sound to keep the scene credible. A practical overview of Premiere Pro video noise cleanup can help with editor-specific operations, but the judgment comes before the software. Denoising is a decision, not an autopilot step.
Preparing the File and Isolating the Track
Start with the original camera media and protect it before processing anything. Import the raw clip into your editor, label the dialogue track clearly, and duplicate the sequence or timeline. Keep the untouched version available so you can compare every repair against the source instead of trusting memory.
Extract the audio as a separate working file. A WAV or AIFF export gives the denoising tool a focused audio asset and makes it easier to replace or relink the result later. Check that the exported file uses the same sample-rate convention as the video timeline and retains enough bit depth for editing headroom. If the camera recorded compressed audio, don't mistake a high-resolution export for restored detail. It preserves the available signal, but it can't recreate information the camera never captured.

Build a reversible working setup
Create a new project copy and an Isolate Audio folder for separated files. Use names that identify both the source and the stage, such as:
- Original: The untouched camera export.
- Working: The copied timeline used for repair.
- Clean stem: The dialogue-focused output.
- Noise stem: The unwanted sound isolated for inspection.
- Final: The file approved for the edit.
Trim only obvious head and tail silence that contains no useful room information. Don't remove every quiet pause inside the performance. Those pauses help you judge whether a processor is cutting unnaturally into the voice or leaving a convincing bed of room tone.
Make the first listen before presets
Load the isolated audio and mark the problem sections. One clip may contain a steady fan, another a passing truck, and a third a chair scrape. Marking them separately prevents a single setting from becoming a compromise across unrelated problems.
If you need to rebuild the video with a corrected track, a guide to ffmpeg video audio combining explains the general process for combining a video stream with an external audio file. For a browser-based workflow, keep the original video separate and use this guide to isolate audio from video as a reference for preparing the extracted track.
At this point, the original is safe, the working audio is separate, and the noise has been marked rather than guessed at. That preparation takes less time than repairing a sequence after an irreversible filter has dulled every speaker.
Using Natural Language Prompts to Isolate the Noise
A generic request such as “clean up background” gives the system too little information about your intention. Describe the unwanted sound and the material that must survive. “Remove air conditioner hum and refrigerator drone, keep the host's voice natural” is more useful because it names both the target and the constraint.
Open the audio-isolation tool, load the prepared file, and write a prompt based on what you heard during the first listen. Be specific without turning the instruction into a technical diagnosis:
- “Remove the low electrical hum from the lighting equipment, preserve the interview voice and natural breaths.”
- “Isolate passing traffic and wind from the dialogue, but don't remove the speaker's consonants.”
- “Reduce the distant crowd chatter while keeping the main speaker and the room's natural ambience.”
- “Separate the espresso machine from the host's speech, including the switching and mechanical sounds.”

The tool should return two useful perspectives: a clean or desired stem, and a stem containing the isolated unwanted sound. Start with the clean stem, but don't stop there. Listen for natural sibilance on words with “s” and “sh,” the ends of breaths, room tone between phrases, and any hollow or phasey quality around vowels. These details tell you whether the separation protected the voice or merely removed large chunks of its spectrum.
The second stem is a quality-control instrument. Solo it and ask whether it contains the air conditioner, traffic, or crowd you described. If the stem also contains vocal harmonics, breaths, or important location sound, the prompt is too broad or the recording has too much overlap for a blanket instruction.
A prompt should describe the sound you want gone, not just the result you want to see.
Vague prompts can produce a technically quiet file that still feels wrong. “Make it professional” doesn't identify a source, a priority, or a preservation rule. The natural-language prompt examples provide a useful starting point, but your ears should decide whether the result is acceptable.
The video preview below shows the kind of visual workflow involved in processing an audio file. Keep the image and playback separate in your review so you don't judge the result from the interface alone.
Save both outputs with clear names before trying another pass. The clean stem becomes the candidate dialogue track, while the noise stem lets you determine whether a stronger setting is justified or whether the first result already solves the distraction.
Choosing Quality Presets and Precision Mode
Presets are useful when they shorten the path to a listenable comparison. They become dangerous when an editor treats the highest setting as a guarantee of the most natural voice. On a difficult clip, render the same short passage through Standard, High, and Maximum, then compare the transitions around words rather than judging only the silent gaps.
The practical distinction is not merely “more cleanup.” Higher-quality processing generally gives the analysis more opportunity to distinguish overlapping material, but that extra analysis can also expose weaknesses in a difficult recording. A steady room hum is usually easier to manage than a lawnmower that rises and falls behind speech. A coffee machine switching on during a sentence is harder still because the unwanted sound changes while the desired signal is present.
Precision Mode belongs on the sections where the ordinary pass leaves audible problems. Use it for wind crossing a lavalier, dense crowd sound, overlapping announcements, or a mechanical noise that shares frequencies with the voice. Don't automatically apply it to every pause. If the voice starts sounding narrowed, brittle, or detached from its room, the setting has crossed from repair into reconstruction.
Match the setting to what you hear
| Preset / Mode | Best For | Tradeoff Avoid |
|---|---|---|
| Standard | Stable fan noise, light HVAC, and a mostly separated voice | Don't use it as a cure for overlapping speech or sudden events |
| High | Noticeable hum, traffic movement, or a recording where Standard leaves audible residue | Watch for dull consonants and a changing room tone |
| Maximum | Difficult material where the voice and noise overlap heavily | Don't assume maximum removal will sound natural |
| Precision Mode | Short, challenging passages with wind, crowd bleed, or mechanical events | Avoid processing the entire timeline when only a few sections need close attention |
For a straightforward interview with a consistent air conditioner, Standard may preserve more life than a stronger pass. For an outdoor interview, High can be worth testing if traffic is masking word endings. Precision Mode is a surgical option for the worst moments, not a badge of technical seriousness.
You can find a fuller explanation of what Precision Mode does before choosing it for a demanding clip. The important test remains audible: compare the first word after the noise, the last syllable before it, and the room tone on either side. If those three points connect naturally, the setting is doing useful work.
Post-Processing and Exporting the Cleaned Audio
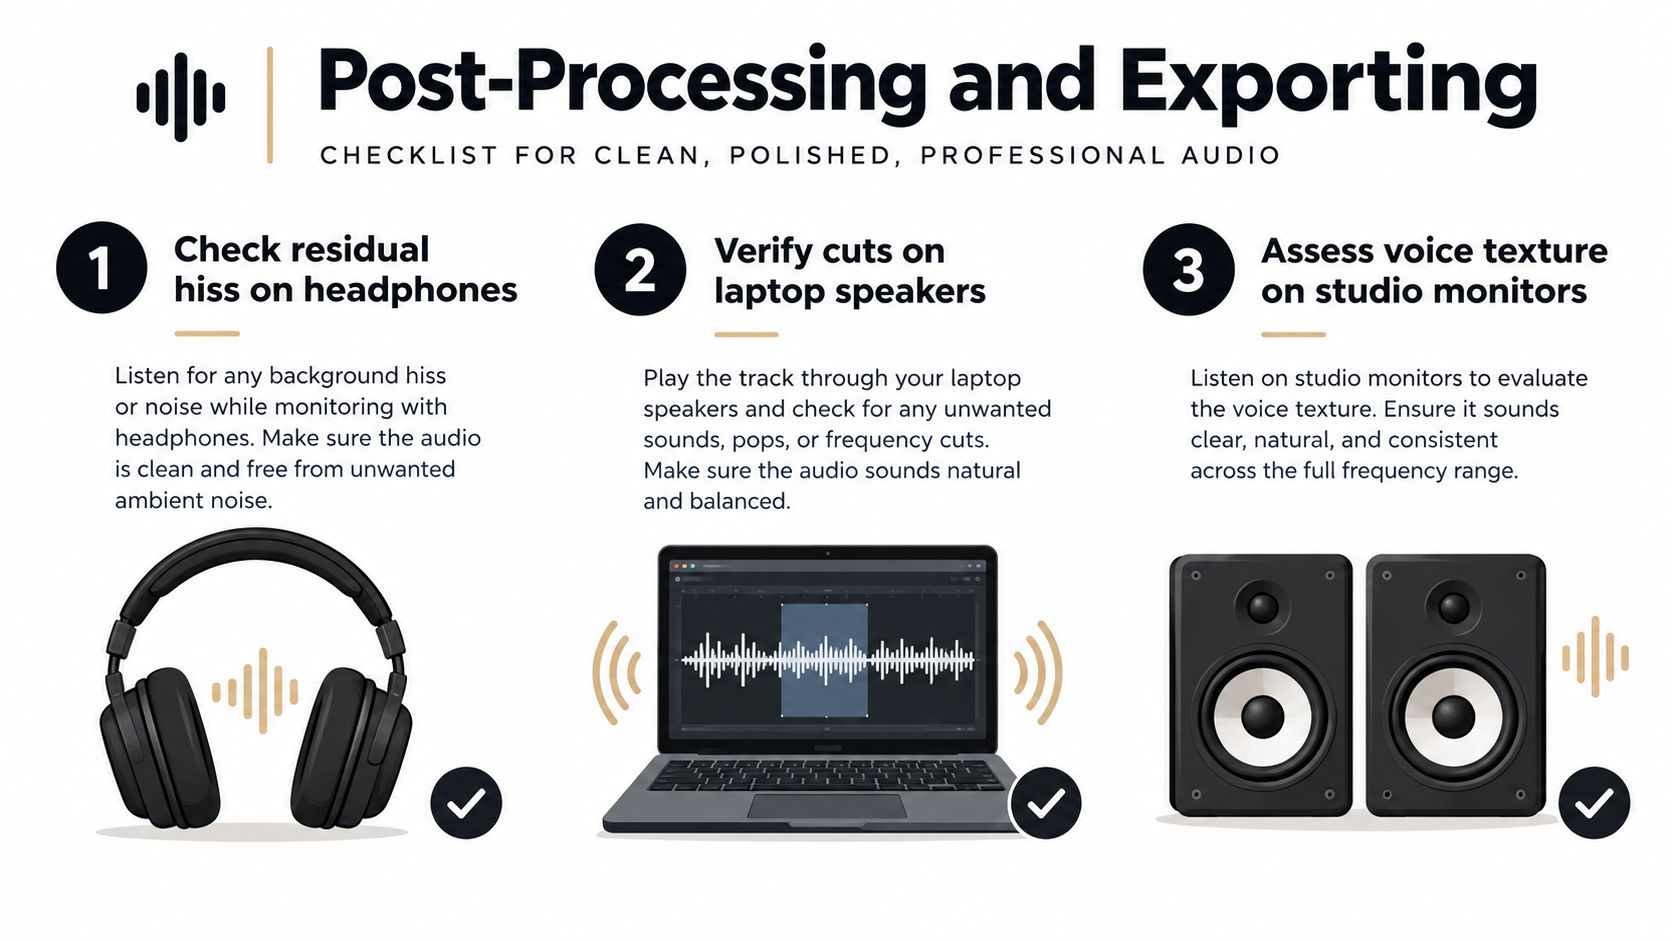
The cleaned stem is not the final mix. Treat it as a repaired source that still needs editorial judgment. Listen once for residual hiss, abrupt edits, clipped breaths, and changes in vocal texture. Then compare it with the original at the same listening level. A louder file can sound better just because it's louder, which makes level matching essential.
Use at least three playback systems. Headphones reveal hiss, watery artifacts, and tiny cuts. Laptop speakers expose whether the dialogue still carries enough midrange presence. A phone tells you whether the words remain intelligible when the listener has little low-end support. Studio monitors can reveal a voice that has become unnaturally thin, but they shouldn't be the only reference.
Restore control without rebuilding the problem
Denoising can reduce presence along with unwanted sound. Apply gentle EQ only after you've listened for what changed. A small presence adjustment may help speech, while a broad high-frequency boost can bring the original hiss back into the mix. Light normalization can establish a workable level, but it shouldn't replace gain riding on individual words or phrases.
For echo or room reflections, use a targeted process rather than treating every reverberant recording as background noise. This guide to removing echo from audio is useful when the main problem is reflection rather than a steady mechanical source. If you reduce both echo and noise aggressively, the voice can lose the acoustic space that makes the edit feel continuous.
Export a lossless master that matches the timeline's sample-rate convention and preserves editing headroom. WAV is a practical interchange format, while FLAC can serve as a lossless archive where the receiving workflow supports it. Create compressed MP3 or AAC derivatives only after the master is approved, because a lossy export can make high-frequency artifacts harder to diagnose.
Before locking the cut, check:
- Residual noise: Solo quiet sections and listen for noise that returns between sentences.
- Edit continuity: Compare room tone before and after every repaired passage.
- Voice texture: Check sibilance, breaths, consonant attacks, and vowel body.
- Picture sync: Confirm that the replacement audio begins and ends at the intended frames.
- Delivery level: Apply the loudness specification required by the destination rather than copying a setting from another project.
A clean export is one that survives the final delivery chain without drawing attention to the repair.
Why Cleaner Is Not Always Better
Aggressive suppression can create the very distraction it was meant to remove. Spectral-subtraction research identifies familiar failure modes, including musical-noise artifacts, speech distortion, and reduced naturalness when suppression goes too far, especially in difficult street and train-like conditions (comparative speech-enhancement research). The voice may become quieter in the unwanted bands, but the listener hears a new pattern of chirps, holes, or unstable texture.
That damage often appears around consonants. A hard filter can flatten the short attack of a “t,” soften an “s,” or remove the upper air that separates one speaker from another. On earbuds, an overprocessed voice may feel muffled and tiring even though the background seems impressively quiet.
The downstream consequences matter too. Compression reacts differently when the noise floor has been shaped unevenly. A de-esser can misread an altered sibilant, and transcription or voice-processing systems may receive a voice whose useful cues have already been stripped away. Audio-only cleanup also lacks visual context. A video can show that a person is speaking, turning toward a source, or stopping, but a purely audio-based process can't use that information to distinguish speech from an overlapping event.
Use a smaller repair area
Selective denoising means cleaning the sections that distract while preserving the recording's underlying continuity. Reduce the HVAC only under the interview, repair the lawnmower entrance rather than the whole scene, and leave a small amount of consistent room tone when removing all of it would make the cuts obvious.
The newer research direction is especially relevant to video because multimodal systems can use visual cues such as lip motion to help preserve speech integrity and synchronization. That doesn't mean every current tool performs this task reliably, or that a visual model should replace listening. It does mean the long-term problem is context-aware separation, not merely turning a suppression control higher.
One recent evaluation illustrates why task-level testing matters. Across four automatic speech-recognition systems and nine noise conditions, noisy audio outperformed enhanced audio in all 40 tested configurations, while semantic word error rate worsened by 1.1% to 46.6% absolute after preprocessing; at 10 dB SNR, it rose from 8.82% to 25.83%, and at 50 dB SNR it rose from 6.54% to 9.82% (the benchmark evaluation). Those results don't mean denoising is useless. They mean you should compare no processing, light processing, and strong processing on the actual material and downstream task.
A little consistent room tone often sounds more professional than a silence that changes every time the speaker pauses.
Two Real Workflows From Raw Footage to Final Cut
The same five checkpoints work across very different recordings: isolate, preview, preset, export, verify. The choices inside those checkpoints change with the source material.
A location podcast with mechanical hum
A podcaster records a two-track conversation in a borrowed room. The voices are clear, but the air conditioner and a low room hum run through the entire session. The editor first isolates the audio from the video, keeps the original tracks untouched, and writes a prompt that names the HVAC drone and electrical hum while protecting both speakers.
The preview reveals that the clean stem preserves the dialogue but slightly thins the pauses. The editor checks the noise stem, confirms that it contains the mechanical sources, and uses the Standard preset because the noise is stable rather than overlapping unpredictably with the speech. A short comparison against the untreated track confirms that the repair removes distraction without making the voices sound disconnected from the room.
The editor exports a lossless WAV, brings it into the DAW, and applies only light level control and corrective EQ. The final verification happens in headphones, on laptop speakers, and on a phone. The checkpoint sequence stays visible in the session notes:
- Isolate: Separate dialogue from the room hum.
- Preview: Check voice texture and the noise stem.
- Preset: Start with Standard.
- Export: Create a lossless working master.
- Verify: Compare across playback systems.
A crowded lobby interview
A video editor records an interview with a DSLR while the subject wears a lavalier. Glasses clink nearby, an announcement sounds in the distance, and crowd voices overlap the quieter answers. A broad cleanup pass would risk damaging the host's consonants, so the editor describes the specific clinking and announcement material in the prompt and keeps the host's speech as the protected element.
The first preview shows that the steady lobby bed is manageable, but the announcement remains audible during two important answers. The editor uses Precision Mode only on those passages, then compares the repaired breaths and word endings with adjacent lines. The cleaned audio returns to the timeline as a linked replacement, allowing the editor to trim around the repaired phrases without losing sync.
The final review catches an important editorial effect. The reduced background makes one cut feel too silent, so the editor carries a small amount of consistent lobby tone beneath the transition. The result isn't noiseless. It's coherent, intelligible, and credible.
Both workflows succeed because they avoid the same mistake: applying maximum cleanup before understanding the recording. Start with the unwanted sound, protect the voice, and let the listener decide whether the repair is transparent.
Isolate Audio lets you upload a video or audio file, describe a target such as HVAC hum, traffic, wind, or crowd noise in plain language, and receive a desired stem plus an isolated background-noise stem. For a selective background noise removal video workflow, visit Isolate Audio and test the repair on a short, difficult passage before processing the full edit.