Remove Vocals for Free: Methods That Actually Work
Why does the same vocal remover give you a usable backing track from one song and a hollow, watery mess from another? Usually, the difference starts with the mix, not the download button.
To remove vocals for free, match the method to the recording, listen for the damage it leaves, and decide whether that damage matters for your intended use. A rehearsal backing track can tolerate a faint harmony. A remix with exposed solo passages can't hide a missing snare so easily.
Which Free Method Removes Vocals Best
For one song and minimal setup, start with a free browser AI separator. It's the most practical default for isolating vocals without installing software. Audacity's traditional cancellation methods are worth trying when the singer sits firmly in the center of a simple stereo mix.
Neither approach retrieves an untouched backing track hidden inside the file. Cancellation removes shared channel content; AI estimates which sounds belong to the voice and which belong to the accompaniment.
Free vocal removal methods compared
| Method | Works best for | Main trade-off | Cost |
|---|---|---|---|
| Center cancellation (Audacity Vocal Reduction and Isolation) | Older or simple stereo mixes with a centered vocal | Also removes centered bass, snare and lead instruments | Free |
| Phase inversion (Audacity Invert and mix) | Stereo mixes where the vocal is centered and has little reverb | Reverb tails stay and centered instruments can thin out | Free |
| Free browser AI separator | Modern mixes, backing vocals and quick results | Monthly separation or track-length limits on the free tier | Free plan |
| Free local open-source model | Batches of songs and full control over settings | Requires installing software and some technical setup | Free, plus setup time |
Match the method to the stereo picture
Listen before choosing. A dry lead vocal that appears directly between your speakers is a reasonable candidate for cancellation. Wide harmonies, doubled singers, audible vocal echoes and dense guitar layers make AI separation the better starting point.
The MERL overview of source-separation development explains the essential limitation of early center cancellation: centered instruments can disappear alongside the singer, while stereo vocal effects remain. Phase inversion isn't a smarter alternative to center cancellation. It's another way to exploit the same channel relationship.
Local open-source models suit repeated work and recordings you don't want to upload. Their advantage is control over model choice and processing, not an automatic guarantee of cleaner audio.
Judge the output, not the promise
Check a browser tool's processing allowance and track-length rules before uploading. For example, test a short chorus excerpt rather than committing a full song to an unfamiliar free tier. Check upload and retention terms too, especially for unreleased material.
Practical rule: The better instrumental is the one that preserves the music you need, not necessarily the one with the quietest remaining voice.
Start with the free browser AI separator row. If it leaves vocal bleed or damaged drums, switch to the free local open-source model row for another model or more control, rather than repeating an identical pass.
How to Remove Vocals in Audacity Step by Step
Audacity is useful for offline cancellation tests and for checking or repairing a backing track made elsewhere. Its classic vocal-removal workflow needs a genuine stereo recording. A mono file copied into a stereo track doesn't gain useful separation information.
Keep an untouched reference, and compare at similar listening levels. A quieter processed version can seem cleaner because you're hearing less of everything.
The workflow below keeps the original available while you test.
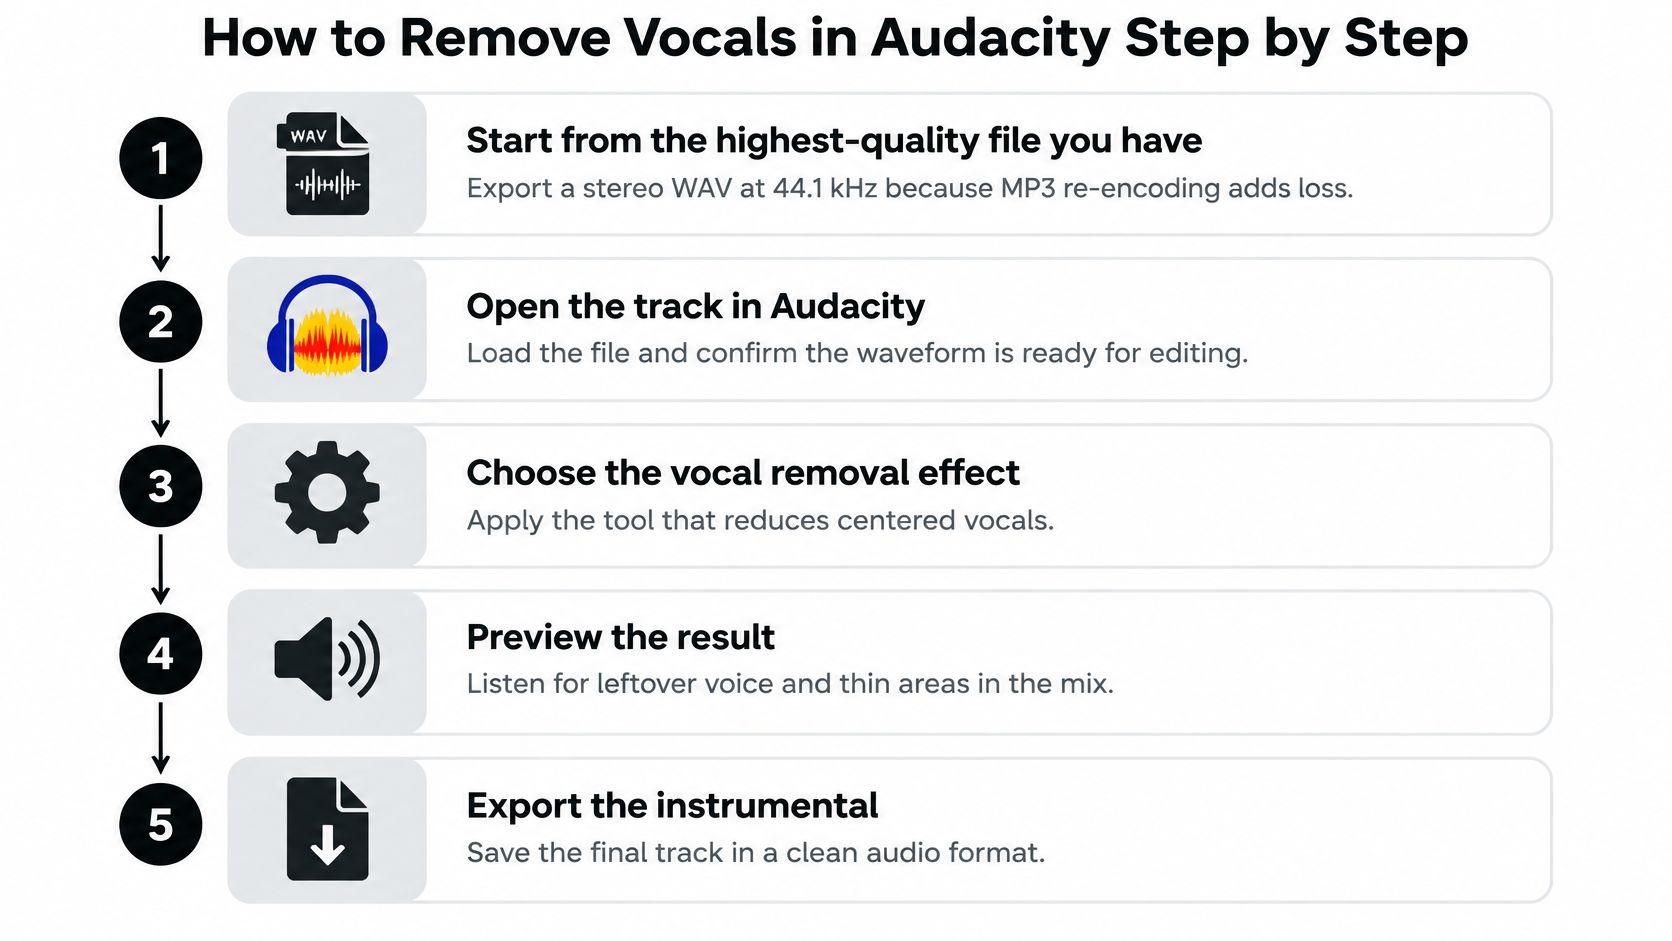
Prepare, process and compare
Start with the highest-quality source you have. For this workflow, prepare stereo PCM WAV at 44.1 kHz, the sampling rate used in the music-separation setup described in the MUSDB18-based separation paper. Converting an MP3 to WAV won't recover lost detail, but it avoids another lossy encoding stage while you edit.
Import the file into Audacity, then duplicate the track and mute the original. Name the copies clearly so you can switch between the untouched recording and your test without accidentally playing both together.
Try Vocal Reduction and Isolation if it's installed in your version. Find it through the Effect menu, choose the vocal-removal action, and preview a chorus before applying it to the whole track. Adjust strength conservatively, backing off when the kick, snare or lead instruments become hollow; effect availability and menu placement can differ between Audacity installations.
For a manual phase test, return to an untouched stereo copy, split its left and right channels into separate mono tracks, and center both. Apply Invert to just one channel, then mix those channels together at equal gain. Don't invert an entire stereo duplicate and mix it with the original, because that cancels the whole recording rather than selectively reducing centered content.
Audition the difficult moments. Listen to quiet passages, consonants, vocal entrances and the busiest chorus, switching back to the reference to check the drums and bass. If you've also imported AI-separated outputs, solo the vocal estimate to hear whether it contains guitar attacks or snare hits that the track needs.
Export the chosen track as WAV when more editing is planned. Mute the reference and unused experiments before exporting, and make an MP3 only when the destination requires one.
Know when cancellation has reached its limit
A usable chorus should keep its rhythmic weight and melodic shape. Some faint vocal ambience may be acceptable for practice, but a disappearing bass line or a snare that loses its body usually isn't worth the reduction in singing.
Don't keep increasing strength once instruments start vanishing. Cancellation can't distinguish a centered singer from another centered source just because you want it to.
If the lead drops but wide backing vocals remain, or the entire chorus becomes thin, move to AI separation. Audacity can still handle the final edit, fades and export. You don't need to force every part of the job through the same effect.
Removing Vocals with a Free AI Separator
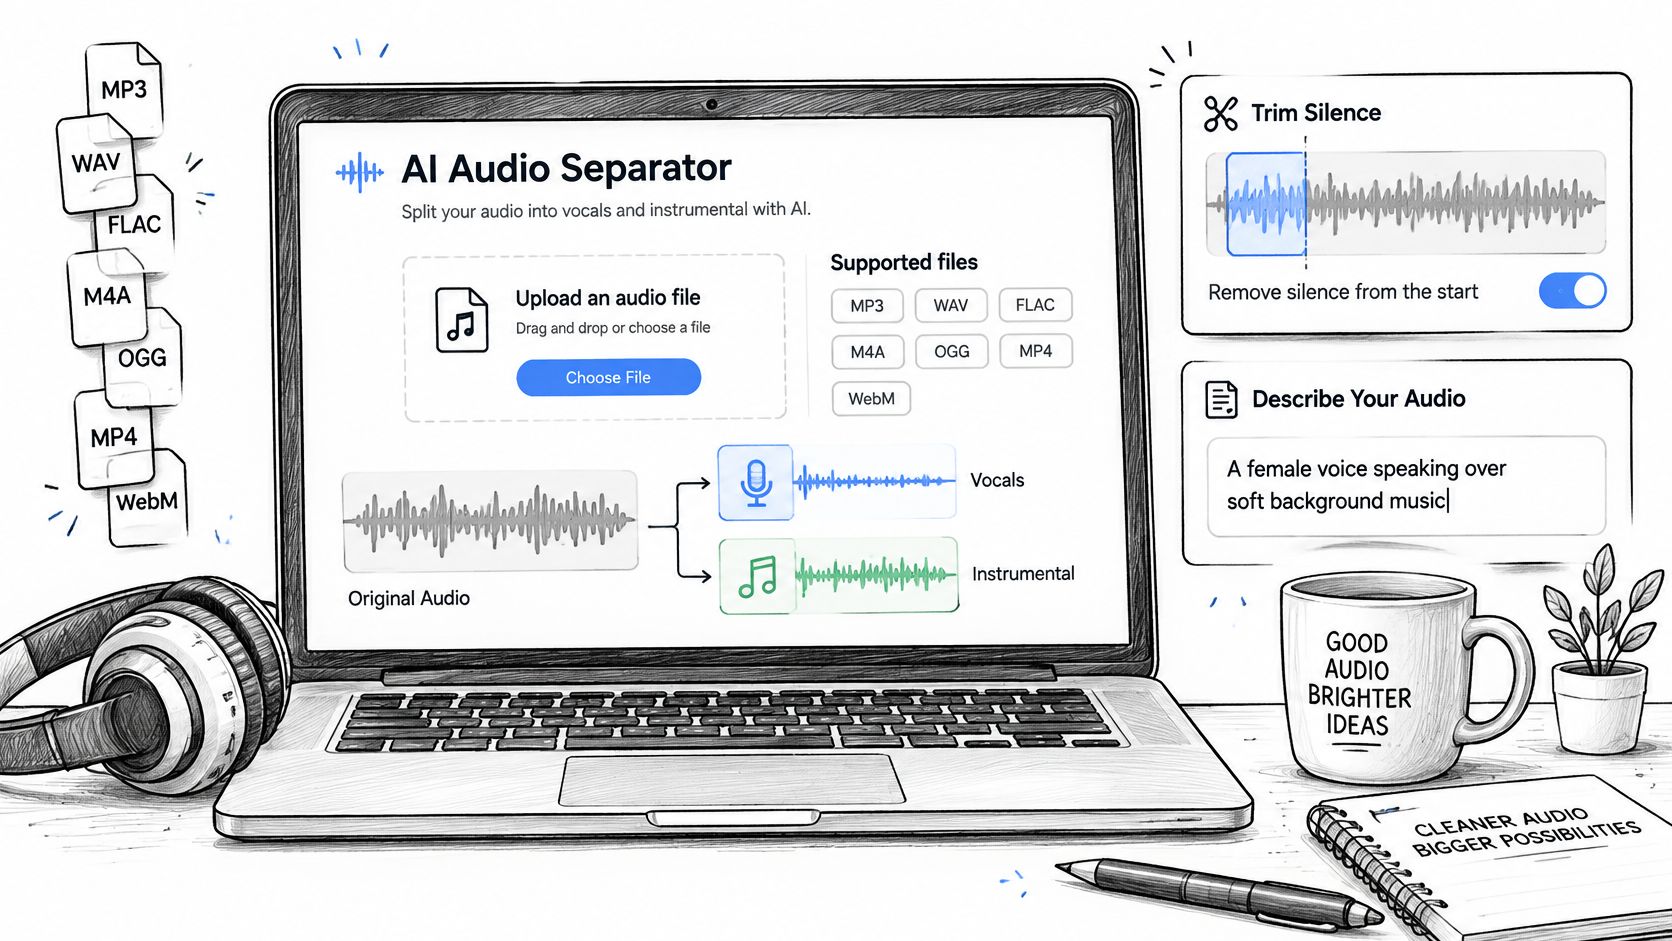
AI separation is the better starting point when channel placement doesn't offer a clean solution. Some tools provide fixed vocal and backing track buttons; text-guided separators also let you describe the sound you want extracted.
The interface may be simple, but the target still needs to match the recording.
Choose the right target
The AudioSep paper describes text-guided separation beyond fixed musical stems, including evaluation with AudioSet's 527 sound classes. That establishes the broader capability, not a promise that any description will produce a perfect backing track.
For a solo singer, start with a description such as lead singing voice. When the goal is a karaoke backing track, all singing voices, including backing harmonies makes the intended scope clearer. A lead-only target may leave supporting singers in the remainder.
Descriptions are useful controls, not magic instructions. A fixed-stem separator won't respond to wording it has no field to accept, and a text-guided model may still struggle to distinguish heavily blended voices and instruments.
Run a controlled separation
Prepare the upload. Remove unnecessary silence, but preserve any intro or transition you need in the final edit. Upload a supported audio or video file, keeping the best available source rather than converting it just to make the upload smaller.
Describe the target if the interface supports prompts, or choose the vocal stem in a fixed-category tool. Avoid contradictory requests such as removing every voice while preserving sung harmonies.
Process the selected audio once. Keep the description and quality setting with your project notes so you know what produced the result.
Download or preview both the isolated target and the remainder. The remainder is your candidate backing track; the extracted voice helps reveal whether the model also removed useful musical material.
Listen before accepting the output. If the main singer is gone but backing singers remain, revise the target's scope; if only a particular passage fails, test that passage separately.
A demonstration can help you identify the upload, target and output controls before processing your own recording.
Don't assume a more elaborate prompt is always better. Name the source clearly, change one setting at a time, and keep the better result. Before committing a long recording or a batch, confirm the tool's file support, download format and processing allowance.
Fixing Bleed, Ghosts and Artifacts
A faint singer in the chorus is a different problem from a snare that disappears whenever the singer enters. Diagnose the symptom first. Otherwise, stronger removal can turn tolerable bleed into obvious damage to the backing track.
Separation estimates overlapping components rather than performing perfect subtraction. The phase-aware separation paper explains why phase handling matters to reconstruction and artifacts. When a voice and guitar occupy similar time-frequency regions, removing the estimated voice can take some guitar with it.
Free vocal removal symptoms, causes and fixes
| Symptom | Likely cause | Fix |
|---|---|---|
| Vocal ghost in choruses | Backing or doubled vocals blended with the lead | Process the problem section separately or state the vocal target more precisely |
| Thin drums or bass | Center cancellation removed centered instrumental energy | Switch to AI separation; use gentle EQ only if usable low-end content remains |
| Underwater or warbling texture | Reconstruction artifacts, lossy source damage or aggressive processing | Return to the best source, reduce processing or try another model; export further edits as WAV |
| Reverb tail left behind | Diffuse stereo vocal effects weren't fully captured | Trim an exposed tail, automate its level or accept it for rough use |
| Pumping or hiss | Unstable separation on a compressed or difficult source | Use a better source and test less aggressive processing |
| Missing snare or guitar | Accompaniment was assigned partly to the vocal estimate | Try another model or blend a very low level of the original underneath |
Compare different estimates
When the tool permits it, make a vocal-focused pass and an accompaniment-focused pass. Compare what each preserves instead of assuming that the cleaner isolated voice must produce the better backing mix.
Solo the extracted vocal. If you hear the snare's crack or a recognizable guitar phrase, check whether that detail is missing from the remainder. An alternative model or quality mode may make a more useful compromise.
For a cancellation result, understand the channel interaction before applying more effects. This guide to phase cancellation in audio helps distinguish deliberate center removal from unwanted cancellation.
Repair locally, not across the whole song
Use a short automated EQ cut when a particular vocal resonance leaks through. Apply it only where needed, because a permanent notch can dull instruments that were fine elsewhere.
A small level dip can hide a brief ghost between phrases. An exposed reverb tail can sometimes be faded, but cutting it during a sustained cymbal or chord will sound like an edit.
A quiet blend of the original can fill a hole, but it also brings the singer back. Treat it as a compromise, not restoration.
Don't boost missing bass indefinitely. EQ can emphasize surviving content; it can't recreate a bass note that cancellation removed.
The troubleshooting guidance from Paddy Studio likewise emphasizes source quality and alternative processing settings. Stop when another pass damages more than it improves, and judge the result in its actual use: rehearsal, rough edit or an exposed musical arrangement.
What Free Means Before You Publish
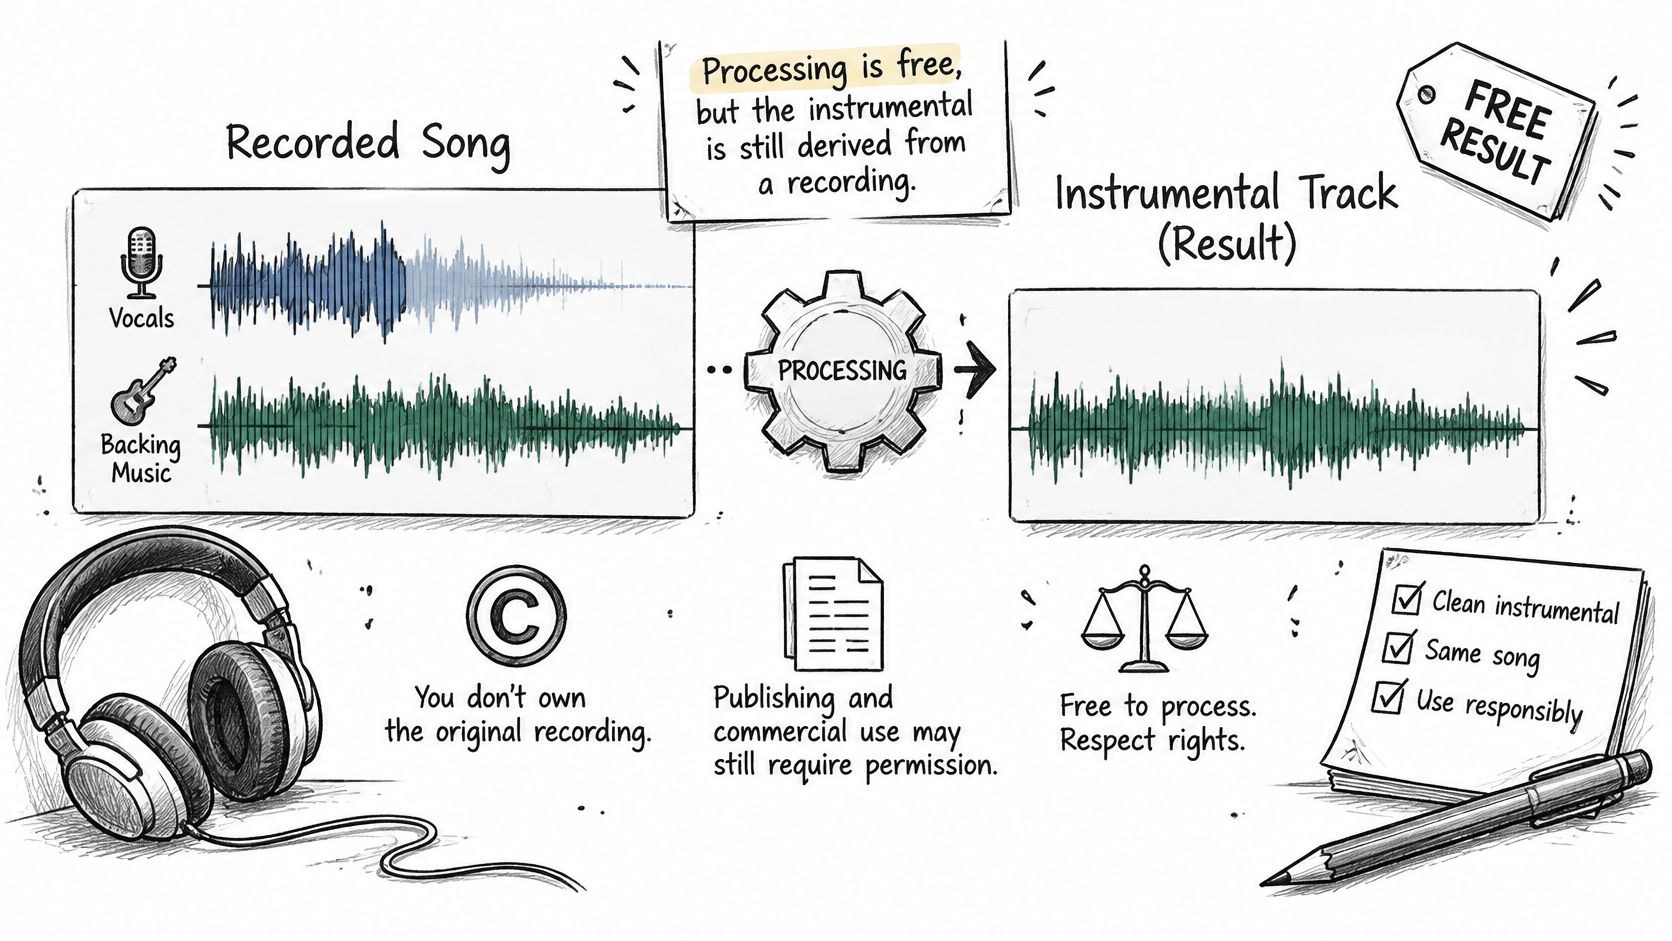
Free processing doesn't make a vocal-free track free to publish. Removing a singer doesn't give you ownership of the underlying recording or composition. A download button grants access to an output, not automatically the rights needed for every use.
Keep tool access and music permission separate. The Los Angeles Times discussion of AI music licensing concerns the broader licensing issue; for an individual project, the practical question is which rights your intended use requires and whether you hold them.
Use the following as a screening checklist, not a jurisdiction-specific legal determination.
Use cases and what to check before publishing
| Use | Usually needs permission? | What to check first |
|---|---|---|
| Private practice or karaoke | Usually no additional publishing permission if genuinely private, subject to local law | Keep it off public platforms and distinguish home practice from public performance |
| Posted cover or remix | Often yes for relevant composition and recording rights | Confirm rights-holder permissions and platform terms |
| Monetized video | Yes, in most cases involving someone else's protected music | Check music policy and licence coverage |
| Streaming or commercial release | Yes, unless you own or already control the necessary rights | Secure appropriate clearance before distribution |
| Client or business work | Yes, unless existing rights cover the job | Obtain written permission and retain source and licence records |
Keep permission attached to the project
Rights can involve both the composition and the sound recording, while platform policies add separate conditions. Exceptions and licensing routes differ by country, so private practice shouldn't be treated as a blanket exemption for public karaoke or sharing.
If the source came from a video platform, Vid Kraken's guide to permitted uses for downloaded YouTube audio is a useful starting checklist. Downloading access still isn't proof of reuse permission.
Keep the source file, processing date, tool, settings and permission documents together. For a remix built around existing recorded material, use the sample-clearance guide to organize the questions before release.
Speak to a licensing professional when the project involves distribution, advertising, client warranties or unclear ownership. If you can't identify who can authorize the use, a separator's terms won't resolve that uncertainty.
Choose Your Free Method and Test One Track
Start with a free browser separator unless the recording clearly suits cancellation or must stay offline. Don't commit a whole batch before you've heard how the method handles the song's busiest passage.
For a practical trial, cut a 30-second chorus excerpt. That's a test length you choose, not a quality requirement, and a short upload may still consume a separation allowance.
Make the test answer a decision
- Prepare the excerpt. Include the vocal entrance and enough accompaniment to hear whether the groove changes.
- Listen on headphones, then speakers, at a comfortable level. Compare against the original rather than judging the processed file in isolation.
- Check the failure points. Note remaining words, unstable cymbals, weakened bass and missing snare attacks; include a quiet verse in your next check if the chorus passes.
- Process the full song only when the result is useful. Otherwise, change the method or the specific setting connected to the symptom.
For an upload workflow, check the supported file types before converting your source. Avoid unnecessary format changes just to begin a test.
Isolate Audio is one option: our Free plan costs $0 forever and includes 5 audio separations per month, standard-quality processing, MP3 output, files up to 5 minutes, and community support. You can sign up, upload the audio and describe the sound in plain English. If ongoing work needs more capacity, our $19-per-month Pro plan includes unlimited separations, WAV and FLAC output, and files up to 30 minutes.
Keep a test log: Record the source, target description, setting, vocal leakage and instrumental damage. A useful comparison needs more than a filename marked final.
Run and log a chorus test today. Commit to the full song only after the excerpt gives you a backing track you'd use.
Isolate Audio lets you describe the vocals you want isolated and returns both the extracted sound and the remainder for comparison. Visit Isolate Audio, upload your test excerpt, and listen to the remaining accompaniment before processing the complete track.