
How Are Songs Recorded: A Complete 2026 Guide
You've written a chorus on your phone, recorded a promising vocal beside a laptop, or captured an interview in a room that sounded quieter than it really was. The confusing part isn't finding a record button. It's understanding what happens after you press it, and knowing which decisions should be made before recording, during the take, or later with editing and modern audio tools.
So, how are songs recorded today? The short answer is that sound moves through a carefully managed chain, from performance and microphone to recorded tracks, edits, a mix, and a final master. The details vary between a commercial studio, a bedroom setup, and a remote project, but the basic logic remains remarkably consistent.
Stepping Inside a Modern Recording Session
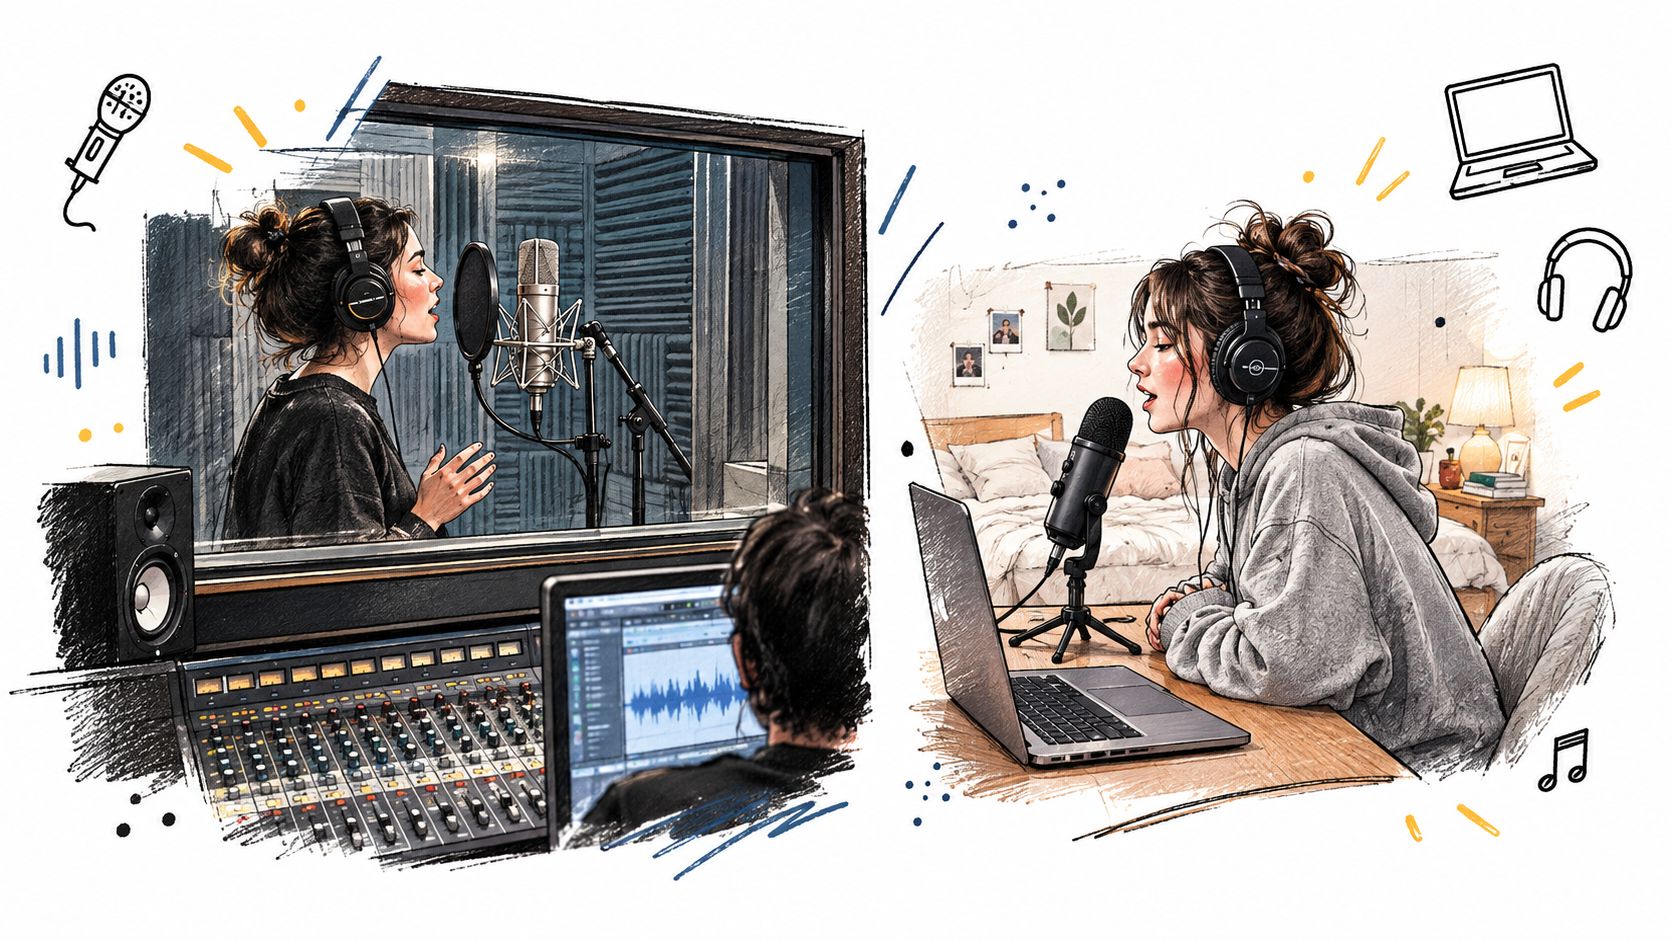
A vocalist in a commercial studio may face a carefully positioned microphone while an engineer watches meters from the control room. Across town, another singer may lean toward a USB condenser microphone in a bedroom, with a laptop running a digital audio workstation nearby. One setup has a vocal booth and assistant. The other may rely on a duvet, headphones, and a chair that squeaks whenever the performer moves.
Both sessions still require the same decisions. What should the song sound like? Which parts deserve separate tracks? Is the room helping or damaging the recording? Should a weak phrase be sung again, edited, or repaired later? Will the finished audio translate to headphones, speakers, and short-form video?
A song can start as a voice memo, beat, lyric sheet, or rough musical idea. The producer develops that starting point into an arrangement. Performers capture usable takes, and the engineer labels and organizes the tracks so they can be shaped without stripping away the performance's character.
Modern sessions may also involve remote collaborators, exported stems, AI-assisted cleanup, and versions planned for a social video's opening seconds. AI cleanup can reduce noise or unwanted sounds, while stem separation can help an editor or independent artist work with parts of an older recording. These tools assist later decisions, but they cannot fully replace a clear arrangement or a convincing take.
Practical rule: The most expensive-looking room cannot rescue an unclear arrangement or an uninspiring performance.
Recording history explains why today's workflow combines old ideas with new tools. Sound recording is commonly divided into acoustic, electrical, magnetic, and digital eras, beginning with the acoustic era in 1877 and continuing through the digital era from 1975 to the present, as described in this history of sound recording overview. Edison's phonograph could record and play back sound, unlike the earlier phonautograph, which traced sound waves without playback. The first commercially released electrical recording arrived in 1920, replacing the recording horn with a microphone.
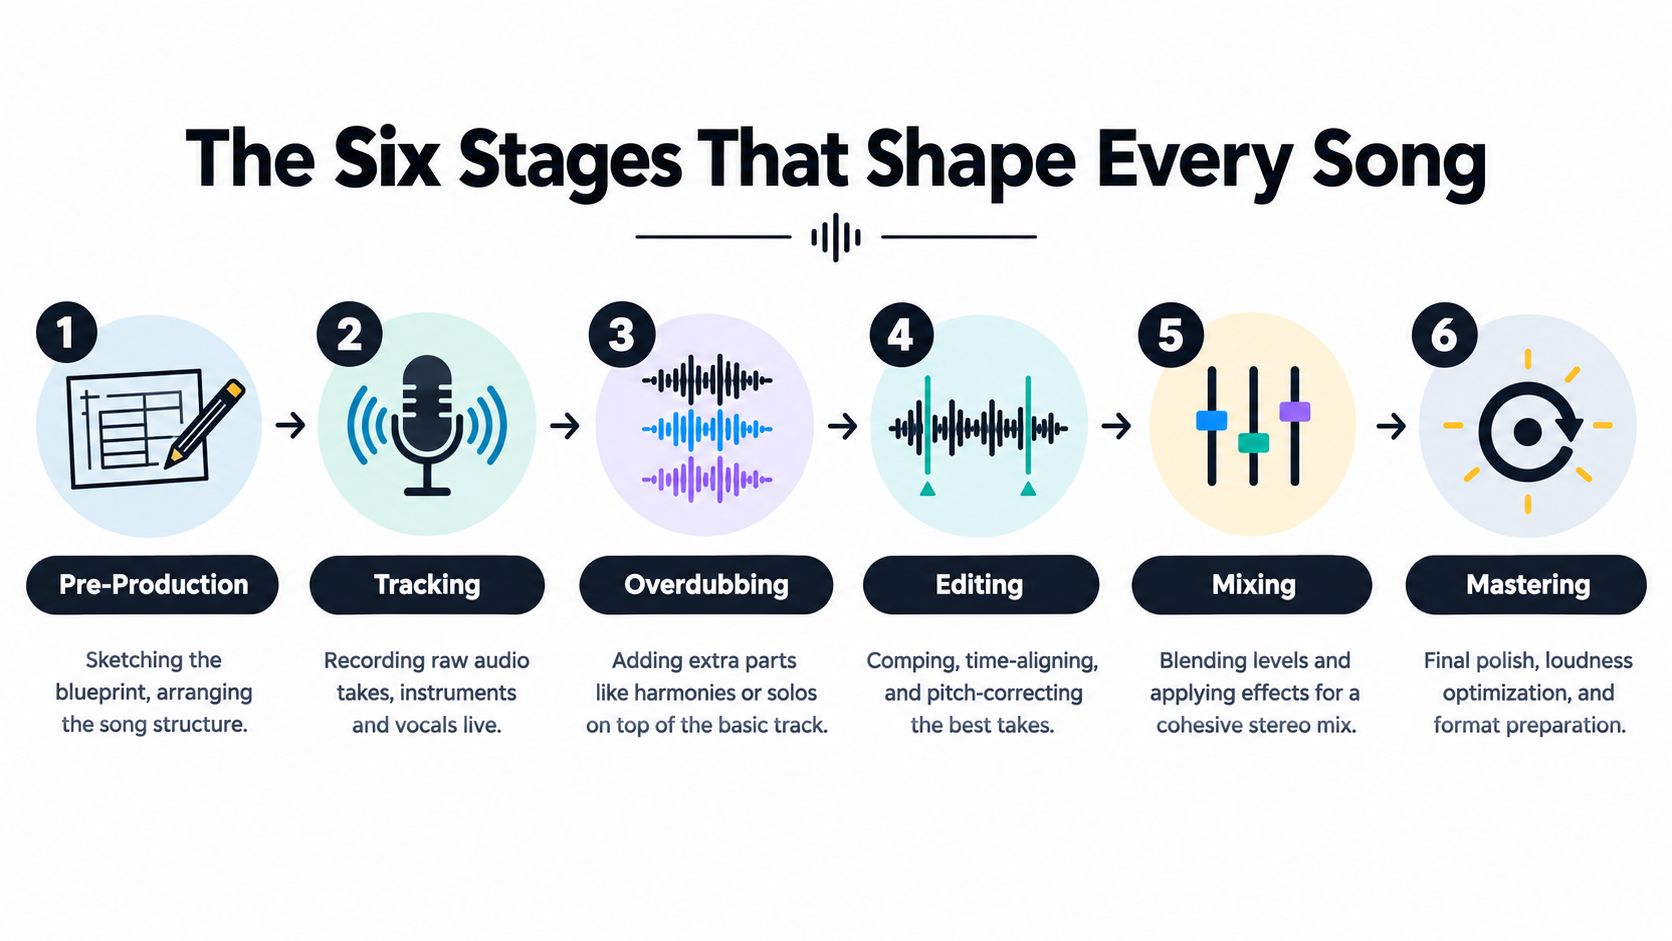
For a practical mental map, keep six stages in mind: pre-production, tracking, overdubbing, editing, mixing, and mastering. Read this guide to tracking a song to see how recording choices affect later edits. Each stage addresses a different problem, and an early decision can either simplify the next task or create work that no plugin can fully undo.
The Six Stages That Shape Every Song
Recording a song resembles building a house. You sketch the design before bringing in materials, create a stable structure, add detail, clean the surfaces, and only then apply the finish. The stages overlap in real sessions, but treating them as separate jobs makes it easier to diagnose problems.
Pre-production is the blueprint
Before microphones go up, the team decides what the song needs. That can include choosing the key, setting the tempo, mapping verses and choruses, testing a click track, and making a rough demo. The artist may discover that a chorus sits too high, while the producer may remove a section that delays the hook.
This stage protects recording time. A five-minute arrangement decision made before tracking can prevent hours of recording parts that later get deleted.
Tracking lays the foundation
Tracking captures the main performances. A band might record drums, bass, guitars, and a guide vocal together, or an independent artist might build the song around a programmed beat and one lead vocal. The goal isn't perfection in every pass. It's to capture a convincing foundation with clean sound and reliable timing.
Overdubbing adds the furniture
Once the foundation works, performers add layers. Harmonies, percussion, guitar solos, backing vocals, handclaps, synths, and ear-candy effects can all be overdubbed on separate tracks. Multitrack recording becomes central, because artists no longer need to perform every part in one take.
Oxford Academic's recording-history summary dates the multitrack concept to 1940 and credits Les Paul with the idea of recording vocals or instruments separately. Magnetic tape, developed in Germany in 1928 and established in studios by 1935, made editing and overdubbing more practical, while the Library of Congress identifies Disney's Fantasia as the first commercial appearance of a four-track recording derived from eight channels in 1940, according to its recorded sound timeline.
Editing tidies the rooms
Editing turns many imperfect takes into a strong performance. An engineer may comp a vocal by selecting the best phrase from several passes, align a late backing vocal, tune a note, remove clicks, or tighten an entrance. Good editing supports the performer. It shouldn't erase every natural movement that makes the track feel human.
Mixing paints the walls
During mixing, the engineer balances levels and positions sounds across the stereo field. EQ, compression, saturation, reverb, delay, and automation help the vocal sit inside the arrangement instead of fighting it. The mix should feel like one record, not a collection of unrelated tracks.
Mastering prepares the finished room
Mastering is the final quality check and delivery stage. It may involve broad tonal adjustments, controlled dynamics, sequencing, format preparation, and checking that the track translates across playback systems. A master isn't a substitute for a broken mix. It's the final polish on a mix that already works.
Skipping stages can be tempting, especially when software makes every task available immediately. But if the arrangement is unresolved, editing becomes guesswork. If the recording is distorted, mixing becomes damage control. If the mix is crowded, mastering has very little room to help.
Who Actually Does What in the Studio
Job titles describe responsibilities, not rigid boundaries. In a large session, the artist, producer, and engineer may divide decisions clearly. In a bedroom project, one person may write the song, choose the sounds, record every part, edit the takes, and mix the result before lunch.
The artist supplies the creative center. They make decisions about lyrics, melody, phrasing, emotion, and identity. A producer can suggest a different chorus entrance, but the artist decides whether that change still feels truthful. During a vocal take, the artist also provides information no meter can measure, such as whether a technically accurate phrase sounds emotionally empty.
The producer shapes the record as a whole. They may change the arrangement, select a tempo, choose instruments, direct performances, decide when a part is too busy, and determine whether the chorus needs more contrast. If the chorus feels small, the producer might ask for a rewrite, a new harmony, or a different drum pattern rather than immediately adding more plugins.
The engineer protects the technical path. They choose and position microphones, check cables and headphones, set recording levels, name tracks, manage session files, and keep the monitoring environment usable. An engineer might suggest a microphone swap because the current one emphasizes an unwanted nasal tone, or move the performer to reduce a reflection from a nearby wall.
| Role | Primary Focus | Typical Decisions |
|---|---|---|
| Artist | Performance and creative intent | Lyrics, melody, phrasing, emotional delivery |
| Producer | Arrangement and artistic direction | Song structure, sounds, tempo, performance notes |
| Engineer | Capture and technical reliability | Microphone placement, gain, routing, editing, session organization |
The handoffs matter. If the engineer hears clipping, they should stop the technical problem before another take. If the producer hears that the bridge weakens the song, they should address the arrangement before polishing the vocal. If the artist feels exhausted, they may need a break rather than another round of forced takes.
The best question in a session is often, “Is this a performance problem, an arrangement problem, or a technical problem?”
Knowing which category a problem belongs to helps beginners ask for the right kind of help. It also prevents the common mistake of asking the mixer to solve a decision that should have been made while writing or recording.
Signal Chain and DAW Workflow Explained
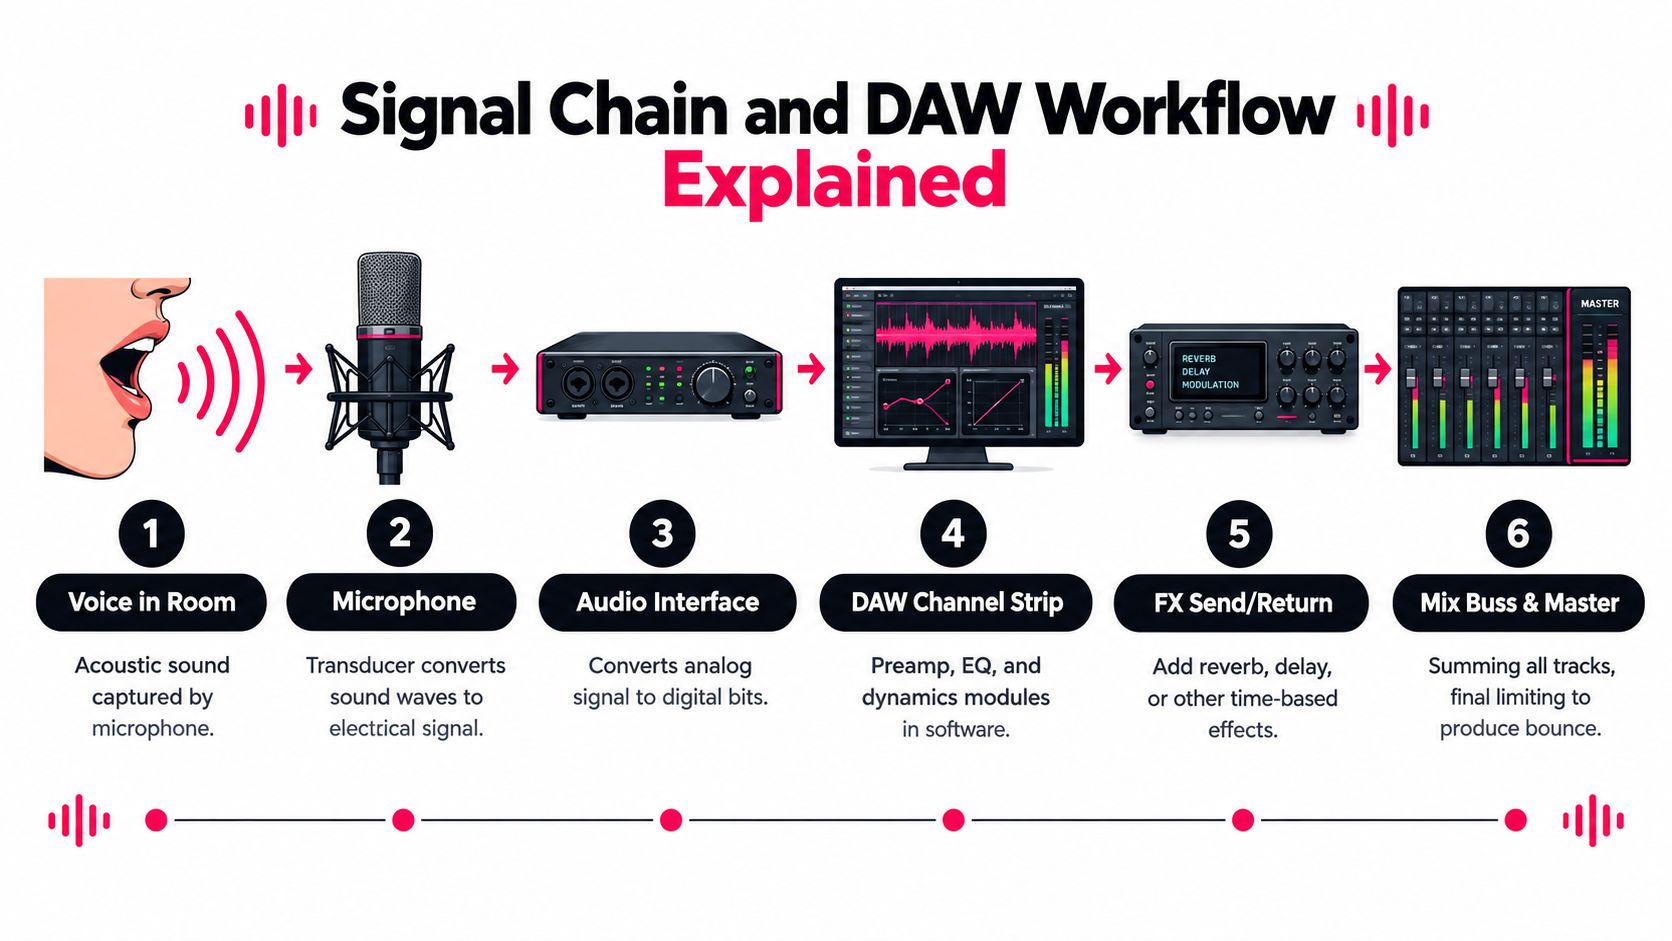
A vocal starts as air moving in a room. The microphone's capsule responds to those pressure changes and converts them into an electrical signal. That signal is still analog, meaning it continuously represents the original movement rather than existing as computer data.
The next important step is the preamp. Microphones generally produce a low-level signal, so the preamp raises it to a stronger line-level signal before conversion. An audio interface then converts the analog waveform into digital information, and the DAW writes that information onto an audio track.
The basic path is:
source → microphone → preamp → analog-to-digital converter → DAW
This signal-chain and gain-staging guide explains why the order matters. If the preamp gain is too low, the recording may carry unnecessary noise. If the input is pushed too hard, distortion can be captured permanently. Software can process a clean recording later, but it can't reliably restore detail that was clipped at the input.
Inside the DAW
Once the waveform reaches the DAW, the engineer decides how it will move through the session.
- Track inserts: EQ and compression can shape an individual vocal or instrument.
- Busses: Several related tracks, such as background vocals, can feed one group channel for shared processing.
- Sends and returns: Reverb and delay can sit on auxiliary channels, allowing multiple tracks to share an effect.
- Automation: Volume, pan, and plugin parameters can change at specific moments, such as raising the last word of a chorus.
- Commitment: Tracks may be frozen, printed, or rendered to reduce computer load and make decisions easier to manage.
The engineer must also decide whether to record dry or monitor with effects. A singer may perform more confidently while hearing a little reverb, but printing that reverb into the recording can limit later choices. Monitoring an effect while recording and keeping the source dry often offers more flexibility, provided the session is routed correctly.
Modern projects rarely stay on one computer from beginning to end. A producer may send a rough mix to a remote vocalist, receive edited stems, and export instrument groups for another engineer. A final session can therefore include the original tracks, consolidated files, alternate versions, and notes about tempo, key, processing, and delivery targets. For a broader introduction to the subject, what recording means in practice offers useful context.
For vocals and instruments, a common technical default is 48 kHz / 24-bit, with 24-bit depth offering more headroom than 16-bit while maintaining a low noise floor for mixing, according to this digital vocal recording guide. That same guidance places practical vocal peaks well below 0 dBFS, often within -18 dBFS to -4 dBFS, so the recording avoids clipping and leaves room for later processing.
Professional Studios Compared to Home Setups
A professional studio buys you control over problems that are difficult to solve after recording. The room may offer acoustic treatment, isolation booths, reliable monitoring, a large-format console, outboard equipment, and an assistant who keeps the session moving. Those advantages matter most when the source is physically demanding, such as a drum kit, string section, choir, or loud guitar amplifier.
A home setup offers a different kind of control. You can record when the performer is ready, repeat an idea privately, pause without watching the clock, and build a song gradually. That freedom suits vocal-focused artists, beatmakers, podcasters, editors, and remote teams exchanging files.
| Factor | Professional Studio | Home Setup |
|---|---|---|
| Room sound | Designed acoustics and isolation | Depends on the room and treatment |
| Scheduling | Booked sessions and fixed availability | Flexible personal schedule |
| Large sources | Strong choice for drums, strings, choirs, and amps | More difficult when sound leaks or space is limited |
| Privacy | Direction from a dedicated team | Comfortable for experimentation |
| Technical support | Engineer or assistant may manage routing | One person often handles every role |
| Cost pressure | Session time encourages preparation | Lower access cost, but setup requires learning |
Neither environment guarantees a compelling record. A studio can produce a sterile performance if the artist feels uncomfortable, while a home room can capture an intimate vocal if the microphone position and reflections are controlled. The best choice depends on the bottleneck.
- Performance bottleneck: Choose the space where the artist feels focused and can deliver.
- Room bottleneck: Use a treated studio when reflections, outside noise, or loud instruments dominate the recording.
- Budget bottleneck: Work at home for preparation and overdubs, then hire specialist help for the parts your room cannot capture well.
For creators recording spoken-word material alongside music, these AI podcast setup tips can help organize microphone placement, room choices, and monitoring without assuming access to a commercial facility.
Where AI Cleanup Fits Into Post-Production
AI tools are most useful when they remove a specific obstacle, not when they replace the recording process. They can assist with noise reduction, vocal extraction, stem separation, and dialogue cleanup, but the result still needs a human listener.
The sensible position is after tracking and initial editing, before final mix polish. First, capture the source as cleanly as possible. Then use an AI tool when a repair or separation task would otherwise take substantial manual work. Finally, compare the processed result with the original, match the gain, and decide whether the repair improved the musical or spoken performance.
Common applications include:
- Dialogue cleanup: Reduce hiss, hum, room rumble, or distracting background sound in an interview.
- Vocal extraction: Lift a lead vocal from a stereo reference for a remix, rehearsal track, or arrangement study.
- Instrument separation: Pull apart drums, bass, vocals, or other components when the original multitrack session isn't available.
- Live-take repair: Reduce headphone bleed or unwanted spill between microphones, while checking that the process hasn't damaged consonants or transients.
- Reference analysis: Remove vocals from a song to study its arrangement, practice the music, or prepare a reinterpretation.
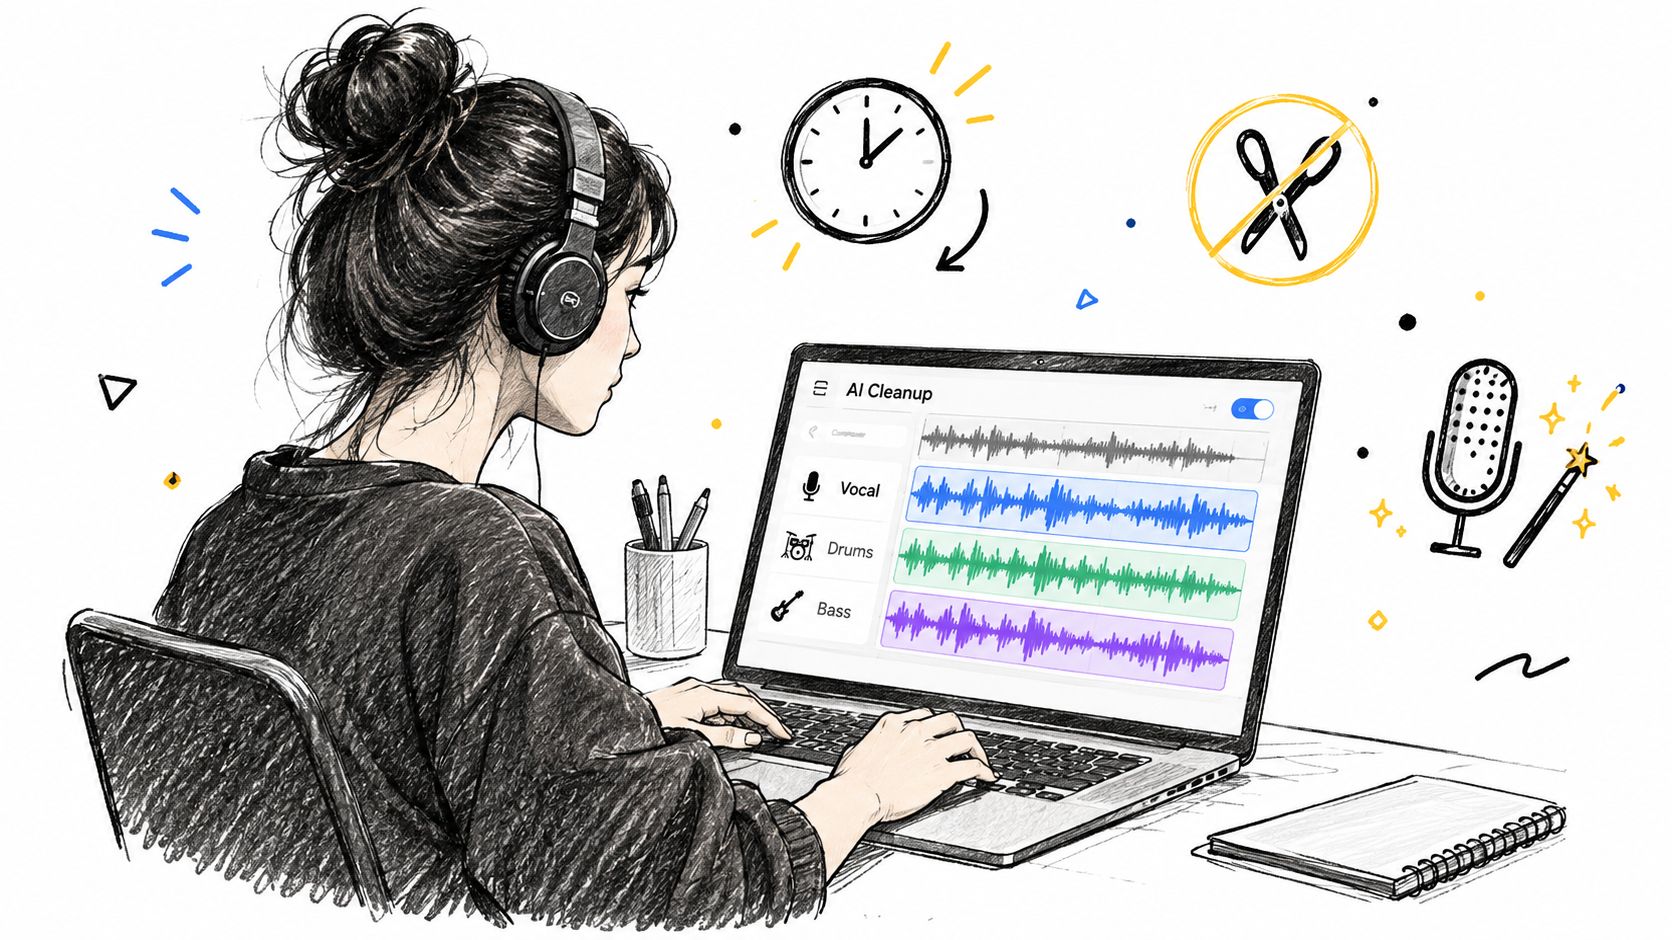
Tools such as AI audio cleanup workflows fit naturally into this assistant role. Isolate Audio, for example, lets a user upload an audio or video file and describe the target sound in plain English, then returns the isolated element and the remainder. That can support a vocal extraction, a dialogue cleanup, or a custom separation request involving a sound that doesn't fit a fixed stem category.
Clean source first, repair second
A noisy recording may still be usable, but AI separation can introduce watery textures, missing consonants, phase-like movement, or softened attacks. These artifacts become more obvious when the isolated file is played alone, compressed heavily, or placed against a sparse arrangement.
Use the processed output as a starting point. Check it in context, compare it with the untouched file, automate only what needs attention, and keep the original safely stored. For new recordings, a quiet room, sensible microphone placement, and clean gain staging remain the most reliable form of noise reduction.
Recent production coverage describes an increasingly platform-aware approach, with producers treating 15-second loops as a primary creative unit rather than an afterthought, according to this 2026 pop production trends guide. Another 2026 producer guide says over 60% of producers use AI for tasks such as ideation, noise reduction, stem separation, and mixing assistance, as reported in this overview of AI in music production. Those claims describe a changing workflow, not permission to record carelessly. The strongest results still begin with a performance worth hearing.
Common Recording Mistakes and How to Avoid Them
Many recording problems hide until the mix becomes dense. A vocal that sounded acceptable in headphones may reveal room reflections, harshness, or background noise once guitars, drums, and effects are added.
Test the room before blaming the microphone
Clap once in the recording position and listen to the decay. A sharp flutter, boxy tail, or obvious wash points to reflections that may need treatment or a different microphone position. Moving away from a bare wall, lowering the microphone height, or adding absorption can solve more than aggressive EQ.
Set gain before reaching for plugins
If the input clips, no compressor can restore the missing waveform detail. If the level is extremely low, boosting it later may also raise the room noise. Watch the meter during the loudest part of the performance, leave headroom, and ask the singer for another test take before committing to a full session.
Don't use layers to conceal timing problems
Double-tracked guitars can sound wide, but two loose performances can create flamming attacks and blurred chords. Mute one layer, listen to each part alone, then hear them together. If the timing problem remains obvious, re-recording may be faster and more natural than trying to force alignment.
Treat reverb as an arrangement decision
A thin dry vocal can tempt you to add a large reverb. That may push the words behind the track instead of making the performance feel bigger. Compare a shorter ambience, a delay tucked behind the vocal, and a quieter reverb return, then automate the effect only where the arrangement needs space.
Comp deliberately
A rushed vocal comp can hide the best emotional phrase under a technically cleaner but lifeless alternative. Label takes, mark strong lines immediately, and listen to the whole section before joining edits. Then check the completed mix on earbuds, television speakers, and a car stereo before calling it finished.
Putting It All Together and Looking Ahead
A useful pre-session checklist is short enough to use every time:
- Arrangement: Confirm the key, tempo, structure, and parts that need recording.
- Reference: Prepare a tuning reference and decide whether the click supports the performance.
- Room: Listen for reflections, outside noise, computer fans, and chair movement.
- Files: Create clear track names, version labels, and a backup routine before the first take.
- Recording: Test the loudest section, verify the input path, and leave headroom.
- Delivery: Decide which mix, stems, and final renders collaborators or platforms will need.
The future of recording isn't a replacement for musicianship. It's a more flexible set of tools around the same central task, capturing a performance that communicates. Platform-aware writing may encourage a stronger opening or a loop that works independently, while AI can assist with cleanup, vocal extraction, and stem preparation. Remote workflows can also let contributors exchange parts without sharing one physical room.
The essential craft stays familiar. Write an arrangement that earns its space, place the microphone carefully, record cleanly, choose performances with intention, and make mix decisions that serve the song. Once those habits are in place, modern tools give independent musicians, podcasters, and editors more ways to recover, reshape, and finish their work.
If you need to separate vocals, instruments, dialogue, or another described sound from an existing recording, visit Isolate Audio and upload your audio or video file for AI-powered separation. Use the isolated track or remainder as a practical starting point for a remix, cleanup, practice version, or edit, then make the final decision with your ears.