
How to Mix 2 Songs Together A Guide for Perfect Blends
Mixing two songs is an art form. It's about way more than just hitting crossfade; you're actually weaving together the DNA of two different tracks—their tempo, key, and structure—to create something new and cohesive. The whole process starts with prepping your audio files, which often means isolating specific parts like vocals or a drum loop. From there, you'll sync up their speed and musical key before you can even think about arranging the transition.
Laying the Foundation for a Seamless Mix
Think of yourself as an audio architect. You're not just queuing up one song after another; you're taking them apart and rebuilding them into something that's uniquely yours. And this skill isn't just for pro DJs or music producers anymore. With the tools we have today, anyone can create slick, impressive blends for a podcast intro, a video soundtrack, or a full-blown creative mashup.
The real goal here is to guide the listener's ear so smoothly that the transition feels completely natural and intentional, not like a sudden, jarring change. It's a mix of technical skill and pure creative gut.
The Core Elements of a Great Mix
To pull off a mix that sounds truly professional, you need a few key components working together. Before you get lost in the weeds of software and plugins, it helps to understand the big picture.
Track Prep: This is your foundation. It's about choosing songs that actually work well together and then isolating the specific parts you want to use. Do you want the vocals from one track layered over the beat of another? This is where you make that call.
Synchronization: Here’s where the technical work begins. You have to get the tempo (BPM) and the musical key of both tracks aligned. If you skip this, you'll get a rhythmic and harmonic train wreck.
Crafting the Transition: This is the fun part. You get to design the actual blend. Will it be a long, smooth crossfade? A quick, energetic cut on the beat? Or maybe you'll gradually layer elements from the new track over the old one.
The Final Polish: Once the blend is in place, you’ll use tools like EQ and compression to make sure everything sounds clean, balanced, and glued together. This is what separates a rough draft from a finished product.
Taking a structured approach like this is what turns a simple song transition into a genuinely memorable moment. And in today's world, that's more important than ever. The explosion in streaming—we're talking 210.3 billion streams in the UK alone—means listeners are always hungry for fresh takes on their favorite music. This is where AI-powered tools are changing the game. In fact, some platforms are seeing that remixes built using isolated stems can increase plays by an average of 35%. If you're curious about these trends, you can find more music industry insights at iMusician.
To give you a clearer picture, let's break down these foundational components.
Core Elements for Blending Two Songs
This table outlines the fundamental components required to effectively mix two songs together, from initial preparation to the final output.
| Component | Objective | Key Tool or Technique |
|---|---|---|
| Track Preparation | Select compatible songs and isolate key elements (vocals, drums, etc.). | Stem isolation software (like Isolate Audio), audio editing software. |
| Synchronization | Match the tempo (BPM) and musical key of both tracks for a cohesive sound. | BPM detection tools, pitch-shifting plugins, key detection software. |
| Transition Crafting | Design the flow between songs using techniques like beatmatching or crossfading. | DJ software, Digital Audio Workstation (DAW), crossfader, looping. |
| Balancing & Polishing | Ensure levels are consistent and the final mix sounds clean and professional. | EQ (equalization), compression, volume automation, limiters. |
Understanding these core pillars is the first step toward creating mixes that not only sound good technically but also connect with your audience.
Preparing Your Tracks for a Perfect Blend
A great mix isn't just a happy accident; it’s built on a solid foundation. Long before you touch a fader, the choices you make about your source material will define the final product. The absolute first step in learning how to mix 2 songs together is picking the right tracks.
Think like a curator. Does a high-energy house track really belong next to a mellow acoustic ballad? Maybe, but it will require a very deliberate and creative transition. Start by just listening. Do the songs share a similar groove, a complementary mood, or instrumentation that could work together? Pay close attention to the structure—find the intros, verses, and choruses. Knowing the roadmap of each song helps you spot the perfect places to mix in and out.
The Power of Stem Separation
Once you've got your tracks, this is where the real fun begins: stem separation. This is the secret sauce. It’s the process of taking a finished song and breaking it back down into its core musical parts—vocals, drums, bass, and all the melodic bits. Instead of just mushing two full songs together, you get to play with the individual ingredients.
Suddenly, you can grab that killer vocal from Song A and lay it right over the instrumental groove of Song B. This is how incredible mashups are born. It lets you get surgical, removing a bassline from one track so it doesn't fight with the bass from the other, or creating a clean acapella intro to kick off your mix.
Pro Tip: Isolating stems gives you an almost unfair advantage. Instead of turning down an entire track to make space, you can just pull out the one specific element that’s causing a problem. This leads to a much cleaner, more professional sound.
This isn't just a simple fade; it's a creative tool that turns a basic transition into a unique production. If this is new to you, it’s worth taking a moment to understand what music stems are and how they can seriously level up your work.
Choosing Your Audio Quality
Garbage in, garbage out. It’s an old saying, but it’s absolutely true in audio. The quality of your source files will directly impact your final mix. Sure, MP3s are everywhere, but they're compressed. That means audio data has been thrown away to make the file smaller. When you start stretching, EQing, and separating stems from a compressed file, you'll start to hear the ugly artifacts.
For the best possible results, you have to start with high-quality, uncompressed audio.
- WAV Files: This is the industry standard for a reason. They are lossless, containing every single bit of the original audio information.
- AIFF Files: Think of this as the Apple equivalent of a WAV. It's another top-tier, uncompressed format.
- FLAC Files: This is the best of both worlds. It uses lossless compression to shrink the file size without sacrificing a drop of audio quality. An excellent choice.
Working with high-fidelity source files is a non-negotiable step for a great-sounding mix. It ensures your isolated stems are clean and that your final blend has the depth, clarity, and punch it deserves.
Mastering Tempo and Key Synchronization
Alright, you've got your audio files prepped and ready to go. Now comes the real magic: getting them to speak the same language. This is where the technical side of mixing meets pure musical instinct. If your two songs are fighting over speed or musical key, you'll end up with a jarring mess that yanks the listener right out of the groove.
To really blend two songs, you need to achieve rhythmic and harmonic cohesion. It's all about making two separate pieces of music sound like they were always meant to be played together. This boils down to two critical tasks: matching the tempo and syncing the key.
Aligning the Rhythmic Pulse
First things first, let's get the tempo, or Beats Per Minute (BPM), locked in. When your songs share a similar tempo, their drum patterns and other rhythmic elements fall into place, creating a single, unified groove. If the BPMs are wildly different, trying to force them together will just make one track sound unnaturally fast and the other sluggish and slow.
Most modern Digital Audio Workstations (DAWs) and DJ software have a "sync" button that does the heavy lifting for you by automatically warping the audio. It’s a fantastic shortcut, but don't just set it and forget it—always trust your ears. Aggressive time-stretching can introduce weird audio artifacts, especially on vocals or melodic instruments. If you need a quick starting point, a good BPM and key finder tool can give you the raw data in seconds.
This flowchart lays out the initial prep work before you even touch a sync button.
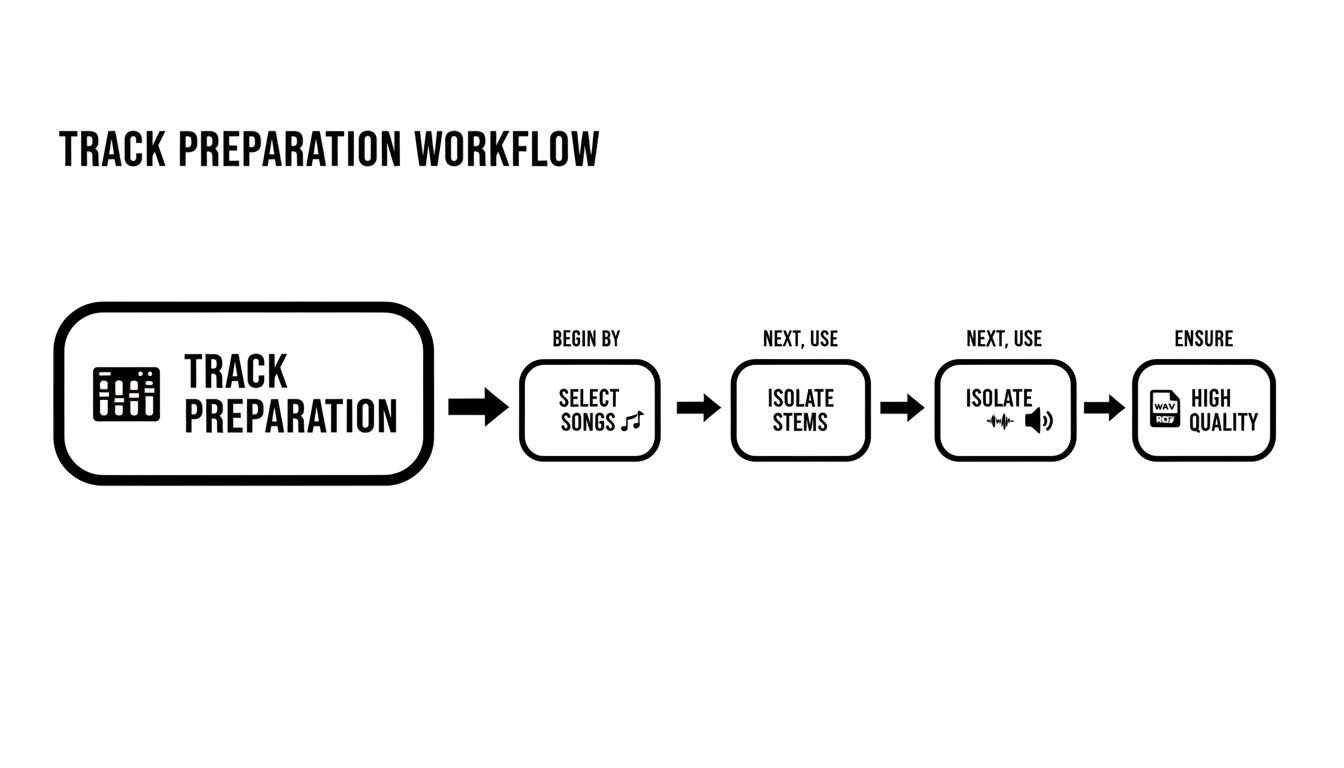
As you can see, choosing the right songs, isolating your stems, and making sure you're working with high-quality files are foundational. Get these right, and the syncing process becomes so much smoother.
Demystifying Harmonic Mixing
Once your tracks are rhythmically locked, the next layer is harmonic mixing. This is all about making sure the songs are in compatible musical keys. A smooth key transition feels emotionally resonant and completely natural; a clashing one just sounds dissonant and awful.
This is where the Camelot Wheel becomes your best friend. It’s a simple, color-coded system that maps out musical keys based on how well they go together. Think of it as your cheat sheet for finding songs that will sound absolutely incredible together.
The rules are incredibly simple:
- Stay in the Same Key: Mixing from
8Ato8Ais a perfect match. - Move One Step: You can go one step clockwise or counter-clockwise (e.g., from
8Ato9Aor7A). - Switch Between Inner/Outer Rings: You can hop from the outer ring to the inner one at the same number (e.g.,
8Ato8B).
This system takes all the guesswork out of the equation. You don't need a degree in music theory; you just need to follow the numbers. It’s a simple but incredibly powerful way to ensure your mixes are always musically sound.
This isn't just abstract theory; it has a huge impact in the real world. DJs prioritize key compatibility, especially in the 120-128 BPM range, which happens to be the sweet spot for roughly 75% of all electronic dance music. By mastering both tempo and key, you elevate your blends from basic fades into something truly professional.
Arranging Your Mix and Crafting Transitions
Alright, your tracks are prepped and synced up. Now comes the fun part—the art. This is where you graduate from the technical grunt work and start making the creative calls that will make or break your blend. A killer transition is more than just a necessity; it's the heart of the mix, the moment that takes the listener on a ride.
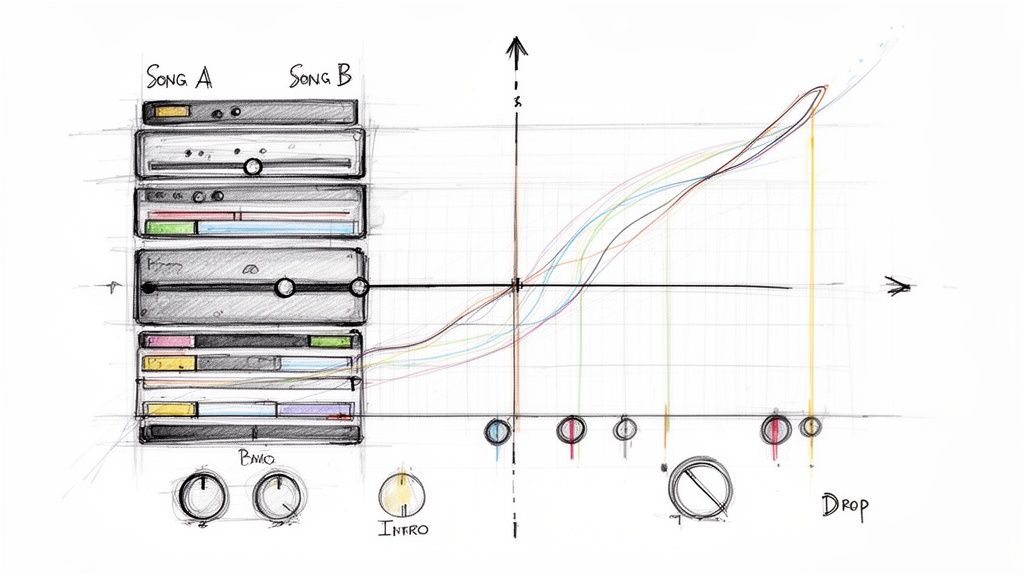
First things first, you need to find the perfect spots to make your move. Don't just crash two choruses into each other and hope for the best. Really listen to the songs. Feel their natural rhythm, their ebbs and flows. A song's intro is often sparse and beat-driven, which makes it an ideal layer to bring in over another track's outro as it’s winding down.
This idea is what DJs call phrase matching. It’s about lining up the musical sections of both tracks—think intro over outro, or verse over verse—so their structures shake hands. When you get this right, the transition feels like it was always meant to be, not like you just hit "next" on a playlist.
Building the Bridge Between Songs
Once you've picked your entry and exit points, it's time to actually build that bridge. A simple crossfade, where Song A's volume dips while Song B's rises, is the most basic way to do it. It works, but it can feel a little flat. To create a truly seamless blend, you need to get a bit more hands-on.
One of the most powerful tools in your arsenal is EQ mixing. This is all about using an equalizer to carve out space for each track. Instead of just playing with volume faders, you're swapping specific frequencies. For example, as you start bringing in Song B, you can slowly roll off the bass from Song A. At the same time, you gradually bring up the bass on Song B.
This simple move creates a smooth handover of the low-end thump, preventing that muddy, distorted mess you get when two basslines fight for the same space. The same principle applies to the mids and highs, letting you gracefully swap out vocals, synths, or hi-hats with surgical precision.
A common pitfall for beginners is having both tracks at full blast at the same time. The secret to a clean mix is knowing that as one element enters, another has to leave. Think of it less like a shouting match and more like a conversation between two songs.
Creative Transition Techniques
Beyond a clean EQ swap, you can use effects to inject some real energy and drama into your transitions. These little tricks are like signposts for the listener, building anticipation and letting them know something new is on the horizon.
Here are a few classic techniques you can try:
- Filter Sweeps: Grab a low-pass or high-pass filter and slowly sweep it across the outgoing track. A gradual low-pass sweep, for instance, makes the song sound like it's sinking underwater, creating a ton of tension right before you drop the new track in at full force.
- Looping: Find a short, recognizable piece of the incoming track—a one-bar drum pattern or a quick vocal chop—and loop it quietly. You can slowly bring up its volume and open the filter on it, teasing the new track's identity before it fully arrives.
- Effects (Reverb and Delay): Slapping a bit of reverb or a syncopated delay on the final beat of a phrase in the outgoing track can create a cool, atmospheric "echo out." This gives you a sonic cushion, a perfect, washed-out space to introduce the next song without any jarring cuts.
Ultimately, learning how to mix 2 songs together is about storytelling. Each transition is a new chapter, guiding your audience from one vibe to the next. By combining smart structural choices with these creative flourishes, you'll be crafting blends that aren't just technically sound, but genuinely exciting to listen to.
Balancing and Polishing Your Final Mix
You’ve built the transition, the tracks are in sync, and the arrangement is solid. Now comes the part that really separates the pros from the amateurs: the final polish. This is where we add clarity, punch, and that cohesive "glued-together" sound that makes a blend shine on any system, from massive club speakers to a pair of earbuds.
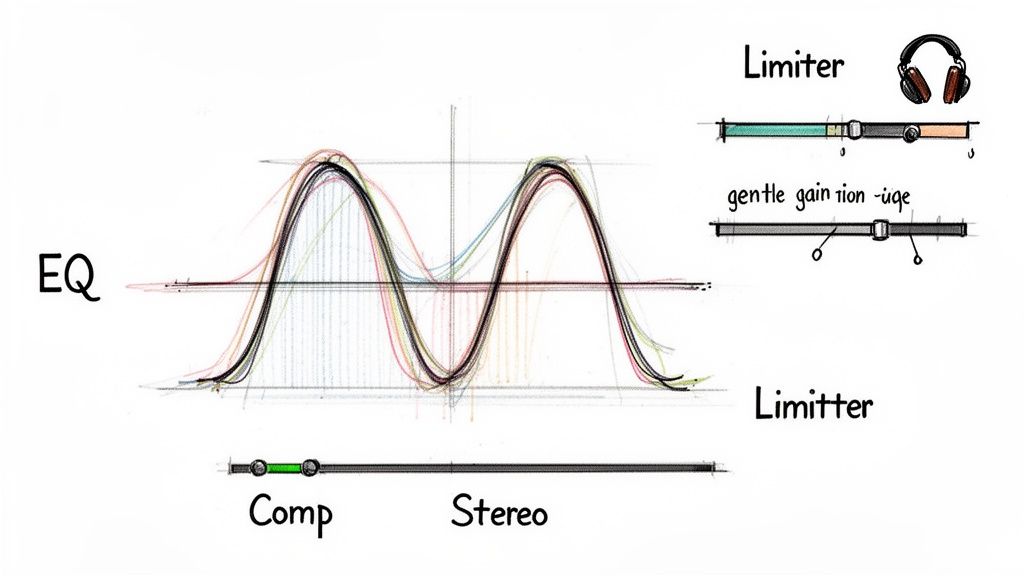
Think of your mix as a conversation in a crowded room. If both songs are yelling over each other in the same frequency range, you just get a muddy, confusing mess. Your equalizer (EQ) is the tool you'll use to give each part its own space to be heard clearly.
The most common culprit is a cluttered low end, where kick drums and basslines from both tracks fight for attention. One of the simplest and most effective tricks in the book is to use a high-pass filter. Gently roll off the deep bass from one track, letting the other’s low end take center stage. This one move can instantly clean up your entire mix.
Adding Cohesion with Compression
Once you’ve sorted out the frequency conflicts, the goal is to make the two songs sound like they actually belong together. This is a perfect job for compression. At its core, a compressor is just an automatic volume fader that tames loud peaks and brings up quieter parts, reducing the overall dynamic range.
When you apply a touch of compression across the entire mix, it works like sonic glue. It smooths out the volume differences between the two songs, creating a much more consistent and unified listening experience. They stop sounding like two separate recordings and start sounding like a single, powerful piece of music. For a deeper look, our guide breaks down exactly how to use a compressor for music production.
Gently compressing your mix isn't just about controlling volume; it's about shaping energy. A well-set compressor can add a tangible punch and excitement, making your blend feel tighter and more powerful.
Creating an Immersive Soundscape
Alright, let's talk about adding some width. Most mixes naturally start in the center (mono), which can feel a bit flat. Stereo panning is your ticket to creating a wide, immersive sound field by placing different elements across the left-to-right spectrum.
- Create Space: Nudge a percussive element from Song A just a little to the left.
- Find Balance: Pan a synth or pad from Song B slightly to the right to counteract it.
Even these small adjustments can open up your mix dramatically, preventing it from sounding congested.
Finally, place a limiter on your master output. This is a non-negotiable final step. A limiter boosts the overall volume of your track to a commercial level without letting it clip or distort. It's the final touch that gives your mix the punch and presence it needs to stand out. Mastering these final touches is what truly elevates the art of blending two songs.
Mixing Techniques for Different Creators
The art of blending audio isn't just for DJs anymore. Knowing how to mix two songs together is a secret weapon for all kinds of creators, but your approach will look completely different depending on what you're making. Scoring a film, for instance, is a world away from producing a podcast.
For Podcasters and Interviewers
If you're a podcaster, clarity is king. You're probably looking to blend interview audio or narration with some background music to set a professional, engaging mood. The biggest challenge? Making sure the music supports the dialogue without ever drowning it out.
This is where a classic technique called sidechain compression comes in handy. It's an automated process where the music's volume "ducks" or lowers itself the moment someone speaks. This little trick keeps the conversation right where you want it: front and center.
For Video Editors and Filmmakers
When you're editing video, mixing audio is all about driving the story forward and hitting the right emotional beats. You're essentially scoring the visuals in real time.
Think about a scene that suddenly shifts from a quiet, reflective moment to a burst of intense action. A perfectly timed audio transition is what sells that shift to the audience. You might need to weave two completely different musical pieces together, matching the cut or the on-screen movement right on the beat. This is where your mix truly enhances the narrative.
For Music Producers and Remix Artists
Producers and remixers have a totally different goal. They see songs not as finished products, but as a collection of raw ingredients for creating something brand new. For them, mixing isn't just about a smooth transition—it's about complete deconstruction and reconstruction.
This is where the magic of stem isolation really comes to life. A producer can grab a clean acapella from a pop track using a tool like Isolate Audio and lay it over a brand new instrumental they’ve built from the ground up. This opens up a world of possibilities for crafting detailed mashups and official remixes that sound entirely original.
Pro Tip: Regardless of your craft, the foundational principle is the same. Starting with isolated stems gives you the ultimate control. It gives podcasters clean dialogue, video editors the exact musical elements they need, and producers the individual building blocks to create without limits.
Once you understand what your project truly needs, you can adapt these core mixing techniques to get polished, professional results every time.
- Podcasters: Focus on dynamic control and always prioritize vocal clarity.
- Video Editors: Make emotional pacing and visual storytelling your main guide.
- Producers: Treat isolated stems as your creative toolkit for building new compositions.
This tailored mindset ensures your final product isn't just technically correct, but perfectly suited for its intended purpose.
Common Questions and Quick Fixes for Mixing Songs
Even after you get the basics down, you're bound to hit a few snags when blending two tracks. It happens to everyone. Here are some quick answers to the hurdles I see creators run into most often.
What's the Easiest Software to Start With?
If you're just dipping your toes in, you don't need a complicated Digital Audio Workstation (DAW). Your best bet is something intuitive. For most people, that means starting with GarageBand (it’s free on all Apple devices) or Audacity (a free, open-source classic). Both give you the essentials—tempo adjustments, EQs, and crossfaders—without overwhelming you.
If your goal is more geared towards live DJing, look at the free versions of popular platforms. Serato DJ Lite and Rekordbox are fantastic starting points that let you learn the fundamentals of beatmatching and mixing before you commit to paid gear or software.
How Can I Stop My Mix From Sounding Muddy?
Ah, the dreaded muddy mix. This almost always comes down to frequencies clashing, especially in the low end where the bass and kick drums live. The key is to use an equalizer (EQ) to carve out space for each element.
A go-to trick is to apply a low-cut (or high-pass) filter to one of the tracks. By cutting the frequencies below 150 Hz on one song, you let the bassline or kick from the other song punch through without competition. This is where having isolated stems becomes a massive advantage, as you can be incredibly precise about what you’re cutting.
The secret to clarity is subtraction, not addition. Before you boost anything, think about what you can cut. Removing clashing elements is often more effective than trying to make everything louder.
Can I Actually Mix Songs That Are in Totally Different Keys?
It's definitely tricky, but not impossible! If the keys are a complete mismatch and sound dissonant, your best bet is to find sections without strong melodic content. Think about mixing a drum intro from one track over an instrumental break from the other.
Another route is to use a pitch-shifting plugin to nudge one of the tracks into a more compatible key. Just be sure to listen closely for any weird, unnatural sounds—what we call audio artifacts—as aggressive pitch-shifting can sometimes degrade the quality.
Ready to take full control of your audio? With Isolate Audio, you can pull any sound from any track with simple text prompts. Go beyond basic stems and start creating truly unique blends. Try it for free at https://isolate.audio today.