How to Remix a Song A Modern Producer's Guide
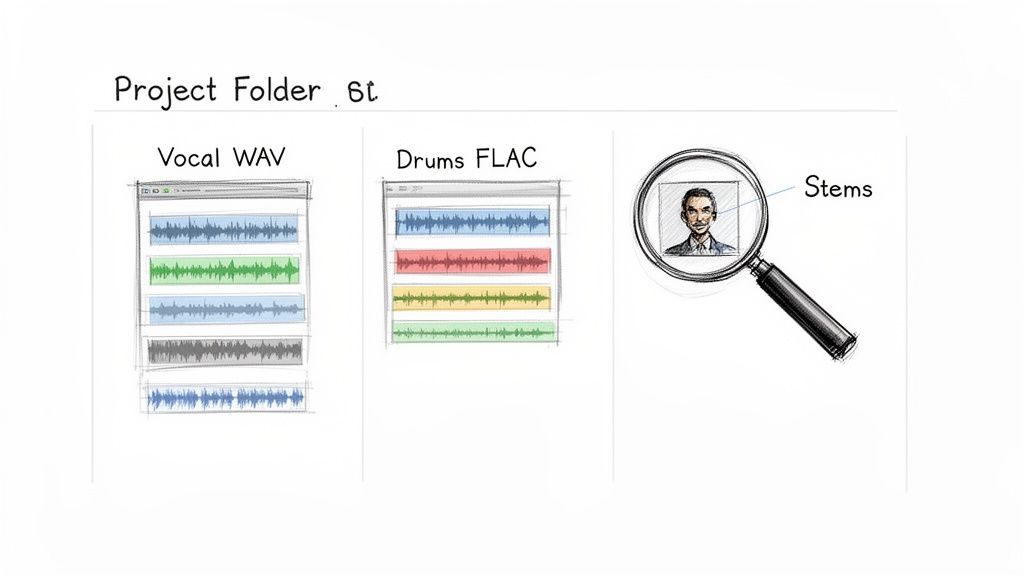
Every great remix starts with one thing: clean, high-quality source material. Before you can even think about adding your own flavor, you have to get your hands on the raw ingredients. These individual audio tracks, what we call stems, are the absolute foundation of your project. Whether you get them officially or create them yourself, how you prepare them will make or break your final track.
Acquiring and Preparing Your Audio Stems
The quality of your remix is a direct reflection of the audio you start with. This first stage is all about sourcing and organizing the building blocks of the original song. Think of it as your mise en place in the kitchen—getting everything prepped and ready to go.
You’ve basically got two ways to get these parts: the old-school route of official stems or the modern, more flexible approach of making your own. Each has its place, and knowing when to use which is part of the craft.
Official Stems vs DIY Extraction
Official stems are the holy grail. These are the pristine, individual tracks straight from the artist or label, often released for remix competitions. They're the cleanest you can get. The problem? They're often hard to come by unless you're specifically invited to the party.
This is where DIY extraction has become a total game-changer. Not too long ago, trying to pull a vocal from a fully mixed track was a nightmare that left you with a garbled, artifact-ridden mess. Today’s AI-powered tools have completely flipped the script, letting you deconstruct almost any song with stunning clarity.
Key Takeaway: The game has changed. You no longer need official permission to practice your remixing craft. AI audio separation gives you the freedom to pull out vocals, drums, basslines, or any other part from a finished song, blowing the doors wide open for your creativity.
Using AI to Isolate Audio Elements
Tools like Isolate Audio use incredibly smart algorithms to break down a finished track into its separate components. What makes this so powerful is that you can just tell it what you want using plain language. You’re not stuck with generic buttons like "vocals" or "drums."
You can get super specific with simple text prompts. For example:
- "Isolate the main vocal" to get a clean acapella to build around.
- "Remove the drums" to gut the rhythm section and lay down your own groove.
- "Extract the piano melody" to grab that one iconic hook you want to chop up.
This technology means you can remix practically anything you can listen to, not just the handful of tracks with official stem releases. It's also a secret weapon for sound design. You can even pull interesting sounds from videos; we have a whole guide on how to extract audio from video that shows you how to rip audio from MP4s for your projects.
Setting Up Your Project for Success
Once you’ve got your files, a little prep work goes a long, long way. Trust me, spending five minutes organizing now will save you hours of headaches later.
First things first, create a dedicated project folder. Inside that folder, create subfolders: "Stems," "Samples," "Bounces," "Project Files." It's a simple habit that keeps your projects from turning into a digital junkyard.
Next, pay attention to file quality. Always, always work with the highest quality audio you can get. That means lossless formats like WAV or FLAC. They contain all the original audio data, which is critical. Compressed files like MP3s are designed to be small, and they achieve that by throwing away audio information. That missing data becomes glaringly obvious once you start stretching, pitching, and processing the sound.
Finally, get your stems into your Digital Audio Workstation (DAW) and get organized from the jump. Label and color-code every single track (e.g., green for vocals, blue for bass, red for drums). This kind of visual organization is a lifesaver when your track count starts to climb. Nailing these prep steps keeps your workflow smooth so you can focus on being creative, not fighting a messy session.
Deconstructing the Original for Creative Inspiration
Once you have your stems ready to go, the real fun begins. This is where you shift from technician to artist. A truly great remix isn't just about throwing a new beat under a vocal—it's about getting to the heart of the original song, finding its most powerful moments, and showing them to the world in a completely new way.
Your first job is simply to listen. I don't mean just having it on in the background; I mean active, critical listening with a producer's ear. Put the original track on a loop and start asking questions. What’s the core emotion here? Is it happy, sad, tense? What’s the one thing you can’t get out of your head—that one vocal hook, that synth melody, that chord change?
This deep-listening phase is all about finding the song's DNA. You’re searching for those one or two "golden threads" that you can weave into your own creation. These are the elements that will make your remix feel connected to the original, even as you build an entirely new world around them.
Finding Your Creative Direction
After you've pinpointed the essential elements, you need a vision. You're not just tweaking a song; you're telling a new story with familiar characters. Are you going to take a slow, somber ballad and transform it into a festival-ready anthem? Or maybe you'll strip back a massive pop track to its bare bones for an intimate, acoustic feel.
There are a million ways to approach a remix, but most fall into a few common categories. Knowing these styles can help you figure out your own angle and make your creative choices with purpose.
Just look at the electronic music world, which ballooned into a $12.9 billion global industry in 2024. It was practically built on the art of the remix. Producers in that space are constantly reimagining tracks to keep their DJ sets exciting for a massive fanbase that has swelled by 566 million across the big platforms. This constant reinvention is a great model for any remixer to follow.
Remix Style Breakdown
Settling on a direction early saves you from just randomly trying things until something sticks. It brings focus to your project and makes every decision—from picking a kick drum to designing a synth patch—that much easier.
To help get the ideas flowing, here’s a quick look at some of the most common remix approaches.
| Remix Type | Primary Goal | Key Techniques | Best For |
|---|---|---|---|
| Club Remix | Optimize the track for a dance floor with a strong, consistent groove. | Add a four-on-the-floor beat, driving bassline, and build-ups/drops. | Turning pop, rock, or indie songs into high-energy dance anthems. |
| Acoustic Reimagination | Strip the song down to its emotional core, focusing on vocals and harmony. | Replace electronic elements with piano, guitar, and subtle percussion. | Creating intimate, emotional versions of upbeat or complex tracks. |
| Genre Flip | Transplant the song's core elements into an entirely different musical style. | Use the vocal from a folk song over a hip-hop beat or a rock riff in a synthwave track. | Showcasing creative range and offering a completely fresh perspective. |
| Chopped & Screwed | Alter the tempo and pitch drastically to create a new, often darker mood. | Slow the track down significantly, pitch-shift vocals, and add rhythmic cuts or stutters. | Creating atmospheric, slowed-down versions with a completely different feel. |
This table is just a starting point, not a set of rigid rules. Feel free to blur the lines. Why not make an acoustic remix that suddenly drops into a massive club section? The creative possibilities are truly wide open.
Building a New Foundation
With a clear direction in mind, it's time to build. Start by muting everything except for those one or two key elements you decided to keep—nine times out of ten, this will be the lead vocal. This is your anchor. Now, you can start building a new musical world around it.
A new groove is a fantastic place to start. Program a drum pattern that fits the style you’re going for. Does it need a massive, punchy kick and snare, or something more laid-back and textured? Once the drums feel solid, add a new bassline that locks everything together and plays nicely with the vocal melody. Our guide on how musicians can use audio separation tools explains how isolating elements like a vocal makes this process much smoother.
From there, you can think about reharmonizing the track. Writing a completely new chord progression under the original vocal is one of the most effective ways to totally change a song's emotional tone. A happy pop vocal can suddenly sound incredibly sad and haunting just by placing it over a minor-key piano progression.
Pro Tip: Don't feel like you have to use every single stem from the original song. In remixing, less is almost always more. A killer remix is often defined as much by what you decide to leave out as by what you choose to put in.
The goal is to create a foundation that sounds like you but still honors the core idea of the original. That perfect balance between your own creative voice and respect for the source material is what makes a remix truly special.
Bringing Your Remix to Life in the DAW
Alright, you've got your vision and your stems are ready to go. Now for the fun part: diving into your Digital Audio Workstation (DAW) and actually building the track. This is where your abstract ideas—that killer new groove or those fresh chord changes—start to become real, tangible layers of sound. The mission here is to weave all those raw elements into a cohesive arrangement that feels like a finished song.
Getting this right is a blend of technical skill and pure creativity. You'll need to nail the essentials, like matching the tempo and key, so every new part you add feels like it truly belongs. But you'll also get to craft the sonic signature of your remix, from the drums and bass right down to the synths and effects that give it a unique personality.
This simple flowchart breaks down the creative loop I always find myself in: listen to what you have, identify what to keep or change, and then rebuild it with your own flavor.
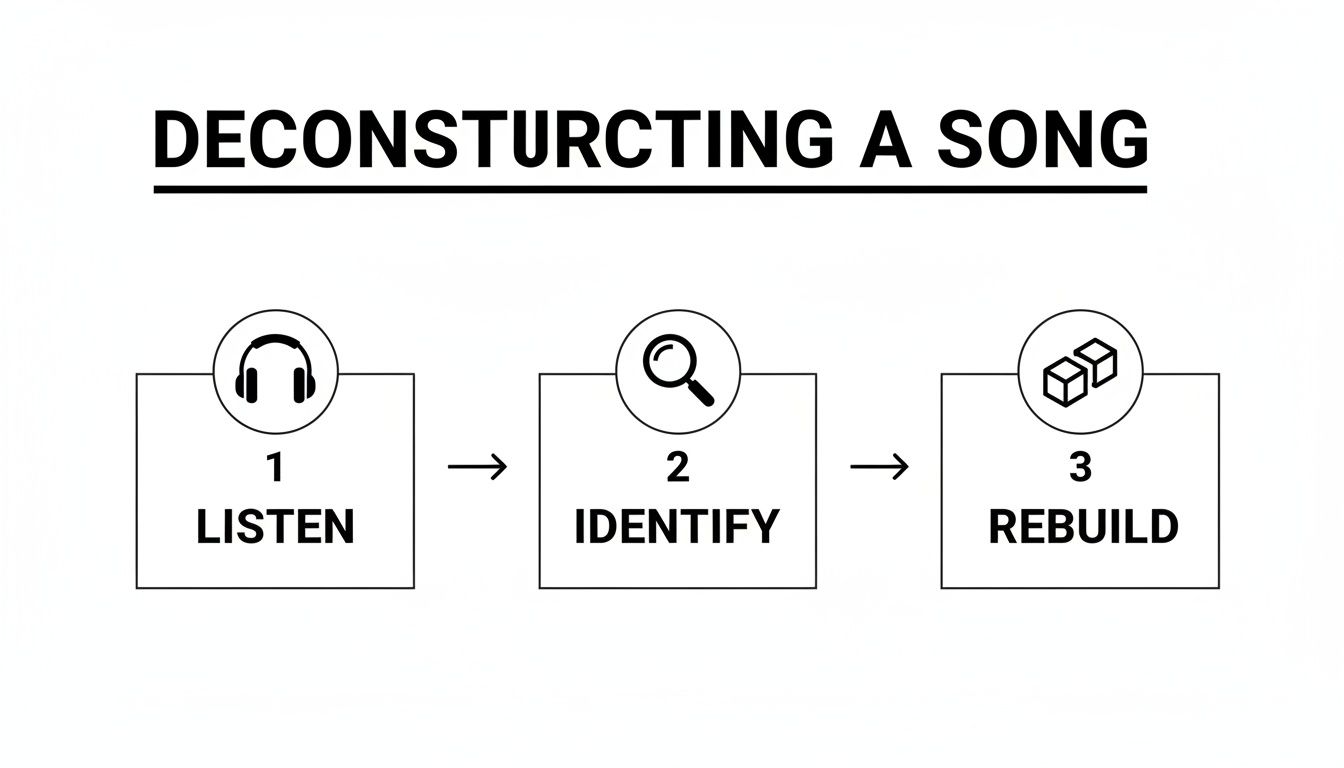
Following this keeps you focused. It ensures every single element you add serves the track and pushes it closer to the vision you started with.
Locking Everything to the Grid
First things first: you have to get the original stems perfectly in time with your project. This is absolutely non-negotiable. If that original vocal drifts even slightly off-beat from your new drums, the whole remix will sound sloppy and amateur.
Thankfully, most DAWs have fantastic time-stretching (or "warping") tools built right in. Just drag the main stem you're working with—usually the vocal—onto an audio track. Use your DAW's tempo detection to analyze it, then enable warping and set your project to the new BPM you want. The stem will magically stretch or shrink to fit your grid.
Pro Tip: When you're warping vocals, listen very carefully for digital artifacts. Pushing the time-stretching too far can introduce weird, watery sounds. Most DAWs have different warp modes for a reason—try options like "Complex" or "Pro" in Ableton Live to help preserve the natural quality of the performance.
Making Sure It All Plays Nicely Together
Just as crucial as tempo is the musical key. Any new basslines, chords, or melodies you write must complement the original vocal or lead instrument. Playing in the wrong key is the quickest way to create a train wreck.
Here’s my go-to workflow for getting this right:
- Find the Original Key: Grab a keyboard, use a tuner plugin that shows notes, or even pop the track into an online key-finder to figure out the original song's key.
- Transpose (If You Want): Feeling adventurous? You can pitch-shift the original stems to a totally new key to change the mood. Shifting a major key to its relative minor, for example, can instantly give a happy track a darker, more emotional vibe.
- Write in Key: Once you've settled on a key, make sure all your new MIDI parts stick to that scale. Many DAWs have a "Scale" or "Key Lock" feature in the piano roll that highlights the right notes, making it almost impossible to hit a wrong one.
Crafting Your Signature Sound
With the technical foundation in place, you can finally start building out the track. This is where you inject your unique style. I always start with the rhythmic foundation.
Program a drum beat that carries the energy you're aiming for. Please, don't just drag in a generic loop and call it a day. Build your own pattern. Find a kick with the right punch, a snare that cuts through, and hi-hats that give it that perfect groove. Layering different drum samples is a fantastic trick for creating textures you won't hear anywhere else.
Next up, write a bassline that locks in tight with your new drums. A great bassline isn't just low-end rumble; it creates a rhythmic and harmonic conversation with the other elements, especially the vocal. A simple, repetitive groove can be all you need to anchor the track and get heads nodding.
This very creative freedom is why fan-made remixes have become such a massive force in music. The culture of dance challenges and song mashups is expected to fuel a projected $53.49 billion growth in music streaming by 2025. This isn't just a local thing; while US on-demand audio streaming grew a solid 6.4% in 2024, it skyrocketed by 17.3% internationally. It’s clear proof of the immense power of user-generated content worldwide. You can learn more about the global impact of music streaming trends and see how this is shaping the industry.
Using Effects to Add Space and Energy
Effects (FX) are the secret sauce. They take a static, flat arrangement and make it feel dynamic, alive, and polished. You'll use them to build tension, create silky-smooth transitions, and give every sound its own little pocket in the mix.
I find it helpful to think of effects in two main categories: insert effects and send effects.
- Insert Effects: These go directly onto an individual track to shape its core sound. Think EQs for carving out frequencies or compressors for taming dynamics.
- Send Effects: These are for putting multiple sounds into a shared acoustic space. Reverb and delay are the classic examples. You set up the effect on a "return" track, then "send" a bit of the signal from different tracks to it.
This send/return method isn't just easier on your computer's processor; it glues your mix together. When your vocals, synths, and percussion all share the same reverb, they sound like they're performing in the same room. Use automation to make these effects breathe—try slowly turning up the reverb on a vocal right before the chorus hits. It's a classic trick for building a huge sense of anticipation and release.
Mixing and Mastering for a Professional Sound
You’ve built a killer arrangement, and all the creative pieces are locked in. Now comes the part that separates the amateurs from the pros—the final polish that turns a great idea into a track that truly slaps on any sound system.
This stage is all about transforming a collection of individual sounds into a cohesive, powerful, and professional-sounding record. Mixing and mastering can seem like a dark art, but they really boil down to two things: clarity and impact. Mixing is about giving every element its own space to shine, while mastering is the final coat of paint that gets your track loud, proud, and ready for the world.
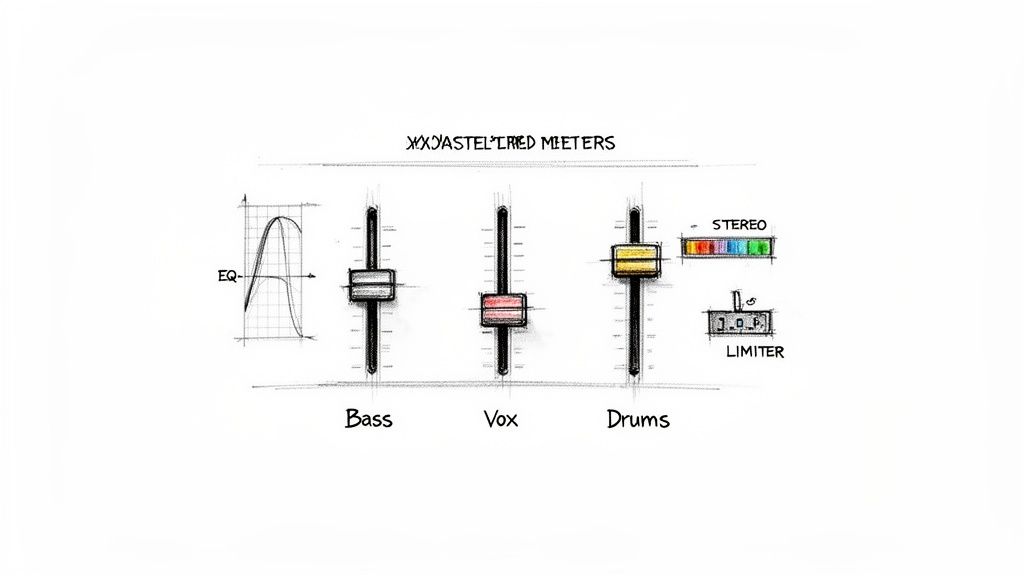
Achieving Clarity Through Mixing
Think of your mix as a sonic puzzle. Each sound—the kick, the bass, the vocal—is a piece, and your job is to make them all fit together perfectly. The goal isn't just to make everything audible; it's to create a balanced, three-dimensional soundscape that pulls the listener in.
Before you even think about touching a plugin, start with a static mix. This is just you, the faders, and your ears. Listen carefully and get a rough volume balance for every track. Where does the vocal want to sit? Is the kick driving the groove? Honestly, getting this basic balance right solves 80% of your mixing problems before you even start.
Carving Out Space with EQ
Once your levels feel good, your next best friend is the Equalizer (EQ). EQ is how you sculpt the tone of each sound so it isn't fighting with others for the same sonic real estate. When two instruments occupy the same frequency range, you get mud—and nobody wants that.
For example, your kick drum and your bassline are almost always battling for space in the low end. An EQ lets you fix that. You might carve out a little sub-bass from the bassline to let the kick’s thump punch through, then scoop a bit of the kick's mid-bass so the bassline's melodic notes can be heard clearly. It’s this constant "give and take" that leads to a clean mix.
Pro Tip: Always try "subtractive EQ" first. Instead of boosting frequencies to make something sound better, try cutting frequencies from other instruments to make space for it. This almost always results in a more natural, less cluttered sound.
Controlling Dynamics with Compression
Next up is compression, a tool for taming a sound's dynamic range—the difference between its quietest and loudest moments. It's the secret sauce for making a vocal sound consistent, adding punch to a snare, or "gluing" a group of instruments together.
A compressor works by automatically turning down the volume when a signal gets too loud. Used subtly, it creates a polished, controlled feel. Pushed harder, it can inject some serious character and energy.
- For Vocals: A gentle compressor can even out the performance, ensuring every word is clear without you having to ride the fader constantly.
- For Drums: A compressor with a fast attack can tame the initial sharp crack of a snare, while a slower attack lets that initial transient pop through before clamping down, making the drum sound fatter and punchier.
Creating Width with Panning
The last piece of the core mixing puzzle is panning. Your track exists in a stereo field, from hard left to hard right, and panning is how you place sounds within it. A mix with everything dead center will sound narrow and lifeless. By panning elements to different spots, you create a wide, immersive experience for the listener.
A classic strategy is to keep the big stuff—kick drum, bassline, lead vocal—right in the center to provide a solid anchor. Then, you can pan other elements like hi-hats, synths, and backing vocals out to the sides to create width and separation.
The Final Polish: Mastering
Once your mix is sounding tight, it’s time for mastering. This is the final quality control step. The main goals here are to bring your track up to a competitive, commercial volume and to make sure it sounds good everywhere, from cheap earbuds to a massive club PA.
This is usually done with a chain of processors on your main output, including a final EQ for broad tonal tweaks, a multi-band compressor for dynamic control, and, most importantly, a limiter. The limiter is the tool that lets you raise the overall volume without letting the audio clip and distort.
Don't forget that the file format you export to is critical. Lossless formats like WAV are essential for the mastering process itself, but you'll need compressed versions for distribution. Understanding the nuances is key; for a deeper dive, check out our comparison of MP3 vs OGG formats to see how they affect sound quality.
Navigating Copyright and Distribution
You’ve poured your heart and soul into creating a killer remix. The track is finally done, and it's a huge accomplishment. But before you hit that upload button, we need to talk about the legal side of things. It can feel like a minefield, but understanding the rules of the road isn't just about protecting yourself—it's about being a professional.
Every song you hear has at least two copyrights attached to it. First, there's the composition (the melody, lyrics, the song itself), and second, there's the sound recording (what you actually hear, the "master"). To legally release a remix for sale or streaming, you need a green light from both of those copyright holders. If you don't have permission, your track is technically an infringing derivative work.
Official Remixes vs. Bootlegs
This is where we draw a line in the sand between an "official remix" and a "bootleg."
An official remix is the real deal. The original artist or their label commissioned you to do it. They send you high-quality stems, you work your magic, and they handle the legal paperwork for an official release. This is the goal.
A bootleg is an unauthorized remix. Think of it as a creative exercise. They're fantastic for honing your skills, dropping in a DJ set, or building a buzz on platforms like SoundCloud. However, you absolutely cannot monetize them. Trying to upload a bootleg to Spotify or Apple Music is a fast track to a takedown notice, and it could even get your entire account flagged or banned.
My two cents: Assume every track is off-limits until you're told otherwise. Keep your bootlegs on non-commercial platforms or in your DJ mixes. It's just not worth the risk to your career to upload them to monetized services.
How to Get Your Remix Cleared
So, what if you've made something truly special and want to take it legit? You have to be proactive and reach out to the people in charge.
Find the Gatekeepers: First, you need to figure out who owns what. The master recording is typically owned by the record label, and the publishing rights belong to the songwriter's publisher. You can often find publisher info by searching for the song on websites like ASCAP or BMI.
Make Your Pitch: Once you have a name, reach out professionally. A cold email to the label's A&R department or the publisher is a good start. Keep it concise, introduce yourself, and provide a private link to your remix. Your job is to convince them your version brings a fresh, valuable perspective to their song.
Talk Terms: If they love what they hear, you'll move on to negotiating a deal. This could be a flat fee, a cut of the royalties, or a mix of both. Be patient here—this part of the process can take a while.
Distribution in Today's Music World
The music industry has changed drastically, and it’s all about streaming now. In 2024, the global recorded music market ballooned to $29.6 billion, and a massive 69% of that came from streaming. Electronic dance music, a genre built on remixes, was a $12.9 billion piece of that pie. You can dive deeper into these trends in the global music market to see just how big the opportunity is. For producers who follow the rules, this hunger for new content is a golden ticket.
If you’ve successfully cleared the rights, a distributor like DistroKid or TuneCore will be your best friend. They can get your official remix onto every major platform.
If your remix is a bootleg, stick to sharing it on SoundCloud or YouTube. Just be sure to clearly credit the original artist and, most importantly, make sure all monetization options are turned off. This shows respect for the original creator while still letting you share your talent with the world.
Common Questions I Hear About Remixing
As you get deeper into remixing, you're going to have questions. It’s a craft that sits right at the intersection of technical chops and pure creative instinct, so it's natural to hit a few walls. Here are some of the most common questions I get from producers, along with some straight-up advice to help you push through.
Think of this as your quick reference for those moments you're staring at the screen wondering, "What now?"
How Do I Know When My Remix Is Actually Done?
Ah, the age-old artist's dilemma. The honest answer? A track is never really finished; you could noodle on it for the rest of your life. A remix is done when it accomplishes what you set out to do. Did you turn that quiet indie song into a main-stage banger? Did you successfully reimagine that pop hit as a downtempo chill track? If you've hit your mark, you're probably there.
A Practical Tip: Once you've wrapped up the arrangement, mixing, and mastering, just stop. Seriously, close the project file and don't listen to it for at least 24 hours. When you come back with fresh ears, if nothing screams "this is broken," it’s time to export and move on.
What Should I Do When I Hit a Creative Block?
It happens to everyone. It's frustrating, but forcing an idea that just isn't landing is the fastest way to burn out. Instead of grinding away at a blank screen, you need to change your process.
- Flip the Genre: If that big-room house remix is going nowhere, what happens if you rebuild it as a funky, lo-fi beat? It’s a low-stakes exercise that can shake loose a new idea you'd never have found otherwise.
- Have a Sound Design Day: Forget about making a "song." Just open your favorite synth or sampler and spend a few hours making completely new sounds. Go wild chopping up random audio or building weird synth patches. It’s all about playing.
- Change Your Inputs: Step away from your DAW and put on something completely different. Listen to a film score, some old jazz, or a genre you know nothing about. You need to get your brain firing in new ways.
The whole point is to take the pressure off. Creative block usually comes from the anxiety of needing to make something "good." Shifting your focus back to pure experimentation often breaks the spell.
Can I Just Remix Any Song I Want?
Creatively? Yes. Legally? It’s complicated. With today's tools, you can technically pull apart and rework anything you can hear. The crucial part is what you do with it afterward.
Here's the deal: making bootlegs for fun, for practice, or to play in a DJ set is a bit of a gray area, but it's largely tolerated. But the second you upload that remix to Spotify, sell it on Bandcamp, or otherwise try to make money from it, you've crossed a very clear legal line. For any commercial release, you must get official permission from the copyright holders.
Understanding this distinction is key to building a real career. Knowing your way around a DAW is one thing, but knowing how the music business actually works shows you respect the artists who made the original and that you're a professional.
Ready to stop waiting for official stems and start creating your own? With Isolate Audio, you can pull vocals, drums, basslines, or any other element from a track just by typing what you want. It's time to take control of your source material.
Try Isolate Audio for free and see what you can create.
Article created using Outrank