How to Remove the Music from a Video a Complete Guide
If you're a modern creator, knowing how to strip the music out of a video isn't just a party trick—it's an essential skill. It usually comes down to using a smart AI tool to pull the different audio layers apart. This lets you salvage dialogue and sound effects from a track that’s already been mixed, which is a lifesaver for dodging copyright strikes or just getting more creative freedom.
Why You Can't Afford to Ignore Music Removal
You might think of music removal as a niche technical task, but it's really a cornerstone of modern video production. The reasons go way beyond basic audio clean-up; we're talking about legal survival, creative control, and making your content ready for a global audience. For anyone serious about video, this is less of a "nice-to-have" and more of a must-have in your toolkit.
This isn't happening in a vacuum. The global video streaming market is on a trajectory to hit a staggering USD 149.34 billion by 2026, which means the demand for clean, versatile video assets is exploding. Platforms like YouTube and Twitch have automated copyright bots working 24/7. To stay safe, you often need multiple versions of your work: one with the original music, one completely clean, and maybe another with a royalty-free track swapped in. You can dig into the numbers behind this market projection on Allied Market Research.
When You’ll Absolutely Need This Skill
Let’s get practical. Here are a few real-world scenarios where music removal becomes a non-negotiable step:
- Dodging Copyright Strikes: A vlogger films a great segment in a coffee shop, but a hit song is playing in the background. If they upload it as-is, they're looking at a copyright claim, demonetization, or even a takedown notice. The only fix is to pull that song out.
- Prepping for International Dubbing: A filmmaker wants to sell their movie to an overseas market. They'll be asked for a "Music & Effects" (M&E) track. This means they have to surgically remove all the original dialogue while keeping every other sound—music, footsteps, explosions—perfectly intact.
- Improving Audio Clarity and Remixing: A podcaster nabs a great interview, but it was recorded in a busy hotel lobby with music bleeding in from the bar. To make the conversation usable, that background noise has to go. On the creative side, a DJ might want to sample a classic movie line, which means lifting the speech cleanly away from the film's score.
Being able to cleanly separate audio elements completely changes your workflow. It shifts from being a damage-control task—like desperately fixing a copyright flag—to being a powerful creative tool for repurposing, remixing, and perfecting your video's sound.
At the end of the day, knowing how to remove music from a video gives you total control over what you create. It keeps your content legally sound, makes it sound professional, and ensures it’s ready for any audience, anywhere. If you're just getting started, seeing how video editors can benefit from AI audio tools is a great first step toward building a more advanced workflow.
Using AI for Precise Audio Isolation
When you need to surgically remove music from a video while keeping everything else—dialogue, sound effects, ambient noise—perfectly intact, AI is no longer a futuristic dream. It's your best and most practical tool. Gone are the days of wrestling with clunky audio software only to get muddy, compromised results. Today’s AI platforms have boiled the whole process down to just a few clicks.
Imagine you're a vlogger who just shot the perfect scene in a bustling café. The dialogue is crisp, the clatter of cups adds a layer of authenticity, but there's a copyrighted pop song playing over the speakers. In the past, you were stuck. You could either mute the entire audio track and lose all that great natural sound, or you could upload it and pray you don't get a copyright strike. With AI, you can simply target and lift out the music.
It's a common problem, and creators need to remove music for all sorts of reasons.
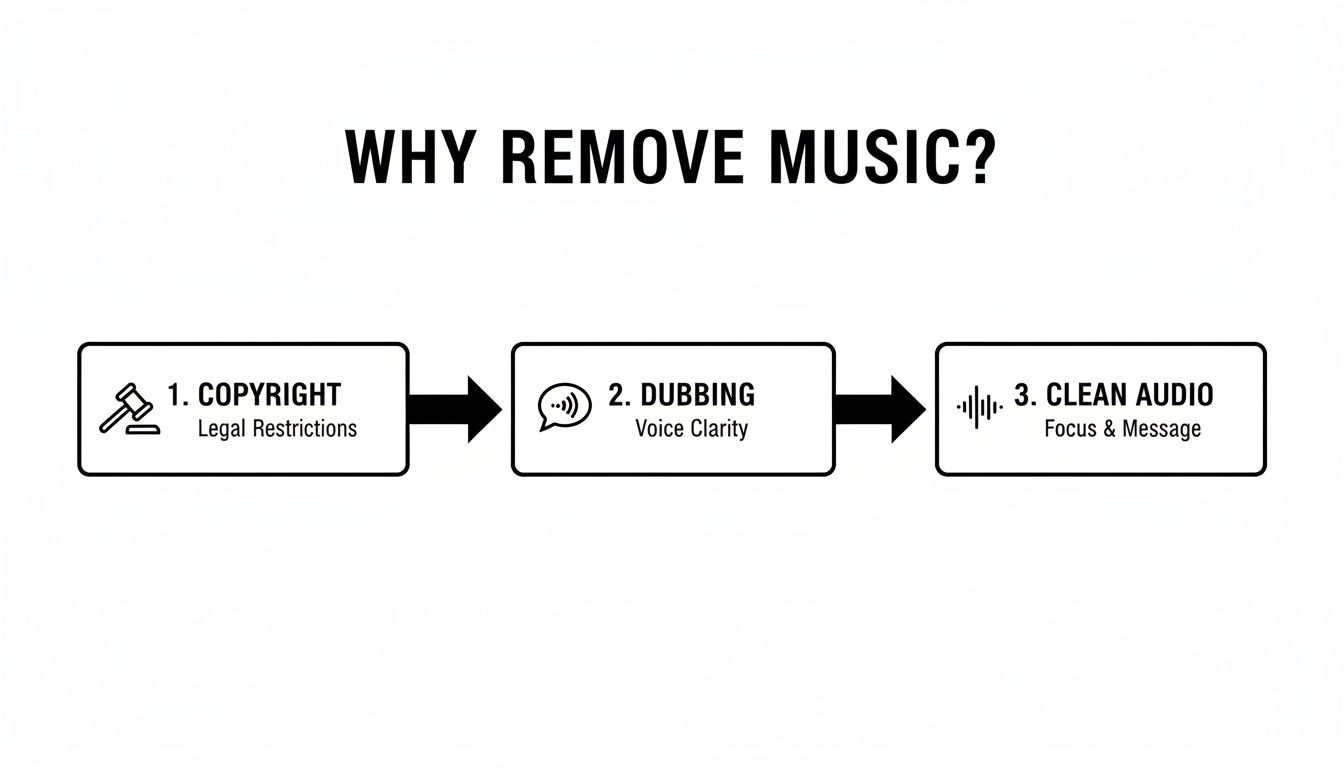
As you can see, the main drivers are sidestepping copyright issues, prepping content for international dubbing, or simply getting clean, professional audio where the dialogue can really shine.
How Does the AI-Powered Workflow Actually Work?
The secret sauce behind tools like Isolate Audio is something called source separation. The AI model has been fed thousands of hours of audio, learning to recognize the unique sonic fingerprints of different elements—vocals, drums, traffic, and, of course, background music.
When you upload your video, the AI listens to the entire mix. Instead of using a blunt instrument like an equalizer that can damage the dialogue along with the music, it intelligently identifies the music's specific frequencies and patterns. Then, it just lifts them out, leaving the sounds you want to keep right where they belong.
This is a massive leap forward. Traditional tools were often limited to crude categories like 'vocals' or 'drums,' which just couldn't handle the messiness of real-world recordings. Now, prompt-based AI can understand descriptions like "crowd cheering" or "instrumental background music," giving you content-aware editing that was unthinkable a few years ago.
Writing Prompts That Get Results
The real magic here is that you don't need to be an audio engineer. You just need to tell the AI what you want to get rid of, and the more specific you are, the better the results.
- Be Specific: Don't just say "music." Try "upbeat pop song with female vocals."
- Describe the Instruments: Things like "acoustic guitar strumming" or "electronic synth melody" give the AI clear targets.
- Focus on the Feel: Sometimes, describing the genre or mood works wonders. Think "cinematic orchestral score" or "lo-fi background music."
Pro Tip: If your first attempt leaves behind some musical ghosts or artifacts, try flipping your prompt. Instead of telling the AI what to remove, tell it what to keep. A prompt like "dialogue between two people" can sometimes produce a cleaner result by forcing the AI to focus entirely on isolating the speech.
Dialing in Your Quality and Precision Settings
After you write your prompt, you'll usually see a few output options. It’s all about finding the right balance between processing speed and audio fidelity for your specific project.
- Fast: This is great for a quick preview or when you're on a tight deadline and the audio isn't too complicated.
- Balanced: For most projects, this is the sweet spot. It gives you a great mix of quality and a reasonable processing time.
- Best Quality: When every detail matters, choose this. It uses more horsepower to deliver the cleanest separation possible, making it perfect for final exports or really challenging audio mixes.
Also, keep an eye out for a Precision Mode. This setting is designed for those tricky situations where the music and dialogue are tangled up and fighting for the same frequency space. It tells the AI to be extra meticulous, which can be the difference between a good result and a perfect one.
If you’re working with a big video file, it often helps to first extract the audio from your video into its own file. This can make the upload and processing workflow a lot smoother and faster.
Comparing Different Music Removal Methods

When you need to strip the music out of a video, the right tool for the job really depends on what you're working with, how much time you have, and the level of quality you're aiming for. It's not a one-size-fits-all problem. Choosing the wrong approach can leave you with muffled, artifact-ridden audio that's worse than what you started with.
Let's walk through the four main ways you can tackle this: the new-school AI platforms, your trusty video editor, a dedicated audio workstation, and specialized plugins. Each has its own battlefield where it shines.
AI-Powered Audio Separation Tools
Frankly, this is the game-changer for most of us. AI tools like Isolate Audio are built from the ground up for one job: untangling mixed audio. They use sophisticated models trained on thousands of hours of audio to intelligently identify what's music, what's dialogue, and what's a sound effect, then pull them apart.
- The upside? They’re incredibly fast and precise. You upload your file, tell it what to do in plain English, and it handles the heavy lifting. The results are often startlingly clean, preserving the stuff you want to keep with very few weird sounds or artifacts.
- The catch? The best performance is usually behind a subscription. Free versions are great for a test drive but might limit your file size or how many times you can use the service.
This is my go-to recommendation for content creators, vloggers, or anyone who just needs to fix a copyright claim or clean up dialogue without getting a degree in audio engineering.
Professional Video Editors (NLEs)
If you're already editing in a program like Adobe Premiere Pro, Final Cut Pro, or DaVinci Resolve, you might be tempted to use the built-in audio tools. You can fiddle with an EQ to try and scoop out the frequencies where the music lives, or maybe use a "Center Channel Extractor" effect, hoping the dialogue is panned dead center.
My experience: These are blunt instruments, not scalpels. More often than not, trying to EQ out music also carves out the body and warmth of the human voice, leaving it sounding tinny, distant, or like it's coming through a bad phone connection.
These built-in tools are only really useful for the simplest of fixes—like turning down a faint, unobtrusive background track that isn't competing with dialogue. For anything more complex, you'll hit a wall fast.
Dedicated Audio Editors (DAWs)
This is the old-school, roll-up-your-sleeves method. Firing up a Digital Audio Workstation (DAW) like the free tool Audacity or professional software like Adobe Audition gives you a ton of manual control. You'll see techniques like phase inversion mentioned online, but they only work in the rare, perfect scenario where you have an instrumental version and the vocal is perfectly centered in the stereo mix.
Back in the early 2000s, this was a painstaking post-production job. Editors would spend hours trying to salvage audio, often just giving up and rebuilding the soundscape from scratch. This history shows just how far we've come from the "mute and replace" days, a topic explored in depth in market analyses of the evolution of audio post-production.
The reality is that this route requires a deep understanding of audio engineering and a lot of patience.
Specialized Audio Plugins
For audio pros who live inside their DAW or NLE, specialized plugins from companies like iZotope (with their legendary RX suite) or Acon Digital offer a powerful middle ground. These tools are designed for audio repair and are far more sophisticated than any native effect in your video editor.
These plugins often use their own AI algorithms but give you far more granular control than a simple web tool. The trade-off is the price tag and the learning curve. They're a fantastic investment for professional editors and sound designers, but probably overkill for a YouTuber trying to remove a background song.
To make things a bit clearer, here’s a quick breakdown of how these methods stack up against each other.
Music Removal Method Comparison
| Method | Ease of Use | Precision | Typical Use Case |
|---|---|---|---|
| AI Separation Tools | Very Easy | Excellent | Content creators needing a fast, high-quality fix. |
| Video Editors (NLEs) | Easy | Low | Quick, minor volume adjustments on simple audio. |
| Audio Editors (DAWs) | Difficult | Variable | Audio engineers with very specific, complex needs. |
| Specialized Plugins | Medium | High | Audio professionals who need control within their workflow. |
So, what's the verdict? For the vast majority of people who just want to cleanly separate music from a video without spending a week on it, an AI-powered platform is the smartest choice. It delivers the best balance of speed, quality, and simplicity.
Advanced Techniques for Creative Audio Control
Once you get the hang of removing music from a video, you can shift your thinking. It stops being just a technical fix and starts becoming a powerful creative tool. When you move beyond simple removal, you open up a world of advanced workflows that let you manipulate sound in ways that used to be reserved for high-end post-production studios. It's all about gaining total control over your video's sonic landscape.
This is where you can start to tackle those really tricky audio situations. Imagine a scene where the dialogue is almost completely buried under a loud, dynamic music track. In a case like that, a simple "remove music" command just won't cut it. This is your chance to refine the process for maximum clarity and creative impact.

Refining AI Prompts for Complex Audio
When you're dealing with a dense, messy audio mix, your prompts need to get more strategic. Instead of one single command, start thinking in layers. If the music and dialogue are practically woven together, you might need to run the separation process a few times, targeting different elements each time.
Let's say a documentary filmmaker has an interview where a street performer's music is bleeding into the speaker's microphone. Here's how a layered approach would work:
- First Pass: You'd start with a broad prompt like, "remove instrumental background music." This will probably take care of the most obvious parts of the problem.
- Second Pass: After listening back, you might notice some stubborn remnants, like a faint bassline that’s still lurking under the dialogue. Now you can run the separated dialogue track through the AI again with a more specific prompt: "remove low-frequency bass notes."
- Flip the Script: Another way to tackle this is to tell the AI to isolate the "male speaking voice" instead of removing the music. Once you have a clean voice track, you can layer it back over the original ambient sounds (after you've stripped the music out of them).
This layered technique gives you surgical precision. You're essentially peeling back the unwanted sounds one by one until you're left with a pristine dialogue track. Think of it like being a sound archaeologist, carefully brushing away the dirt to reveal the artifact underneath.
Creative Applications Beyond Simple Removal
The real fun starts when you stop thinking about removing sound and start thinking about reinventing it. With precise audio separation, you can deconstruct a video's entire soundscape and rebuild it into something completely new.
This process gives you access to the individual audio components, which are often called stems. These separated tracks are the building blocks for countless creative projects. If you're new to the term, it's worth learning more about what audio stems are and why they're so useful in modern production.
Here are a few real-world scenarios where this becomes a game-changer:
- For the DJ and Music Producer: A DJ could lift the iconic orchestral score from a classic movie scene, leaving the dialogue behind. They could then chop, sample, and remix that instrumental into a brand-new electronic track for a live set.
- For the Filmmaker: Maybe you love the ambient sounds in a scene you shot, but the original score just doesn't fit the mood anymore. You can extract the music while keeping the dialogue and Foley perfectly intact, then slide in a new, custom-composed score to completely transform the emotional tone.
- For the Sound Designer: A sound designer prepping a film for international distribution needs a clean "Music & Effects" (M&E) track. Using AI, they can strip out all the original English dialogue, delivering a perfect canvas for foreign language dubbing studios to work with.
By treating your video's audio as a collection of separable parts rather than a single, unchangeable block, you unlock endless possibilities. You're no longer just an editor; you're a sound architect.
Exporting and Reintegrating Your Audio
After you’ve successfully isolated the audio you need, the final step is to get it back into your video project. This part is critical for maintaining quality and perfect sync.
First, export your separated audio tracks from the AI tool. I can't stress this enough: always choose the highest quality format available, like WAV or FLAC. These are lossless formats, which means they preserve 100% of the audio data without any quality-killing compression—vital for professional results. An MP3 should be your absolute last resort.
Next, you'll import these fresh audio files into your video editing software, whether that's Premiere Pro, Final Cut Pro, or DaVinci Resolve.
- Drop the new, clean dialogue or sound effects track onto your timeline.
- Carefully line it up with the original video clip. Most editors have a "snap" feature that makes this simple, but you can also use a sharp visual cue—like a hand clap or a door slam—to lock it in perfectly.
- Finally, just mute or delete the original, mixed audio track that was attached to your video clip.
And that's it. Your video now plays with only the audio elements you wanted to keep. From here, you're free to add a new royalty-free music bed, drop in sound effects, or just let the clean dialogue shine. You've just turned a technical hurdle into a seamless creative advantage.
Troubleshooting Common Audio Separation Issues
Even with the best tools on the market, you'll sometimes hit a snag on the road to perfectly clean audio. When you're trying to strip music out of a video, small imperfections can pop up. The good news is, almost all of them are fixable with a few smart adjustments. Knowing how to spot and solve these common issues is really the final step in mastering your audio workflow.
The most common culprits I see are faint musical remnants—what we call artifacts or bleed—that linger behind after the AI does its first pass. These are those ghostly echoes of a synth pad or a stubborn bass note that the algorithm couldn't quite grab. Don't worry, this doesn't mean the tool failed. It just means you've got a particularly challenging audio mix that needs a more hands-on approach.
Dealing with Lingering Audio Artifacts and Bleed
When you hear those faint bits of leftover music, your first instinct might be to scrap it and start over. But hold on—a few small tweaks can often get you the rest of the way there. The secret is to refine how you're telling the AI what to do.
A classic example is trying to remove a rock song from a clip and still hearing the faint, rhythmic thump of a kick drum under the dialogue. This happens a lot because the low-frequency sounds of the drum can easily overlap with the frequencies of a human voice.
When you run into this, here’s a practical checklist I use:
- Refine Your Prompt: Instead of something generic like "remove music," get more specific. Try "remove rock music with heavy drums" or even flip the script to "isolate the spoken dialogue and remove everything else."
- Use Precision Mode: Most good AI tools, including Isolate Audio, have an option for a deeper scan, often called Precision Mode. Turning this on tells the AI to take its time and do a much more detailed analysis. It takes a little longer, but for tricky mixes, the difference in quality can be night and day.
- Process in Layers: This is a pro-level trick that works wonders. Run the separated dialogue track through the AI a second time. Now, write a prompt that specifically targets the artifact you hear, like "remove low-frequency drum thump." This multi-pass technique can be incredibly effective.
The goal here is to guide the AI with as much context as you can give it. Think of yourself as an art restorer carefully cleaning a painting—each pass removes another layer of grime until the original is crystal clear.
Handling Problematic File Formats
Sometimes the problem isn't the audio itself but the digital container it's in. Heavily compressed files, like a low-bitrate MP3 or the audio from a video you downloaded off social media, can introduce their own set of problems. Compression works by throwing away audio data the computer thinks you won't miss, which can make it much harder for an AI to tell the difference between music and dialogue.
If your source file is heavily compressed, you're more likely to notice artifacts after separation. The AI is essentially trying to solve a puzzle with half the pieces missing.
My best advice? Always start with the highest-quality source file you can get your hands on. If you have the original camera footage, use that. Exporting your audio as a lossless WAV or FLAC file before uploading it to a separation tool will always give you cleaner, more reliable results than a compressed format.
Correcting Audio and Video Sync Issues
One of the most frustrating things that can happen after you remove music from a video is finding that your new, clean audio no longer lines up perfectly with the picture. This sync issue, or drift, usually happens for a couple of reasons, but it often comes down to variable frame rates (VFR) in the original video file.
For instance, videos shot on smartphones often use VFR to save file space, meaning the frame rate actually changes slightly from moment to moment. When you pull the audio out and then drop it back in, it might not line up with that shifting video timeline.
Fortunately, this is a straightforward fix inside any video editor:
- Import Both: Put both the original video clip (with its original audio) and your new, clean audio track onto the timeline.
- Find a Sync Point: Look for a sharp, clear sound in the original audio that has an obvious visual cue. A person clapping their hands, a door slamming, or even a hard consonant in a word are all perfect sync points.
- Align the Waveforms: Zoom way in on your timeline. Visually line up the peak of the waveform from your clean audio with the exact same peak in the original audio at the sync point you found.
- Mute the Original: Once they’re perfectly aligned, just mute or delete the original audio track.
By manually locking the audio to a specific visual cue, you ensure everything stays perfectly in sync for the entire clip. It’s a small step that can save you a massive headache and is absolutely essential for a professional finish.
Got Questions About Removing Music from Video?
It’s completely normal to have questions when you first start separating audio tracks. Whether you're a pro editor looking for a faster workflow or just trying to salvage one important clip, you're bound to run into a few uncertainties. Let's tackle some of the most common ones I hear.
Think of this as your go-to cheat sheet. We'll cut through the noise and get you clear, practical answers on everything from free tools to the legal stuff you absolutely need to know.
Can I Actually Remove Music from a Video for Free?
Yes, you can give it a shot, but let's be realistic about the results. Free software like Audacity has tools like phase inversion, but that trick only works on very specific types of old-school stereo tracks. For most modern audio, it’s a non-starter.
Another free method is to get aggressive with an equalizer (EQ) and try to carve out the frequencies where the music lives. The major catch? Human voices and musical instruments often occupy the same sonic space. So, while you might quiet the music, you'll likely leave the dialogue sounding thin, muffled, and just plain weird.
For anyone who needs a clean, professional-sounding result, jumping straight to an AI tool is the smarter move. Many offer free trials or a few minutes of processing, which is more than enough to show you how much better the quality is compared to those old-school free methods.
Will Taking the Music Out Mess Up the Dialogue Quality?
This is probably the single biggest difference between the old ways and what AI can do today. Traditional methods like center channel removal or heavy EQ are the audio equivalent of a sledgehammer—they almost always cause collateral damage. The dialogue you’re trying to save ends up losing all its warmth and clarity.
A good AI tool, on the other hand, is like a surgical scalpel. It has been trained to understand the unique characteristics of the human voice versus musical instruments. This allows it to intelligently lift the music out while leaving the natural tone and richness of the dialogue intact. You might get a tiny artifact here and there on a super complex track, but the final quality is light-years ahead of what was possible before.
What’s the Best Format for My Video After I've Removed the Music?
Alright, you've got your clean audio track—now what? The best practice is to bring your original video and the new music-free audio into a video editor like Adobe Premiere Pro or DaVinci Resolve.
Once you've synced them up and you're ready to export, the gold standard is MP4 with an H.264 video codec and AAC audio. This combo gives you a fantastic balance between high quality and a manageable file size, which is exactly what you want for YouTube, Instagram, or TikTok.
For 99% of online video, a high-bitrate MP4 is the way to go. If you're working on a broadcast TV project or something that needs to be archived forever, you might look at a lossless format like ProRes, but that's usually overkill.
Is It Legal to Remove Music and Re-Upload Someone Else’s Video?
This is a huge one, so please pay close attention. Removing music from a copyrighted video does not give you the rights to that video. The visuals and the dialogue are still protected by copyright. Re-uploading content you don't own, even if you've tweaked the audio, is almost always copyright infringement. Plain and simple.
Sure, you might hear people talk about "fair use," but that's a very complicated legal defense that is judged on a case-by-case basis and is notoriously difficult to win.
Here’s the bottom line:
- Your Own Content: These tools are designed for you to use on videos you created. Perfect for when you accidentally captured a copyrighted song in the background of your vlog.
- Licensed Content: You can also use them on material you have the legal right to modify. For instance, creating a karaoke track from a song you've officially licensed for that purpose.
When in doubt, assume you can't re-upload someone else's work. This technology is incredibly powerful, but it's meant to be used responsibly on content you either own or have explicit permission to change.
Ready to get clean, professional audio without the headache? With Isolate Audio, you can remove music, isolate dialogue, and take full control of your video’s sound using simple text prompts. Try it for free and hear the AI-powered difference for yourself.