Reduce Background Noise for Crystal-Clear Audio
Let's get one thing straight: nothing kills a good recording faster than bad audio. If you want to keep your listeners engaged, the best approach is a one-two punch of smart recording habits and targeted post-production cleanup. This is how you make sure your message, not the background noise, is what people hear.
Why Crystal-Clear Audio Is Your Secret Weapon
Poor audio quality is a credibility killer. Whether it’s the low hum of a computer fan, distracting keyboard clicks, or traffic sounds drifting through an open window, these noises force your audience to strain to hear you. This mental workout leads to something called listener fatigue, where the effort of tuning out distractions makes people simply give up and move on.
Put yourself in their shoes for a moment. Your content is fighting for attention in a crowded space. Clean, crisp audio instantly makes you sound more professional and trustworthy. It's a fundamental sign of respect for your audience's time.
The Growing Demand for Clean Sound
The expectation for high-quality audio has officially gone mainstream. The global background noise reduction software market is on a trajectory to skyrocket from USD 3.21 billion in 2026 to a massive USD 45.02 billion by 2034. This isn't just a niche trend; it shows a massive shift in what both creators and consumers value. You can dig deeper into the growth of noise reduction technology to see just how significant this is.
This is exactly why major tech companies are building noise-cancellation directly into their hardware. A report from the Consumer Technology Association (CTA) found that about 77% of consumer electronics brands now include these features in new smartphones and laptops.
The takeaway is simple: Clean audio is no longer a luxury for professional studios. It's an essential, accessible part of creating content that connects, engages, and holds an audience's attention.
Learning a few key techniques to reduce background noise can be the difference between content that gets skipped and content that gets shared. In this guide, we’ll walk through the practical steps to get you that professional sound, no matter your budget or experience level. It's all about making sure your voice is heard, loud and clear.
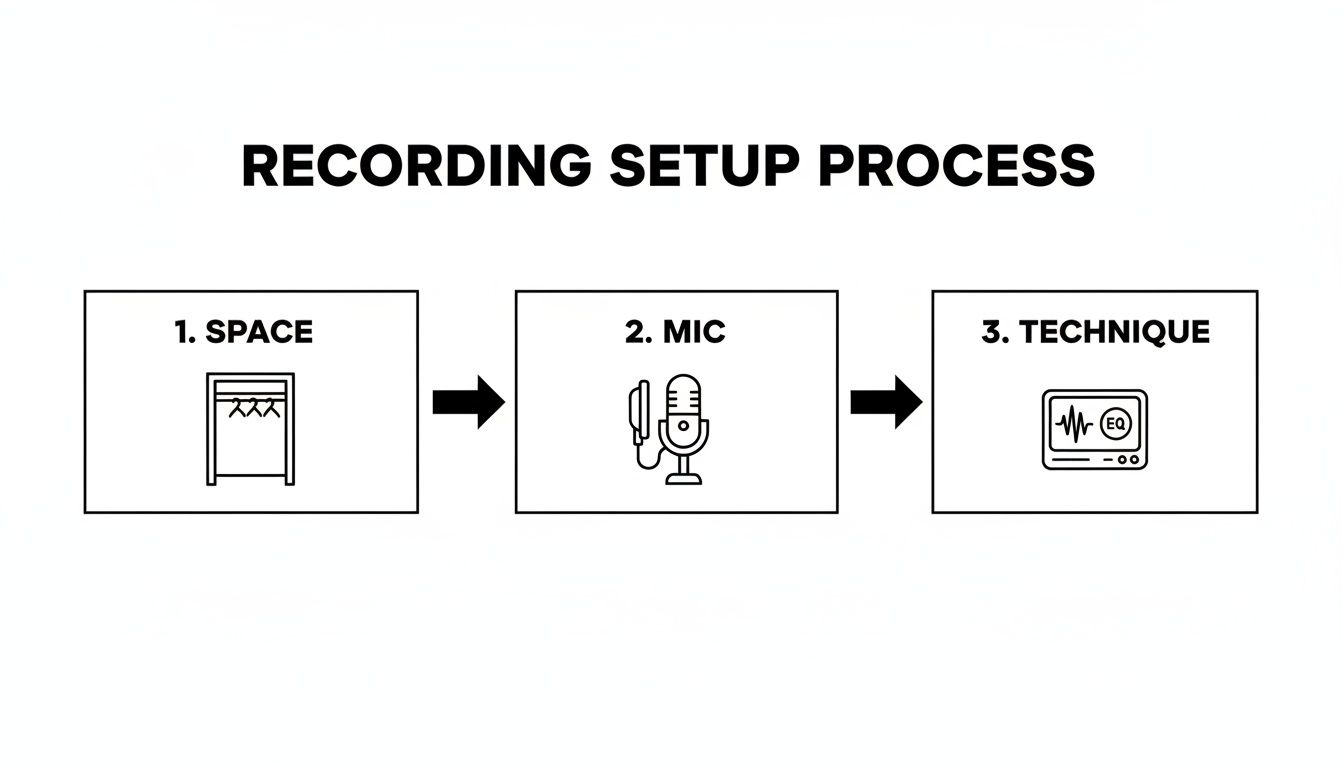
Preventing Noise Before You Hit Record
The best way to deal with background noise? Stop it before it ever gets recorded. Honestly, this is the single biggest thing you can do to save yourself headaches in post-production and keep your original audio sounding clean and professional. The great news is you don't need a fancy studio to get this right.
Your recording space is the first thing to tackle. Think about sound like a bouncy ball. Hard surfaces—bare walls, hardwood floors, big windows—are a nightmare because they let sound waves bounce all over the place, creating echo and reverb. You want to find places with soft surfaces that soak up that sound. There's a reason a walk-in closet packed with clothes is a time-honored trick for DIY recording; all that fabric is basically free acoustic treatment.
Choosing the Right Space and Microphone
If you can't cram into a closet, look for a room that already has things like carpets, heavy curtains, or a comfy couch. Even just strategically placing some pillows or throwing a thick blanket over a hard surface can seriously cut down on those annoying reflections. Your goal is to make the space as acoustically "dead" as possible, so your voice is what shines through, not the sound of the room.
Next up is your microphone. Condenser mics are amazing for capturing every little nuance in a treated studio, but that sensitivity becomes a liability in a typical home office. They'll pick up everything—the hum of your air conditioner, traffic outside, the whir of your computer fan.
For most people recording at home, a dynamic microphone is a much better bet. They're less sensitive by nature and are designed to reject sound that isn't coming from directly in front of them. This makes them incredibly forgiving if your room isn't perfect.
A good microphone is your first line of defense against unwanted noise. Here’s a quick breakdown of how different types handle less-than-ideal recording spaces.
Choosing a Microphone to Minimize Noise
| Microphone Type | Best For | Noise Rejection | Pro Tip |
|---|---|---|---|
| Dynamic | Vocals, podcasts, broadcasting in untreated rooms. | High. Excellent at rejecting off-axis sound (from the sides/rear). | The Shure SM7B is a classic for a reason. Great for noisy environments. |
| Condenser | Studio vocals, acoustic instruments in a quiet, treated room. | Low. Very sensitive and will pick up ambient room sound. | If you must use one in a noisy space, get a cardioid pattern mic and use a reflection filter. |
| Shotgun | Dialogue for video, field recording. | Very High (Directional). Extremely focused pickup pattern. | Can be sensitive to handling noise. Best used on a boom pole or stable stand, not handheld. |
| Lavalier (Lav) | Interviews, presentations where mic needs to be hidden. | Moderate. Placement on the speaker's chest helps isolate the voice. | Can pick up clothing rustle. Use a high-pass filter to cut low-frequency rumbles. |
Choosing a dynamic or shotgun mic is often the smartest move for anyone who doesn't have a dedicated, soundproofed studio.
Mastering Your Mic Technique
Once you've got your space and mic sorted, how you actually use the mic can make a huge difference. It's not just about turning it on and talking.
- Get Closer: Position the microphone about two to four inches from your mouth. This simple trick ensures your voice is much louder than any background noise, giving you a strong, clean signal.
- Work the Angle: Don't talk straight into the front of the mic. Aim it slightly off to the side of your mouth. This helps you avoid those harsh popping "p" and "b" sounds (plosives) while keeping your voice clear.
- Watch Your Levels: This is called gain staging. You want to set your recording level so your voice peaks somewhere between -12dB and -6dB on your meter. If your signal is too quiet, you'll have to crank it up later, and you'll be cranking up the noise right along with it.
I see people make this mistake all the time: they assume they can just "fix it in post." While modern software is incredible, it works best when it has a clean recording to start with. Nailing the source audio is always priority number one.
This focus on getting the physical setup right is why the market for hardware is still booming, even with all the incredible software out there. The global market for noise suppression components is actually projected to hit around USD 86.33 billion by 2034. That trend tells you that pros know that a good recording starts long before you click the record button. You can dig into the full research on noise suppression components if you want to see where the industry is heading.
By taking control of your environment, mic choice, and technique, you're giving yourself the best possible foundation for a fantastic final product.
Mastering Classic Audio Cleanup Techniques
Even when you do everything right during recording, some unwanted noise almost always finds its way in. This is where you roll up your sleeves and dive into post-production. The classic cleanup techniques are the bread and butter of audio engineering, and they're built into just about every digital audio workstation (DAW) for a reason.
Think of these tools as a sculptor's chisels. Each one is designed for a specific job, letting you meticulously chip away at imperfections and shape your final sound. Getting comfortable with them gives you a powerful foundation for any audio work you'll ever do.
Using Filters and EQ to Cut Unwanted Frequencies
One of the most common problems I hear is a muddy, cluttered recording caused by low-frequency rumble. It’s that persistent, almost unnoticeable hum from an air conditioner, a refrigerator, or even traffic outside. It might not sound like a big deal, but it eats up valuable headroom and fights with the clarity of your main audio.
The quickest fix is a high-pass filter (HPF), which you might also see called a low-cut filter. It does exactly what it sounds like: lets the high frequencies pass through while cutting out the lows. For most vocal recordings, setting an HPF somewhere around 80-100 Hz is a great starting point. It’ll clear out that rumble without making the voice sound thin or weak.
For more surgical work, you'll want to reach for a subtractive equalizer (EQ). Let's say your recording has a harsh, piercing sound from a less-than-ideal microphone or a room with terrible acoustics. With an EQ, you can pinpoint that exact offending frequency and just turn its volume down, smoothing out the sound without messing with the rest of the vocal tone. If you're using free software, our guide on vocal isolation in Audacity touches on some related techniques that can be really helpful here.
Taming Dynamics with a Noise Gate
Another indispensable tool is the noise gate. A noise gate is basically an automatic mute switch for the quiet parts of your track. You tell it a volume level (the "threshold"), and anything that drops below that level gets completely silenced.
This is a lifesaver for getting rid of the breath sounds between sentences or the faint hiss from a guitar amp when you aren't playing. It instantly cleans up the "silence" in your recording, which makes the whole track feel tighter and more polished.
Pro Tip: Go easy with a noise gate. If you set the threshold too high, it can start chopping off the natural decay of words, which sounds incredibly jarring. My advice is to start with a low threshold and slowly bring it up just until the noise vanishes, making sure your actual audio is untouched.
This whole process—from mic choice to final edit—is really a chain of events where each step affects the next.
Getting a clean recording from the start makes the job of these editing tools so much easier. You're refining, not rescuing.
Visual Cleanup with Spectral Editing
What about those sudden, one-off noises? The door slam, the dog bark, the phone notification that you missed. For those, spectral editing is the classic weapon of choice. This tool shows you a visual map of your audio's frequencies over time, where you can literally see the offending sound as a bright blob or streak.
Using a selection tool, you can just highlight that specific noise and essentially erase it from existence. It’s an incredibly powerful technique that laid the groundwork for many modern AI tools. In fact, similar principles are now used in enterprise-grade headsets that can cut 80-90 dB of background noise for call center agents, a market trend you can see detailed in this industry report. Mastering these foundational skills gives you a true understanding of what's happening under the hood of any audio repair software.
How AI is Changing the Game in Audio Editing
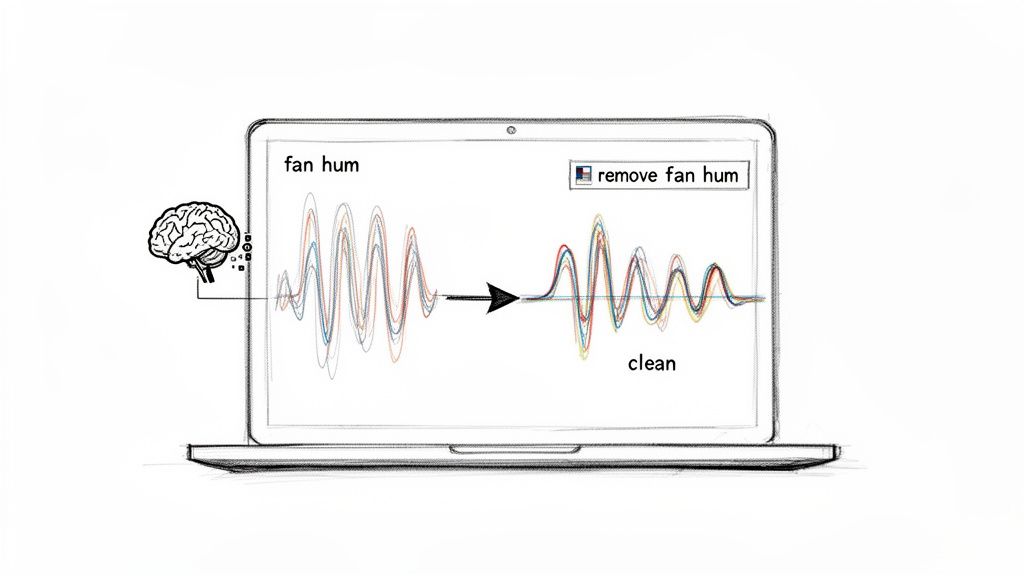
While the classic tools of the trade like EQs and noise gates still have their place, the real leap forward in cleaning up audio is happening right now, and it’s all thanks to artificial intelligence. This isn't just a minor update; it's a fundamental shift from painstaking manual adjustments to intuitive, goal-oriented commands.
The days of hunting for specific frequencies, meticulously setting thresholds, and stacking multiple plugins are fading fast.
Think about it: you've just finished a fantastic podcast interview, but it was recorded in a busy café. Instead of spending the next hour fighting with filters, what if you could just tell your software, "remove the coffee shop chatter"? That’s the reality of modern AI audio tools. They don't just see frequencies; they understand context.
A Completely New Way to Think About Noise Reduction
This new wave of technology completely rewires the workflow for anyone working with sound. The old way forced you to diagnose the problem (like a 60 Hz hum), pick the right tool (a high-pass filter or notch EQ), and then carefully dial in the settings. AI collapses all that into a single, straightforward step focused on what you actually want to achieve.
Let’s look at a few real-world examples:
- For Podcasters: Your guest is recording from home, and their air conditioner is blasting in the background. The instruction is simple: "isolate the speaker's voice." The AI then intelligently separates their dialogue from the HVAC hum.
- For Video Editors: You have a perfect take, but wind noise is ruining the dialogue. Instead of wrestling with filters that might muffle the voice, your command is "remove the wind." The AI knows what wind sounds like and surgically removes it.
- For Musicians: You’ve found the perfect drum break in an old soul track you want to sample. Rather than trying to isolate it with complicated EQ tricks, you can now just say, "extract the drums."
This approach is a lifesaver when dealing with complex, overlapping sounds—like a reporter’s voice competing with street traffic. Traditional tools often create nasty audio artifacts in these situations, but AI can differentiate between the sources and pull them apart cleanly.
AI doesn't just filter out noise; it actually deconstructs the audio. It learns to identify the unique fingerprint of a human voice, a guitar, or a car horn, allowing it to perform separations that would be almost impossible by just carving out frequency bands.
Balancing Speed and Precision in Your Workflow
One of the smartest things modern platforms do is offer different processing modes. This lets you strike the right balance between speed and quality, which is absolutely critical when you’re up against a tight deadline.
For instance, a tool like Isolate Audio might give you presets that let you call the shots:
- Fast Mode: This gets you a result in a hurry. It's perfect for quickly cleaning up rough cuts or when you have a mountain of files to get through.
- Balanced Mode: The everyday workhorse. It provides an excellent mix of processing speed and high-quality results, making it the default choice for most projects.
- Best Quality / Precision Mode: When you need the absolute cleanest result, this is the one. It uses more computational power to tackle really tough audio, like when a voice and background noise are tangled together.
This kind of flexibility means you can adapt the tool to the job at hand. You’re no longer stuck with a one-size-fits-all solution. This new generation of audio repair software is putting professional-grade results within everyone's reach. By letting you focus on your creative vision, the AI handles the technical heavy lifting, giving you back precious time to tell your story.
Putting Noise Reduction to Work: Real-World Scenarios
Knowing the theory behind noise reduction is great, but the real magic happens when you apply these tools to actual projects. Every creator runs into their own unique audio headaches, and the secret is matching the right technique to the problem at hand. The mission is always the same: reduce background noise so your important audio can take center stage.
Let's get practical and walk through some common situations. Seeing how these tools tackle specific problems will give you a much better sense of how you can fix your own audio nightmares.
For the Determined Podcaster
You just finished a fantastic interview, but there's a problem. Your guest recorded from a home office with a nasty echo and the low, constant drone of an air conditioner. In the old days, you’d be facing a long, frustrating session of tweaking EQs and noise gates, often leaving the voice sounding thin and processed.
Now, the fix is much cleaner. You can drop the audio file into an isolator and simply tell it to "isolate the speaker's voice from the room echo and HVAC hum." The software is smart enough to know the difference between a human voice, the reverberations of a room, and a mechanical drone. It neatly separates them, saving you a ton of time and producing a result that sounds far more natural.
For the On-Location Video Editor
As a video editor, you’re constantly fighting audio captured in the wild. A classic challenge is cleaning up dialogue from an outdoor shoot where traffic noise is a constant distraction. A single car horn or the rumble of a passing bus can completely derail an otherwise perfect take.
Rather than painstakingly cutting out each sound with a spectral editor, you can now lift the dialogue right out of the mix. A great workflow is to first extract the audio from your video file, which lets you focus solely on the sound. From there, you can process the audio to remove "passing cars" or "wind gusts," leaving you with pristine dialogue to drop back into your video timeline.
This is all about precision. Older noise reduction methods often muffled the entire track, sacrificing vocal clarity to get rid of the noise. Modern tools can surgically remove just the problem sounds, keeping the dialogue crisp and the scene's natural ambience intact.
For the Creative Musician
Noise bleed is the bane of many musicians' existence. You might have an incredible vocal take from a demo, but you can faintly hear the metronome clicking from the singer’s headphones. Or maybe you recorded a killer guitar riff, but a low-level amp buzz pollutes all the silent moments.
These are perfect jobs for audio isolation. For that vocal track, you can prompt the tool to "remove the metronome clicks," and it will erase them without touching the performance. For the guitar, a simple command to "eliminate the amp buzz" cleans up the track, creating a silent foundation that makes mixing a breeze.
For the Field Researcher
This technology goes way beyond just media production. Imagine a bioacoustics researcher with hours of recordings from a rainforest. They need to study the call of one specific, rare bird, but the audio is a soup of insect chirps, wind noise, and dozens of other animal sounds.
Trying to find that one call by hand would take forever. Using an AI tool, the researcher can use a direct prompt like, "isolate the call of the blue-crowned motmot." By giving the tool a clear target, they can pull that specific sound out from the acoustic chaos, making their analysis incredibly fast and accurate.
Common Questions About Cleaning Up Audio
As you get deeper into cleaning up audio, you'll inevitably run into a few common hurdles. Getting good answers to these questions can be the difference between a headache-inducing editing session and a polished final track. Let's walk through some of the things I get asked most often.
The whole game is about finding the right balance. You want to surgically remove the stuff you don't want while keeping the audio you do want sounding rich and natural.
Can I Get Rid of Background Noise Without Ruining My Main Audio?
This is the big one, right? The fear is that if you get too aggressive with noise reduction, you'll end up with a main track that sounds thin, watery, or robotic. And that's a valid concern. The best defense is always a good offense—start with the cleanest recording you possibly can. The less noise you have to remove, the better.
That said, modern AI tools have gotten incredibly good at this. Instead of just slapping a generic filter over everything, they can actually tell the difference between a human voice and, say, an air conditioner hum. They are designed to lift the voice out of the noise, which helps preserve its original character and tone.
A great way to think about it is separation, not just subtraction. When you isolate the sound you want, you’re not just cutting frequencies out of the whole track; you're lifting one element away from the others. It's a much cleaner, less destructive way to work.
What’s the Difference Between Noise Reduction and Audio Isolation?
This question really gets to the core of how audio cleanup has evolved.
Traditional noise reduction is more of a blunt instrument. It's built to handle steady, consistent sounds—think of the hiss from an old tape machine, the low hum of a refrigerator, or the general "room tone" of an empty space. You typically take a "fingerprint" of that noise and tell the software to turn down those specific frequencies everywhere.
Audio isolation, on the other hand, is a much smarter, more targeted approach. It’s all about identifying a complete sound source (like a specific person talking) and separating it from everything else going on in the recording.
- Noise Reduction: Turns down the volume of that constant air conditioner hum in the background.
- Audio Isolation: Pulls one person's voice out of a noisy coffee shop, leaving the clatter of cups and other conversations behind.
Isolation hands you a completely clean track of only the sound you wanted to keep. This gives you way more creative freedom than just ducking the volume of a persistent background hum.
How Do I Deal with Sudden Noises, Like a Dog Barking or a Siren?
Ah, the sudden, sharp sounds. We've all been there. A perfect take gets ruined by a slammed door or a car alarm. These are often called transient noises, and they used to be a nightmare to fix.
The old-school way was to dive into spectral editing. You'd open a visual editor, find the ugly yellow-and-red blob representing the dog bark, and try to literally paint it out of the frequency spectrum. It can work, but it’s tedious and you often leave behind a weird, noticeable gap or digital artifact.
A much faster and cleaner way to handle this now is with an AI tool. You can just upload the clip and type a simple prompt like "remove dog bark." The AI has been trained on what thousands of barks sound like, so it can find that specific audio event and cleanly separate it from your main recording. It’s a game-changer compared to the hours you could lose doing it manually.
Ready to stop fighting with unwanted noise and just get back to creating? With Isolate Audio, you can remove any sound you don't want just by typing what it is. Give it a try for free and hear what it can do for your tracks. Learn more at Isolate Audio.