Audacity Vocal Isolation A Guide to Clean Acapellas
So, you're hoping to pull a clean acapella out of a track using Audacity? The short answer is yes, you absolutely can. Audacity has built-in tools designed for vocal isolation, but the quality of your final result hinges almost entirely on the source audio you start with.
These traditional methods shine when working with older, simpler stereo mixes where the lead vocal is placed right down the middle.
Setting Realistic Expectations For Audacity Vocal Isolation
Before we jump into the "how-to," it's really important to get a handle on what Audacity can and can't do. It's a fantastic (and free!) audio editor, but its vocal isolation features are built on classic audio-processing techniques, not the sophisticated AI you see in modern tools. Understanding this difference is key to avoiding a headache later.
The main techniques in Audacity, like the "Vocal Reduction and Isolation" effect or doing it manually with phase inversion, work by identifying and removing audio that's panned to the dead center of a stereo file.
Here's what that practically means for your project:
- Success on Older Tracks: For songs from the '60s, '70s, or '80s, producers often parked the lead vocal squarely in the center channel. On these tracks, Audacity can sometimes pull off a surprisingly clean separation.
- Challenges with Modern Music: Today's music production is a different beast. Vocals are often drenched in wide stereo reverb, have layered harmonies, and other effects that smear them all over the stereo field. This makes it nearly impossible for Audacity's center-channel removal to grab them cleanly.
- Instrumental Bleed: Here’s the catch—vocals aren't the only thing in the center. The kick drum, snare, and bass guitar are almost always there, too. Audacity's tools can't tell the difference, so they often take a chunk of the rhythm section out along with the voice, leaving things sounding muffled or thin.
This flowchart gives you a quick way to gauge whether Audacity is the right starting point for your particular audio file.
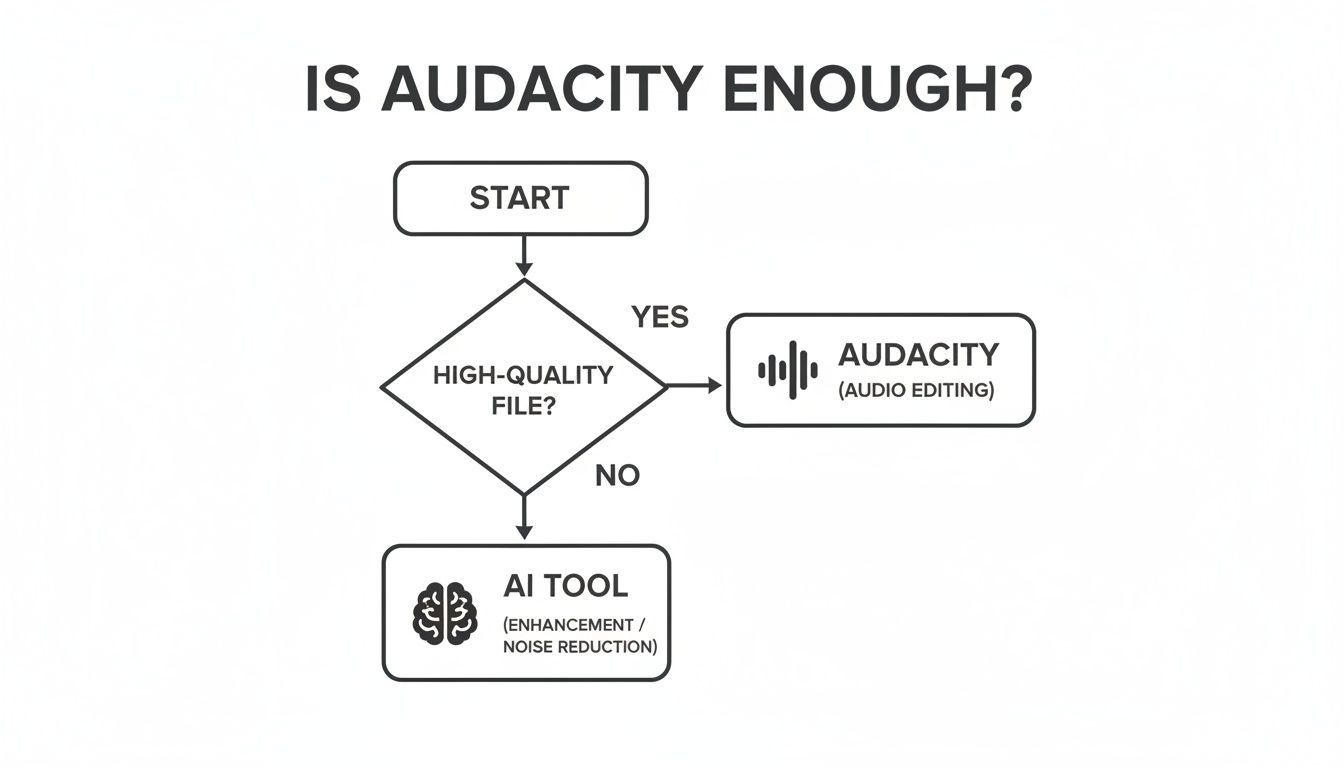
As you can see, the quality of your source file is the single most important factor. If you're working with sound from a video file, getting the best possible quality from the start is non-negotiable. We've got a whole guide on how to properly extract audio from video if you need some pointers.
Ultimately, it’s best to think of Audacity as a great tool for the right job, but not a magic wand for every song you throw at it.
Audacity Vocal Isolation Methods At a Glance
To give you a clearer picture, here's a quick rundown of the different approaches you can take within Audacity compared to what dedicated AI separators offer.
| Method | Best For | Common Issues | Success Rate |
|---|---|---|---|
| Vocal Reduction & Isolation | Simple, center-panned vocals in older stereo mixes. | Removes other center elements (bass, kick, snare); creates thin, "phasey" artifacts. | Low to Medium |
| Phase Inversion (Center Cut) | Manually replicating the effect above for more control. | Same as above; requires a perfect stereo source file. | Low to Medium |
| Spectral Editing | Isolating very short vocal phrases or single words. | Extremely time-consuming; can sound unnatural if not done meticulously. | Low (for full songs) |
| Modern AI Separators | Complex modern mixes, high-quality acapellas, and instrumentals. | Requires a subscription or one-time fee; quality varies by service. | High to Very High |
This table makes it pretty clear: Audacity’s methods are more like surgical tools for very specific, often vintage, recordings. For everything else, especially modern pop, rock, or electronic music, you'll likely get a much cleaner and faster result by turning to a purpose-built AI tool.
Diving Into Audacity's Built-In Vocal Reduction Tool
The most straightforward way to tackle vocal isolation inside Audacity is with its own Vocal Reduction and Isolation effect. The tool works by zeroing in on audio that’s panned right down the middle of a stereo track—which, conveniently, is where lead vocals have traditionally been mixed for decades.
But don't be fooled by its apparent simplicity. This isn't a magic one-click solution. Getting a clean result means you'll have to get your hands dirty and tweak the settings to fit the specific song you're working on. Think of it less like a button and more like a set of dials you need to tune carefully.
Finding Your Way Around the Effect's Settings
First things first, load your stereo track into Audacity. Then, head up to the "Effect" menu and select Vocal Reduction and Isolation.
You'll be greeted with a few options, but the most critical one is the "Action" dropdown. Make sure you select Isolate Vocals. This tells Audacity to preserve the centered audio (the vocals, hopefully) and get rid of everything else panned to the left and right.
Now for the real work. You have three main controls to play with:
- Strength: This slider dictates how aggressively the tool tries to rip the vocal out. Gentle settings are on the left, while cranking it to the right gets more forceful but often introduces weird, watery-sounding artifacts.
- Low Cut for Vocals (Hz): This is your filter for the low end. It's perfect for telling Audacity to ignore things like a centered kick drum or bass guitar that might muddy up your vocal track.
- High Cut for Vocals (Hz): The opposite of the low cut, this one filters out high-frequency noise. Think cymbal hiss or bright synth sounds that can bleed into the vocal isolation.
I see this all the time: people immediately slide the "Strength" all the way to the max, expecting a studio-quality acapella to pop out. That almost never works. You'll end up with a thin, robotic mess. A much better approach is to start with a modest strength (around 50-70%) and nudge it up, listening closely for that sweet spot where the vocal is clear but the artifacts are still at bay.
A Few Real-World Scenarios
Let's put this into practice. Say you're working with a classic soul track. The vocals are front and center, but so is that groovy bassline.
Your first move would be to set the Low Cut for Vocals to something around 120 Hz. This effectively tells the tool to ignore the deep, thumping frequencies of the bass, keeping it out of your final vocal track. If you're also hearing a lot of distracting hi-hat sizzle, you could try setting the High Cut for Vocals down to 8000 Hz to clean things up.
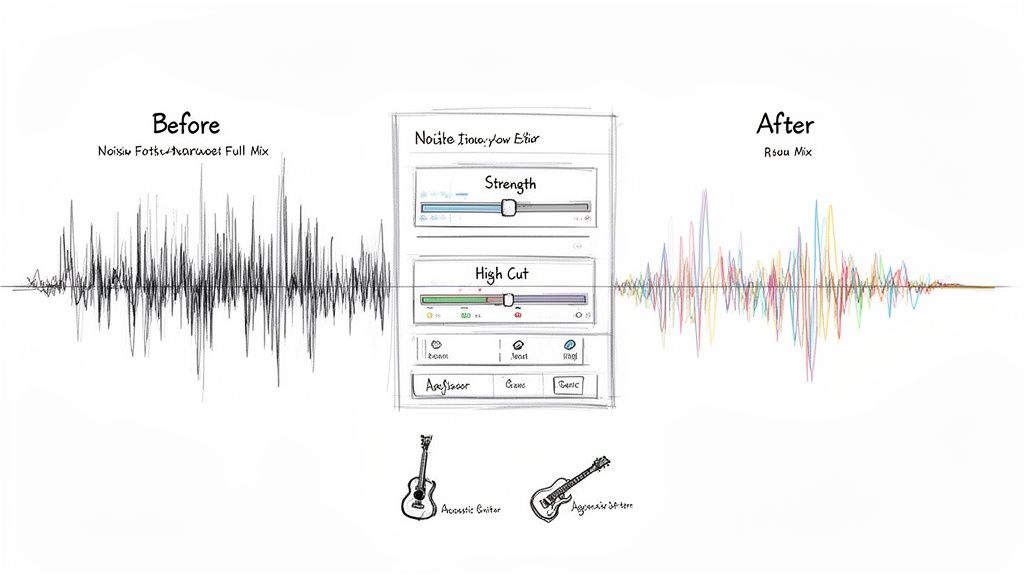
Now, imagine a completely different project: a sparse acoustic song with just a singer and a guitar. Here, you can be much less aggressive. Since there's less instrumental clutter to fight with, you can probably get away with a lower "Strength" setting, which will help preserve the natural, airy quality of the singer's voice.
Ultimately, this tool is a balancing act. It gives you the controls, but it's your ear that has to make the final call.
Going Manual: The Phase Inversion Technique
Before Audacity offered a one-click effect, there was a classic, hands-on trick for pulling vocals out of a mix: phase inversion. Sometimes called the "center-cut" or "karaoke" method, it’s the principle that many automated vocal removers are built on. Learning how to do it manually gives you a ton of insight and control, even if its success is a bit of a coin toss.
The whole idea hinges on a common mixing practice. In most stereo tracks, the lead vocal is panned dead center, meaning the exact same signal exists in both the left and right channels. Phase inversion is all about exploiting that symmetry.
The Magic of Cancellation
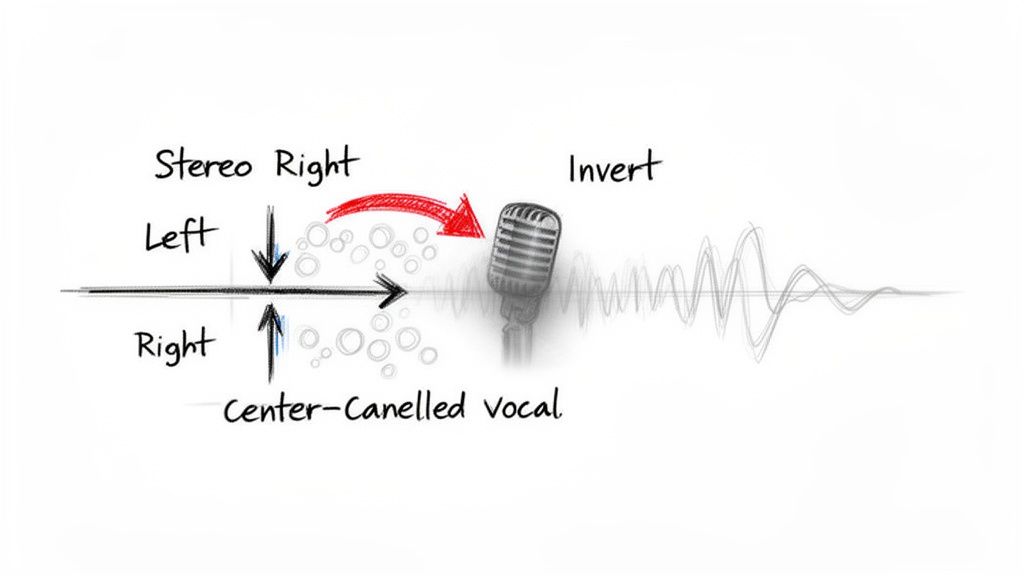
So, how does it work? You start by splitting your stereo track into two separate mono tracks—one for the left channel, one for the right. Next, you pick one of them and apply Audacity's "Invert" effect, which literally flips its audio waveform upside down.
When you play these two tracks back, something fascinating happens. Any sound that was identical and centered, like our lead vocal, cancels itself out and disappears. Think of it like adding +1 and -1; they become zero. Everything else that was panned off-center remains, leaving you with what’s essentially an instrumental version. To get the vocal instead, you’d take this instrumental and invert it against the original, which cancels out the instruments.
Why It’s a Long Shot With Modern Music
While it sounds great in theory, the phase inversion method runs into a lot of problems with modern production styles. For this trick to work, the vocals have to be perfectly centered in the mix, with very few stereo effects applied to them. That's rarely the case anymore.
You’ll know this method isn't the right fit if you hear:
- Ghostly Reverb Trails: Stereo reverb and delay effects are common on vocals. The inversion will erase the main vocal but leave these "wet" ambient sounds floating in the mix, creating a hollow, weird echo.
- Missing Rhythm Section: The kick drum, snare, and bass are also frequently panned to the center for punch. This technique will often remove them right along with the vocals, leaving your track without its core groove.
- Lingering Background Vocals: Many songs use backing vocals and harmonies panned wide to create a bigger sound. The center-cut method won't touch these, so they'll remain after the lead is gone.
The demand for clean audio is a huge driver in the music world. The global market for sound isolation enclosures, for example, was valued at over $16.8 billion in 2025, showing just how much goes into capturing perfect audio at the source. When you don't have a pro studio, older software techniques like phase inversion often can't compensate for a messy mix, which is where AI tools really start to shine.
Phase inversion is an awesome audio science experiment and a fundamental concept every producer should understand. But for practical use, like making an acapella for a DJ set or a remix, its success rate on modern tracks can be incredibly low. Getting truly clean vocal stems is crucial for those projects, a topic we dive into in our guide on how to remix a song.
How To Fix Common Vocal Isolation Problems
So, you've followed all the steps, but the result from your Audacity vocal isolation attempt is… less than stellar. It happens. You’re often left with a track that’s technically a vocal but is riddled with bizarre artifacts and sounds hollowed out.
This is by far the most common frustration, but don't scrap the project just yet. Nearly every issue has a logical cause, and once you understand what's happening under the hood, you can start to fix it.
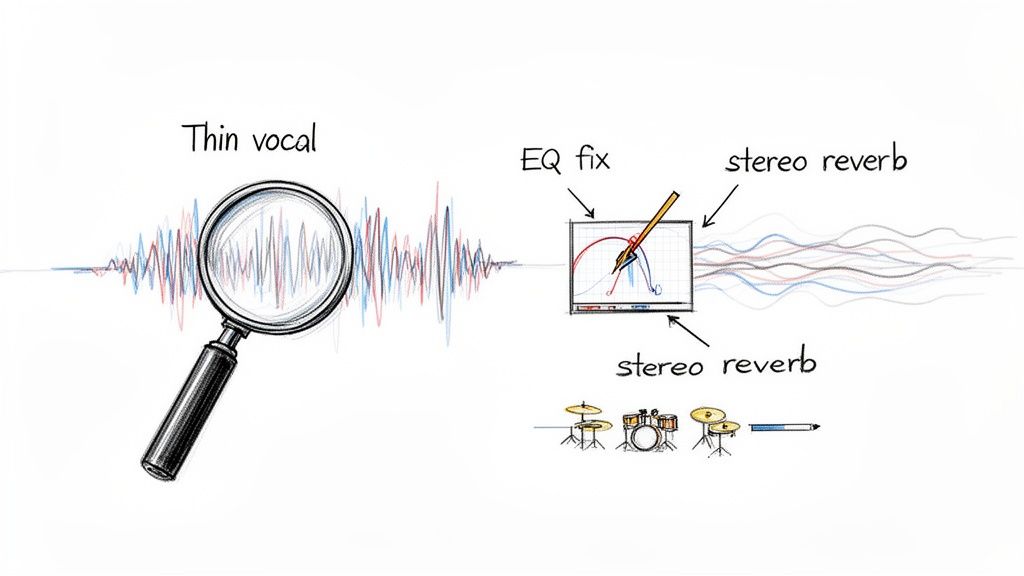
Issue 1: The Vocal Sounds Thin and Phasey
This is the big one. You run the effect, and the vocal suddenly sounds like it’s being broadcast through a tin can—all its original body and warmth are gone. That "phasey," hollow sound is a direct side effect of how center-channel cancellation works.
The process doesn't just remove instruments panned to the center; it also carves out any part of the vocal that was identical in both the left and right channels. What’s left behind are the subtle differences, like stereo reverb tails or tiny production variances, which don't sound like a complete vocal on their own.
- Quick Fix: Head over to Effect > EQ and Filters > Graphic EQ and try a gentle boost in the low-mid frequencies, somewhere between 200 Hz and 500 Hz. This can bring back some of the warmth and fullness that got scooped out.
- Best Practice: Add a touch of new, subtle reverb. A phasey vocal often sounds unnaturally dry. A small amount of fresh stereo reverb can create a more pleasing sense of space and do a great job of masking some of the lingering artifacts.
Issue 2: Watery Artifacts and Digital Gurgling
Ever get that weird, liquid-like digital noise bubbling around the vocal? These "watery artifacts" are the sonic ghosts of the instrumental track—bits and pieces the algorithm couldn't quite erase.
This usually pops up when an instrument, like a strummed acoustic guitar or a synth pad, shares similar frequencies with the voice. The software gets confused trying to separate them, creating a garbled mess where they overlap. It’s especially common if you pushed the "Strength" setting too high in the Vocal Reduction and Isolation effect.
Pro Tip: Your first move should always be to undo the effect and try again with a lower "Strength" setting. It's much easier to clean up a little instrumental bleed with EQ than it is to remove digital gurgling that's been permanently baked into your vocal track.
Issue 3: Pesky Drums and Cymbals Remain
You’ve managed to get rid of most of the music, but the hi-hats are still sizzling and a faint snare hit keeps punching through. This is classic, and it happens for two main reasons.
First, producers often pan the kick and snare drum dead-center in the mix—the exact same spot as the lead vocal. Audacity’s center-channel removal simply can't tell the difference between a voice and a drum hit if they occupy the same stereo space. Second, the high-frequency wash of cymbals tends to spread across the entire stereo field, making it impossible for this type of tool to grab all of it.
- For Low-End Bleed (Kick Drum): Apply a High-Pass Filter from the EQ menu. Start by setting the cutoff around 100-120 Hz. This should roll off the low thud of the kick without making the vocal sound too thin.
- For High-End Bleed (Cymbals): Use a Low-Pass Filter. Gently roll off the very top frequencies, starting around 10,000 Hz and nudging it lower until the cymbal hiss is less noticeable. Just be careful not to go so far that you muffle the natural air and brightness in the vocal.
When To Use AI Vocal Separators Instead
If you've tried all the troubleshooting tips and your vocal track is still a garbled mess, don't blame yourself. You've just hit the hard limits of what Audacity’s traditional tools can do, especially with today's complex music production.
When your search for "audacity vocal isolation" ends in a wash of artifacts and phasey weirdness, it’s a clear sign that you need a different approach.
The problem is fundamental. Audacity's effects, like phase inversion or center-channel removal, are essentially clever math tricks based on waveform subtraction. They don't actually hear the difference between a voice and a synth pad; they just look for sounds panned dead-center in the stereo mix. This was great back when mixes were simpler, but it falls apart with modern techniques.
The AI Advantage Over Waveform Subtraction
AI-powered vocal removers play a completely different game. Instead of just guessing based on stereo placement, these tools analyze the actual sonic DNA of the audio.
Think of it this way: an AI model has been "trained" by listening to thousands of hours of music. It learns to recognize the unique texture of a human voice, the percussive snap of a snare drum, and the warm resonance of a bass guitar. It identifies and separates sounds much like a human ear would—by their character, not just their location.
This difference is a game-changer and brings some huge benefits:
- It Handles Stereo Complexity: AI has no problem with vocals drenched in wide stereo reverb or layered with harmonies, things that completely confuse Audacity’s center-cut method.
- It Distinguishes Instruments: It can easily separate a centered vocal from a centered bassline because it understands they are two totally different sounds, not just two signals occupying the same space.
- It Dramatically Reduces Artifacts: Because AI rebuilds the vocal track from the ground up rather than just carving it out, you get a much cleaner result. Say goodbye to most of those tell-tale "phasey" or "watery" sounds.
The quest for better audacity vocal isolation is often what leads people to discover the limits of classic audio processing. Honestly, success rates for pulling a clean acapella from a dense, modern pop song using only Audacity's built-in tools are often below 50%, based on what you see in hobbyist forums. This widespread frustration is a big reason the audio separation market, valued at around USD 563 million in 2024, is booming. You can learn more about the tech and market growth in this industry report.
Knowing When to Make the Switch
So, when do you finally close Audacity and open an AI tool? The answer is pretty straightforward: whenever quality and time are your top priorities.
If you’re working on a professional remix, making a high-quality karaoke track, or need a clean acapella for a DJ set, AI is the only way to go. Audacity is a fantastic free tool for learning the ropes of audio, but dedicated AI separators deliver the polished, professional-grade stems that modern projects demand. They can save you hours of frustrating EQ battles and give you dramatically cleaner audio to work with.
And if your end goal is a full backing track, you can explore other creative workflows in our guide to finding instrumental music to popular songs.
Frequently Asked Questions
Even after walking through the steps, you probably still have a few questions. That's normal. Let's tackle some of the most common things people ask when they're trying to pull vocals out of a track in Audacity.
Can Audacity Perfectly Isolate Vocals From Any Song?
The short answer is no. Audacity’s tools are built on a classic technique called center-channel removal. This trick only really works on older, simpler mixes where the lead vocal is panned dead center and doesn't have much stereo reverb or delay sloshing around.
Modern music production is far more complex, so most songs just don't fit that mold. You’ll almost always end up with leftover instrumental bits and weird, watery artifacts. If you need a genuinely clean acapella for a serious project, AI-based separators are going to be a much better bet.
What Is The Best Free Alternative For Vocal Isolation?
Look, Audacity is an incredible free audio editor, but its vocal removal tools are definitely showing their age. If you want drastically better results without opening your wallet, your best bet is to look at web-based AI services.
Many of them offer free tiers or a few free credits to start. This is the perfect way to hear the night-and-day difference for yourself. They don't just subtract audio; their machine-learning models actually identify and rebuild the vocal stem, giving you a much cleaner result.
When the goal is a truly clean acapella, the method matters. Traditional tools subtract audio, which is inherently destructive. AI tools, on the other hand, identify and reconstruct the vocal, leading to a more natural and complete result with far fewer unwanted remnants of the instrumental track.
Why Does My Isolated Vocal Still Have Drums In It?
This is probably the most common complaint I hear, and it perfectly highlights the weakness of phase inversion. Think about a typical mix: what's right in the center, punching through? The kick drum, the snare, and the lead vocal. They all share the same sonic space.
Audacity’s tools can't tell the difference between a singer's voice and a snare hit. When you tell it to remove the center channel, it just takes a hatchet to everything panned there. Unfortunately, that means the drums often go right out with the vocals.
How Can I Improve My Results In Audacity?
If you're determined to stick with Audacity, there are a couple of things you can do to nudge the quality up a bit. First, always start with the highest-quality audio file you can get your hands on—a WAV or FLAC file is ideal. A compressed MP3 has already thrown away audio data, giving the software less to work with.
After you run the isolation effect, you can try some post-processing with Audacity's Graphic EQ. Try gently boosting the key vocal frequencies (usually around 1-4 kHz) and making very precise cuts where you hear the most instrumental bleed. Just be realistic; these are minor touch-ups. The fundamental quality is baked in by the initial separation process.
For truly clean vocal and instrumental stems without the artifacts, Isolate Audio uses advanced AI to separate any sound with precision. Ditch the limitations of older methods and get professional-quality results in minutes. Try it for free at https://isolate.audio.