Mastering instrumental music to popular songs with AI
Not long ago, if you wanted a clean instrumental of a popular song, you had two options: hope the official version existed, or dive into some serious audio engineering tricks that rarely worked well. We’d spend hours with phase inversion and surgical EQ, only to end up with a hollow, artifact-ridden track where you could still hear the ghost of the lead vocal. It was frustrating, to say the least.
Thankfully, that’s all in the past. Modern AI has completely flipped the script, making it possible for anyone to pull pristine instrumentals from a finished song in just a few minutes.
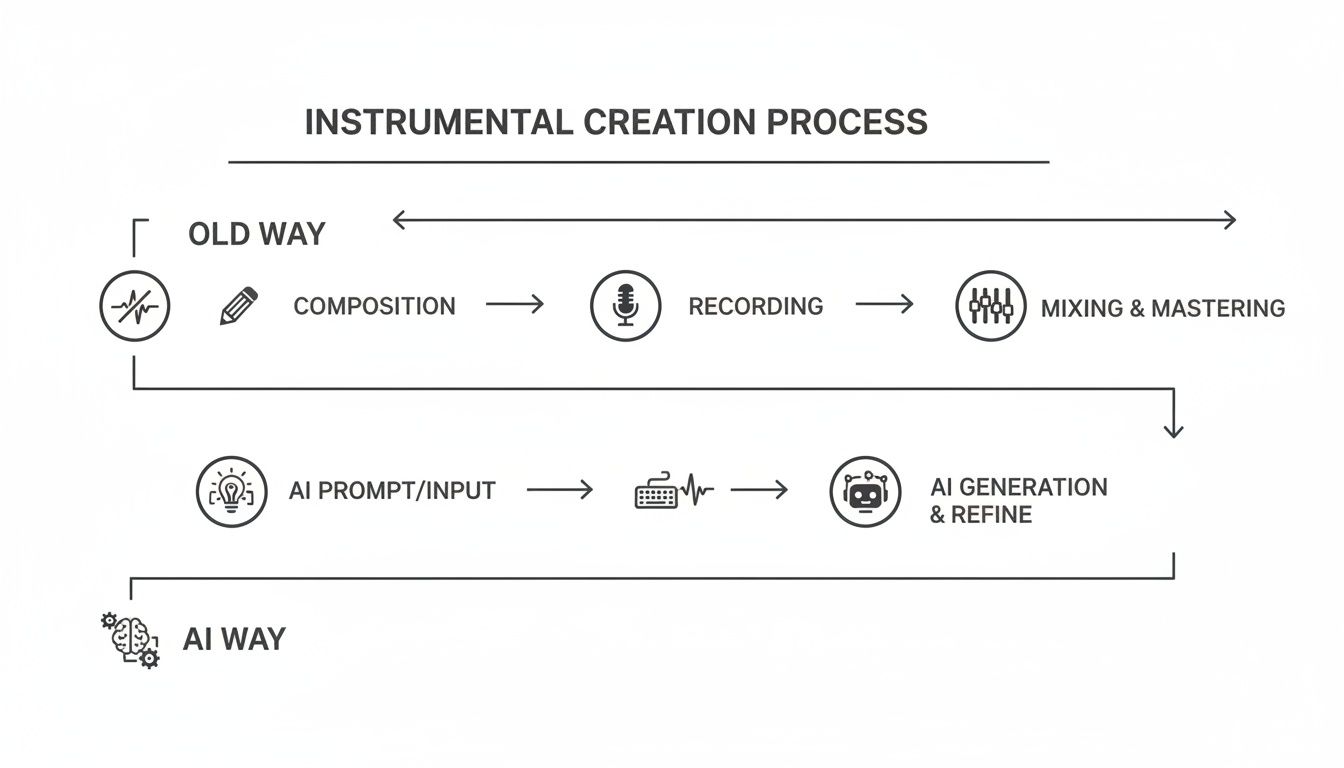
The Old Way vs. The AI Way
The traditional methods were always a compromise. When you used subtractive EQ to carve out vocal frequencies, you'd inevitably take a chunk of the guitars, synths, and cymbals with it. Phase inversion was a neat trick, but it only worked on perfectly centered vocals and often left the rest of the mix sounding weird and thin. You couldn’t just remove the voice; you were ripping out everything that lived in its sonic space.
AI audio separation is different. It doesn't just filter frequencies; it listens to the music. The algorithms are trained to recognize the unique sonic fingerprints of different instruments—the timbre of a voice, the snap of a snare, the warmth of a bass guitar. It intelligently deconstructs the mix, letting you lift one element out while leaving the rest of the track completely intact.
From Tedious Work to Creative Flow
This is a massive shift. What used to demand a seasoned audio engineer and hours of painstaking work now happens with a simple click or a typed command. For creators who don't have the original multi-track session files (which is most of us), this is a game-changer.
We have built Isolate Audio around this very idea. The entire process is designed to be intuitive.
You just upload your file and tell the AI what you want in plain English.
Gone are the days of wrestling with complex plugins. Now, you can just ask the AI to "remove the lead singer" or "isolate that funky bassline," and you get back studio-quality stems. It’s not just a better workflow; it’s a catalyst for creativity.
Powering a New Generation of Musicians
This technology is feeding a huge appetite for playing, learning, and remixing popular music. The demand for high-quality backing tracks has exploded, and it’s no coincidence that the musical instruments market—valued at $19.82 billion in 2024—is projected to hit $31.97 billion by 2032. This growth is fueled by everyday creators and hobbyists who just want to jam along to their favorite songs. You can dig into the specifics in this musical instrument market trends report.
With these new tools, you can finally:
Make flawless karaoke tracks without any distracting vocal bleed.
Create custom backing tracks to practice your instrument with the real band.
Pull clean stems for remixes and DJ sets, opening up endless creative doors.
Study production techniques by soloing specific instruments to hear exactly what’s going on in a professional mix.
Ultimately, AI has leveled the playing field, turning what was once a highly technical chore into a simple and accessible creative task for everyone.
Your First AI-Powered Instrumental Track
Getting started with AI audio separation is a lot easier than you might think. We're going to walk through creating your first instrumental from a popular song, and you'll see just how intuitive it is. Forget needing a complicated DAW; all you really need is an audio file and a clear goal.
First things first, you need to give the AI your source material. This can be a standard audio file like an MP3 or WAV, but one of the handiest features is that it also accepts video files, like an MP4. If you have a music video or a live performance clip, just upload it directly—the AI is smart enough to pull the audio on its own.
Crafting Your First Command
Once the file is ready, this is where the fun begins. You're going to tell the AI what to do using a simple, natural-language prompt. You could just type "remove vocals," and that works, but the real power comes from being more specific. Think like a producer: what do you want to keep, and what needs to go?
Let's imagine we're working with a pop-rock track. It's got a strong female lead vocal, some backing harmonies, a driving drum beat, a solid bassline, and a crunchy electric guitar.
Instead of a generic command, let's try a few specific prompts:
For a full instrumental: "Isolate everything except the lead female vocal."
To get individual instrument tracks (stems): "Extract all instruments separately."
For a practice track: "Isolate the bass and drums."
See the difference? Giving the AI clear, descriptive instructions results in a much cleaner separation. The more detail you feed it, the better the final output will be. This new AI-driven workflow is a world away from the old, manual methods of audio production.
This approach isn't just filtering out frequencies; it's intelligently deconstructing the song, which is why the quality of the remaining parts stays so high.
From Prompt to Polished Track
After you hit 'enter' on your prompt, the AI gets to work processing your track. It usually only takes a few minutes, and then you'll have your new audio files ready to download.
Going back to our pop-rock example, if we used the prompt "Isolate everything except the lead female vocal," we'd get a high-quality instrumental. The main vocal would be gone, but the drums, bass, guitar, and even those subtle backing harmonies would still be there, clean and clear.
The real trick is to stop thinking about it as just "vocal removal." Start thinking like a sound engineer. When you use descriptive language to target specific parts of a song, you're essentially deconstructing and rebuilding it in a way that used to require the original studio multitracks.
This opens up a ton of creative doors. You can make backing tracks for karaoke or practice, pull clean samples for a new beat, or just dig into the arrangement of a song you love. And if you want to take those separated stems and get really creative, you can dive into how to remix a song and completely transform it. Your first high-quality instrumental is really just the beginning.
Mastering Prompts for Cleaner Separations
Sure, a simple "remove vocals" command gets the job done, but if you want to get truly professional results, you need to start thinking more like a producer. The real secret to pulling exceptionally clean instrumental music from popular songs is all in how you word your prompts.
The AI is smart, and it's built to pick up on the nuances in your language. Instead of telling it what to get rid of, you can point it directly at the specific sounds you want to keep. This level of control is what makes modern AI tools so much better than the clunky, phase-inverting software of the past.
From General to Granular Prompts
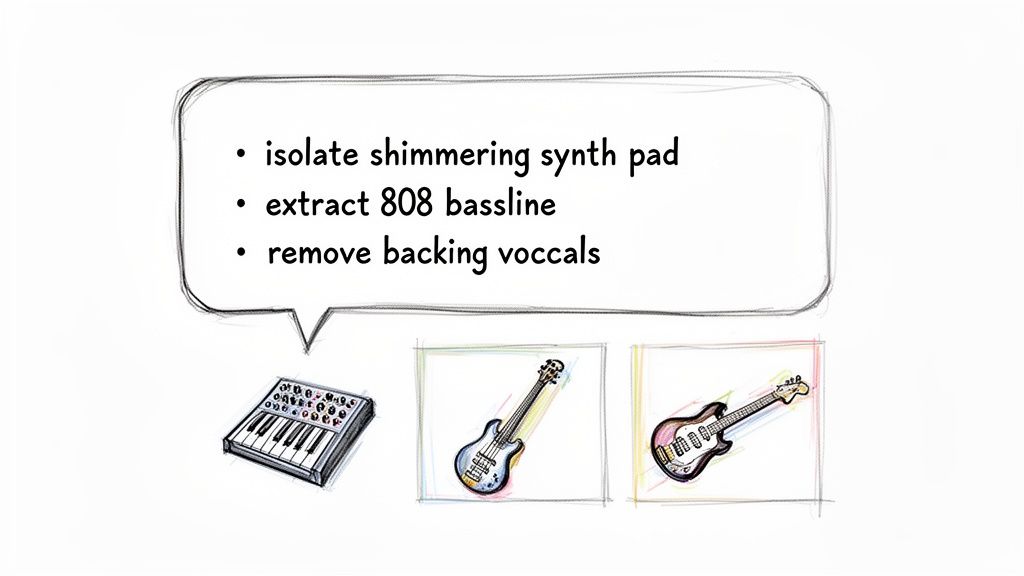
Let’s dig a little deeper. Imagine you're working with a packed electronic track. A basic "remove vocals" prompt might work, but what happens when the vocal is drenched in a long delay that's washing over the synth pads? You'll end up with a muddy, artifact-filled instrumental.
A much smarter approach would be to tell the AI: "Isolate the shimmering synth pad and driving 808 bassline."
See the difference? This prompt tells the AI exactly what to save, which helps it make better decisions about what to cut. It’s a game-changer when you're trying to get pristine stems for a remix or a clean backing track for a live performance. For instance, you could grab a live performance from a video file and tell it to pull out just the drum track for you to practice with. If you find yourself working with video files a lot, our guide on how to extract audio from video has some great tips to speed up your workflow.
Pro Tip: Don't be afraid to get descriptive. Adjectives are your best friend here. Using words like "distorted," "clean," "acoustic," "reverb-heavy," or even "background" helps the AI lock onto the exact sonic texture you're trying to isolate or remove.
Choosing the Right Quality Setting
Your prompts are one half of the equation; the other is the quality preset you choose. In Isolate Audio, you have a few options, and each one is a trade-off between processing speed and final audio quality. Knowing when to use each is key to working efficiently.
Here's a breakdown to help you pick the right tool for the job.
Comparing Isolate Audio Quality Presets
This table breaks down Isolate Audio's quality settings, helping you choose the best option for your project by balancing speed and fidelity.
| Preset | Best For | Processing Speed | Audio Quality |
|---|---|---|---|
| Fast | Quick previews, chopping up practice loops, or non-critical projects where speed is everything. | Highest | Good |
| Balanced | Your go-to default for most tasks. It offers a fantastic mix of speed and high-quality results. | Medium | Excellent |
| Best | Final production stems, professional remixes, and dense mixes that demand maximum clarity. | Slower | Pristine |
The right choice really depends on what you're doing.
If you're a DJ quickly sifting through tracks to find samples for a set, Fast mode is your best bet. You can process dozens of files in no time to see what works.
But if you're producing a serious remix or crafting a polished backing track for a vocalist, you'll want to use the Best setting. That extra processing time allows the AI to do a much deeper analysis, which dramatically reduces artifacts and bleed. The result is an instrumental that's as clean as you can possibly get. Balanced is that perfect sweet spot in the middle, making it a reliable workhorse for most of your day-to-day creative work.
Diving Deeper with Precision Mode for Those Tricky Mixes
Sometimes, the easy way just doesn't cut it. We've all been there: you try to pull the vocals from a track, but the singer was drenched in so much reverb that it’s now smeared all over your "instrumental." Or maybe the background harmonies are so baked into the lead vocal that your "remove vocals" command leaves behind a mess of weird, ghostly artifacts.
These are the kinds of dense, complex mixes where a basic separation algorithm can start to show its limits. When all the sounds are tangled up on top of each other, it’s a tough job for any AI to draw a clean line. That's exactly when you need to bring in the heavy machinery.
Knowing When to Flip the Precision Switch
Think of Precision Mode as your sonic scalpel. The default settings are great for most everyday jobs, but this mode kicks in a much more intensive, fine-grained algorithm built to untangle the gnarliest audio knots. It takes a little more time to cook, but the results are almost always worth the wait, giving you a noticeably cleaner and more accurate separation.
So, when should you reach for it?
Reverb-Soaked Vocals: If a long reverb tail on the vocal is washing out the instruments, Precision Mode can intelligently separate the dry vocal from its ambient trail, keeping the instrumental crisp.
Crowded Vocal Stacks: Got a track with layers of backing vocals, harmonies, and ad-libs? This mode is brilliant at zeroing in on just the lead vocal without grabbing bits of the harmonies along for the ride.
Old, Mono, or Low-Quality Recordings: Vintage tracks or mono recordings inherently have less separation baked in. Precision Mode does a much deeper dive to find the subtle clues needed to pull the elements apart cleanly.
Bottom line: If your first attempt has audible artifacts or bleed-through, Precision Mode is your next move. It’s often the one thing that separates a pretty good instrumental from a truly professional-sounding one.
Let's See It in Action
Here’s a classic scenario. You’re working with a live ballad recording. The vocal is powerful and emotive, but the stage reverb is bouncing off every wall in the virtual room. Your first pass using a standard preset gets rid of the lead vocal, but now you're left with this weirdly hollow, metallic echo haunting the instrumental. It's unusable.
This is the perfect time to give it another shot with Precision Mode. You'd use the exact same prompt—something like, "isolate the piano and strings"—but this time, you just toggle on the precision setting before hitting go.
Now, the AI is performing a much more detailed analysis. It’s not just looking for a vocal; it’s actively identifying the core vocal performance and learning to distinguish it from the reverberant field it’s creating in the mix.
The result? The vocal vanishes, and those distracting reverb artifacts that were clinging to it are either gone or dramatically reduced. You’re left with a clean, pristine instrumental track where the piano and strings can finally take center stage. This kind of granular control is what makes creating high-quality instrumental music to popular songs a real possibility, not just a shot in the dark.
How to Polish Your Instrumental in a DAW
Alright, you’ve used Isolate Audio to pull the instrumental, and now you have the raw track ready to go. While the AI gets you 95% of the way there, spending just a little time in a Digital Audio Workstation (DAW) is what takes your track from "good" to "studio-quality." It’s this final touch that makes all the difference.
You don't need to be a seasoned audio engineer to do this, either. We're talking about small, tasteful adjustments that have a big impact. Any DAW will work, whether you’re using free tools like Audacity and GarageBand or professional software like Logic Pro or Ableton Live. If you're new to this, we've got a great guide on choosing the best DAWs for beginners to get you started.
Fine-Tuning with EQ and Reverb
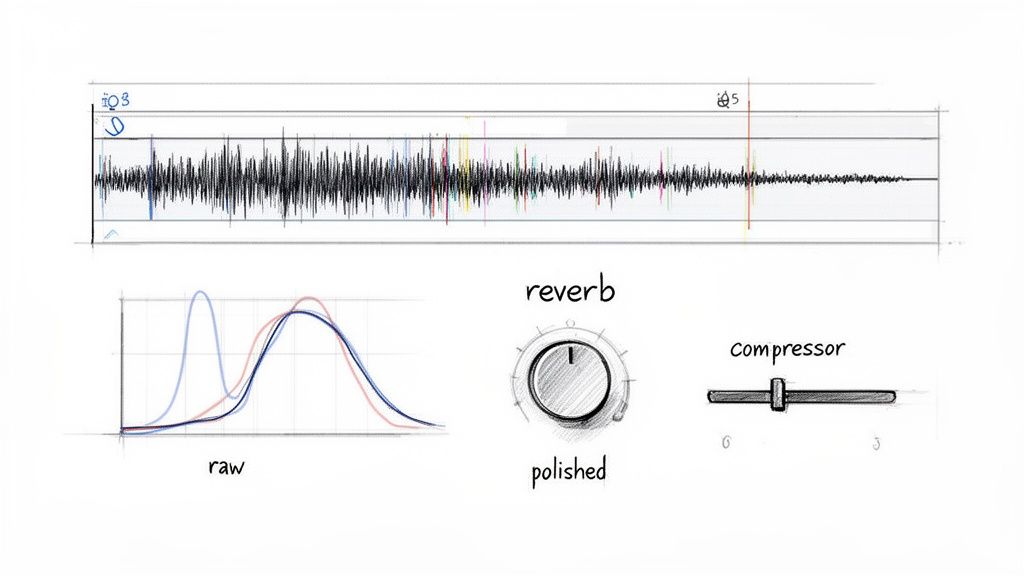
First up, let's talk EQ. When a vocal is removed, it can sometimes take a little bit of high-end sparkle with it. I usually start by adding a gentle high-shelf EQ boost—just a decibel or two—to bring back some of that crispness in the cymbals, hi-hats, and synths. The goal is to restore clarity, not make it sound harsh.
Next, a little reverb can work wonders. The original vocal probably had its own reverb effect, and when that’s gone, the instrumental can sound a bit dry or disjointed.
Think of a subtle room or hall reverb as the "glue" that holds everything together. It puts all the instruments back in the same acoustic space, making the track feel more cohesive. The key is to be subtle—you should feel its effect more than you actually hear it.
This simple step helps your instrumental music to popular songs feel like a finished, intentional production.
Adding Dynamic Control and Width
Finally, a bit of light compression can really tighten things up. A compressor balances the dynamic range by making quieter parts louder and taming the loudest peaks, creating a much fuller sound. I usually aim for just 2-3 dB of gain reduction on the loudest parts of the track. This is enough to add punch and consistency without crushing the life out of it.
Here are a few other tricks I often use:
Stereo Widening: A simple stereo imaging plugin can gently push the sound out to the sides, making the track feel wider and more immersive.
Subtle Saturation: A touch of tape or tube saturation can add some warm, pleasant harmonics that give the instrumental a more analog, vintage feel.
Limiting: Always place a limiter at the very end of your effects chain. This will catch any unexpected peaks and let you bring the overall volume up to a competitive commercial level.
The demand for high-quality instrumentals is huge. The global musical instruments market reached $47.5 billion in 2024 and is projected to grow at a 7% CAGR through 2034, much of it fueled by producers needing instrumental layers for pop tracks. By creating these polished versions, you're tapping directly into a thriving creative ecosystem that Isolate Audio was built to support.
Navigating the Legal Side of Using Instrumentals
Alright, so you've just created a perfect, crystal-clear instrumental from your favorite track. This is where a big, important question pops up: what are you actually allowed to do with it?
The answer really boils down to one thing: how you plan to use it.
Personal Practice vs. Public Performance
If you're just making a backing track to sing over in your bedroom or to practice your guitar solos, you're almost certainly in the clear. Think of it as a personal study tool. No harm, no foul.
But the moment you decide to share that creation with the world, the game changes entirely.
Uploading your instrumental to YouTube, dropping it into your podcast's intro, or using it as the foundation for your next big remix—all of that counts as public distribution. And that's when you run headfirst into the wonderful world of copyright law.
Here’s the thing every popular song is wrapped in at least two separate copyrights:
The composition: This is the song itself—the melody, the chords, the lyrics. It's owned by the songwriters and their publishers.
The sound recording: This is the specific version you hear on Spotify or the radio, performed by the artist. It's typically owned by the record label.
When you strip the vocals out, you're creating a new version of the sound recording, but the composition is still 100% intact and still owned by the original writers.
Let me put it this way: AI gives you the technical power to create the instrumental, but it doesn't magically grant you the legal permission to share it.
Using a copyrighted instrumental publicly without getting the right licenses can lead to all sorts of headaches, from takedown notices and copyright strikes on your accounts to more serious legal trouble.
So, for any project you plan to release publicly, you'll need to look into getting a license from the copyright owners. I know that can sound intimidating, but simply understanding the line between practicing for yourself and performing for others is the single most important step you can take.
Disclaimer: This is just a friendly guide to help you create responsibly, not formal legal advice.
Got Questions? We've Got Answers
You're not the only one with questions about making high-quality instrumentals. Here are some of the most common things people ask when they start out.
Can AI Really Get Every Last Bit of the Vocals Out?
This is the big question, right? Modern AI is shockingly good, but the final quality really hinges on how the original song was mixed.
For a standard pop track, a tool like Isolate Audio can usually give you an incredibly clean instrumental that's virtually artifact-free. However, if you're working with a really complex track—think tons of vocal layers, heavy reverb, or a busy mix—you might need to take a more hands-on approach.
Switching to a higher quality setting or using a Precision Mode is often the key. This tells the AI to work a bit harder, and the difference is usually night and day, getting you a result that's ready for professional use.
What Kind of Files Can I Actually Upload?
Most modern AI tools are designed to be super flexible, so you don't have to worry about converting files all the time. The goal is to get you creating, not stuck on technical details.
You should be able to drop in most common file types without a problem, including:
Audio: MP3, WAV, FLAC, AAC, M4A
Video: MP4, MOV
If you're pulling from a music video, the tool will automatically strip the audio out for you. No extra steps needed.
The big takeaway here? Don't waste time converting a video file to an MP3 first. Just upload the video directly. It saves a step and gets you to the fun part faster.
Is It Legal to Post an AI Instrumental on YouTube?
This is a huge one, and you need to tread carefully. Just because you used AI to create the instrumental doesn't change who owns the original song. The musical composition and the sound recording are still protected by copyright.
Uploading an instrumental cover of a copyrighted song without the proper permissions can get your video flagged with a copyright claim or even a strike against your channel.
If you plan to use your instrumental publicly on platforms like YouTube, you'll almost always need to secure a license from the copyright holders first. It's the only way to stay out of trouble.
Ready to hear just how clean an AI instrumental can be? Give Isolate Audio a try and see what you can create in just a few minutes. https://isolate.audio