The Ultimate Guide to Using an Audio High Pass Filter
At its core, an audio high-pass filter (HPF) is pretty simple: it lets high frequencies pass through and cuts out the low frequencies. Think of it as a selective bouncer for your audio, keeping the unnecessary low-end rumble out of the mix so the important stuff can shine.
Why a High-Pass Filter Is Your Secret Weapon
Picture your mix as a crowded room. A high-pass filter is the person at the door who politely tells all the low-frequency troublemakers to leave—the mic stand rumble, the air conditioner hum, the muddy bass buildup that's just taking up space. This one move doesn't just tidy things up; it completely changes the feel of the room. By carving out all that useless low-end energy, you instantly create more space and clarity for everything else.
This is a non-negotiable step if you're aiming for a professional sound. When every single track is fighting for attention with its full frequency range, you get a muddy, cluttered mess. A high-pass filter helps you assign a specific spot for each element, cleaning up the competition.
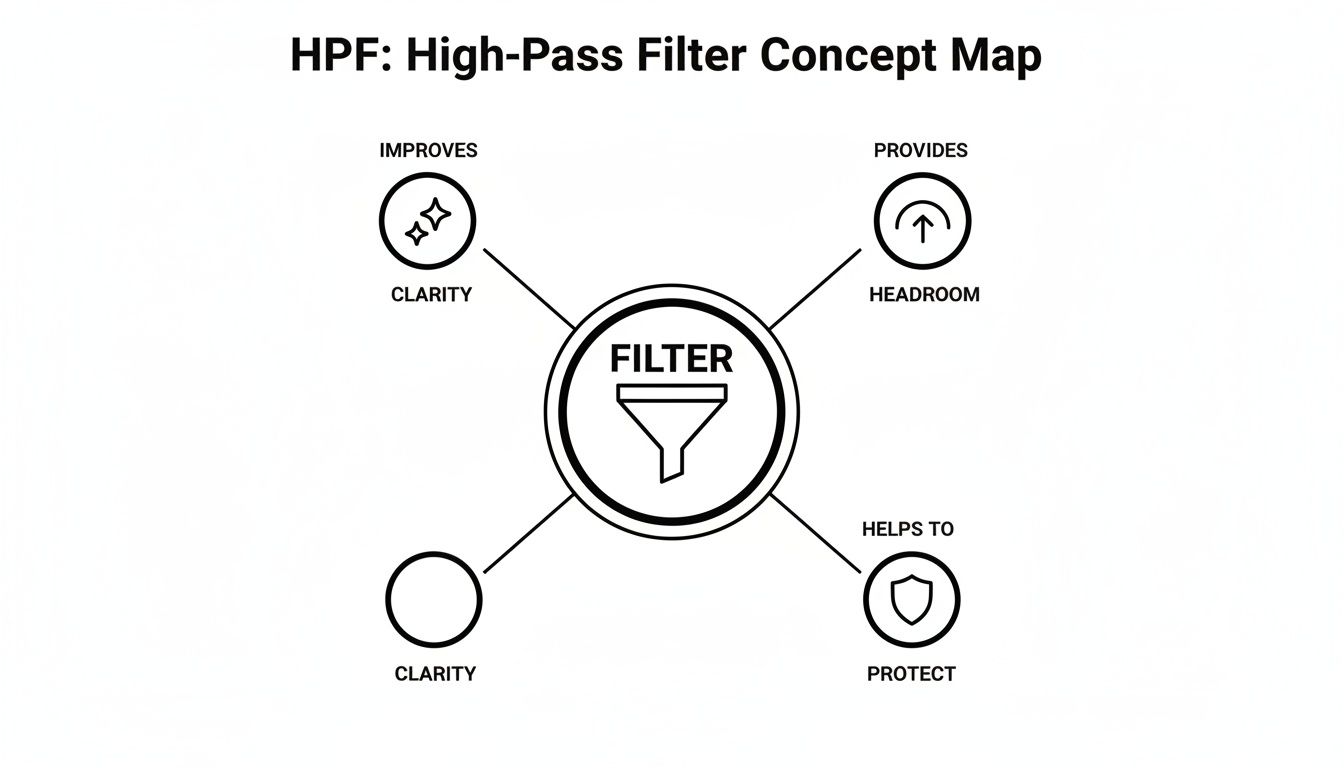
The results are immediate and often dramatic:
- Creates Clarity and Definition: Once you clean out the low-end mud from instruments that have no business being down there (like vocals, cymbals, or acoustic guitars), the kick and bass finally have room to breathe. They can punch through with power instead of fighting a losing battle.
- Increases Headroom: You'd be shocked at how much energy inaudible sub-bass frequencies eat up, pushing your master bus closer and closer to clipping. An HPF gets rid of that wasted energy, giving you back precious headroom. This means you can get a louder, more dynamic master without hitting digital distortion.
- Protects Your Equipment: Pushing extreme low frequencies through speakers and subs is a great way to damage them, especially at high volumes. Filtering out that content is a simple, smart way to protect your gear.
A well-placed high-pass filter is probably the single fastest way to make a mix sound less amateur and more professional. Its real power isn't in what it adds, but in what it takes away.
A Tool Forged in Broadcast History
This isn't some new-fangled digital trick; the concept is as old as audio engineering itself. Back in the early days of broadcast radio in the US, the high-pass filter was a problem-solver. During the 1960s and 1970s, AM and FM stations would use clippers to make their signal as loud as possible, but this often introduced a ton of nasty low-frequency distortion. The solution? Engineers would stick a high-pass filter right after the clipper to roll off all that subsonic garbage, delivering a much cleaner signal to millions of listeners. If you're curious, you can dive deeper into the history of transmission audio processing.
Today, that same idea is built into virtually every EQ plugin and digital audio workstation on the market. It's still one of the most vital tools for any modern music producer, podcaster, or sound designer.
Understanding the Core Controls of a High-Pass Filter
To really get the hang of a high-pass filter, you need to get comfortable with its main controls. Think of them as the knobs on a sophisticated gatekeeper for your sound, each one shaping how aggressively it cleans things up. Getting a feel for the Cutoff Frequency, Slope, and Resonance (Q) is what separates clumsy cleaning from surgical sculpting.
These controls don't work in a vacuum; they interact with each other to define exactly how the filter behaves. Learning to dial them in with intention is the key to gaining total command over the low-end of your tracks and, ultimately, your entire mix.
The Cutoff Frequency: The Starting Point
The cutoff frequency is your ground zero. It’s the single most important setting on any HPF because it tells the filter where to start working. Imagine drawing a line in the sand—any audio frequencies below this line get turned down or cut out completely, while everything above it is allowed to pass through, untouched.
Let's say you set the cutoff to 100 Hz on a vocal track. The filter will immediately start chipping away at mic stand rumble, air conditioner hum, and any other muddy noise below that 100 Hz mark. The important parts of the vocal, which live higher up, sail right through. Finding the perfect cutoff frequency is always a balancing act: you’re trying to remove the mud without accidentally making the instrument sound thin or gutless.
The Slope: How Steep Is the Cliff?
Once you’ve set your cutoff, the slope determines how aggressively the filter removes those low frequencies. Think of it as the steepness of a hill. A gentle slope rolls off the low end gradually and musically, while a steep slope creates a sharp, almost-vertical drop. This setting is measured in decibels (dB) per octave.
A gentler slope of 6 or 12 dB/octave sounds transparent and is great for general cleanup. Steeper slopes, like 18 or 24 dB/octave, are more like a brick wall. They're perfect for surgically removing a problem or for creative effects, like when a DJ uses a steep 24 dB/octave filter to completely gut the bass from one track to blend it into another. This has been a go-to technique since the rise of active RC filters in the 1970s, which you can learn more about in this deep dive on how cascaded op-amps create these sharp filters.
To help you choose the right setting, here’s a quick guide to common slope values.
Common HPF Slope Settings and Their Uses
This table breaks down different filter slope values (dB/octave) and explains their typical applications, from gentle, transparent cleanup to aggressive, surgical removal of low frequencies.
| Slope Value | Steepness Level | Common Use Case | Character/Sound |
|---|---|---|---|
| 6 dB/octave | Gentle | Very subtle cleanup, taming sub-bass on masters, program material. | Extremely transparent, musical, almost unnoticeable. |
| 12 dB/octave | Moderate | The workhorse setting. General cleanup on vocals, guitars, overheads. | A clean, effective roll-off that balances cleanup with natural sound. |
| 18 dB/octave | Steep | More focused low-end removal on bass or kick when needed. | A noticeable, firm cut. Good for preventing low-end bleed between tracks. |
| 24 dB/octave | Very Steep | Surgical removal of problem frequencies, creative filter sweeps, sound design. | Aggressive and sharp. Can sound unnatural if not used carefully. |
| 48+ dB/octave | Brickwall | Isolating frequency bands, sidechain filtering, advanced sound design. | A near-vertical cut. Used when you need to completely eliminate everything below the cutoff. |
As you can see, the slope you choose dramatically changes the character of the filter, so it's worth experimenting to find what works best for each sound source.
The Resonance or Q: The Strategic Bump
Some high-pass filters come with an extra control: Resonance, sometimes labeled Q. This parameter creates a small, narrow peak—a little boost—right at the cutoff frequency just before the signal starts to roll off. It’s like putting a little speed bump at the edge of the cliff.
Why would you want that? It can be a clever way to add a bit of perceived weight or punch back into an instrument. For instance, if you're filtering a bass guitar to clean up sub-bass rumble, adding a slight resonance bump can emphasize the fundamental note, helping it feel full even as you’re cleaning it up.
Be careful with this control. A little goes a long way. Too much resonance will create a nasal, ringing tone that sounds harsh and unpleasant. Use it subtly to enhance, not to distract.
A Quick Note on Phase Shift
It's good to be aware that any filter, especially a steep one, introduces a subtle side effect called phase shift. This is a tiny timing discrepancy between frequencies right around the cutoff point. While it's often completely inaudible, aggressive filtering across many tracks at once can sometimes cause the mix to sound a little "smeared" or less focused.
This isn't something to be afraid of, just something to listen for. If an instrument suddenly loses its punch right after you apply an HPF, you might be using too steep of a slope. Try backing it off to a gentler setting and see if the clarity returns.
Where to Start? Practical HPF Settings for Your Mix
Knowing the theory behind a high-pass filter is one thing, but actually using it to clean up a messy mix is where the real skill comes in. While there’s no substitute for listening closely, having some solid starting points can save you a ton of time and get you 90% of the way there, fast.
Think of these as your go-to reference points. The golden rule is always to trust your ears, not just the analyzer, and to make your adjustments while listening to the entire mix. A guitar that sounds huge and full by itself might just be a muddy mess once the bass and drums kick in. These settings are safe, musical places to begin before you start fine-tuning.
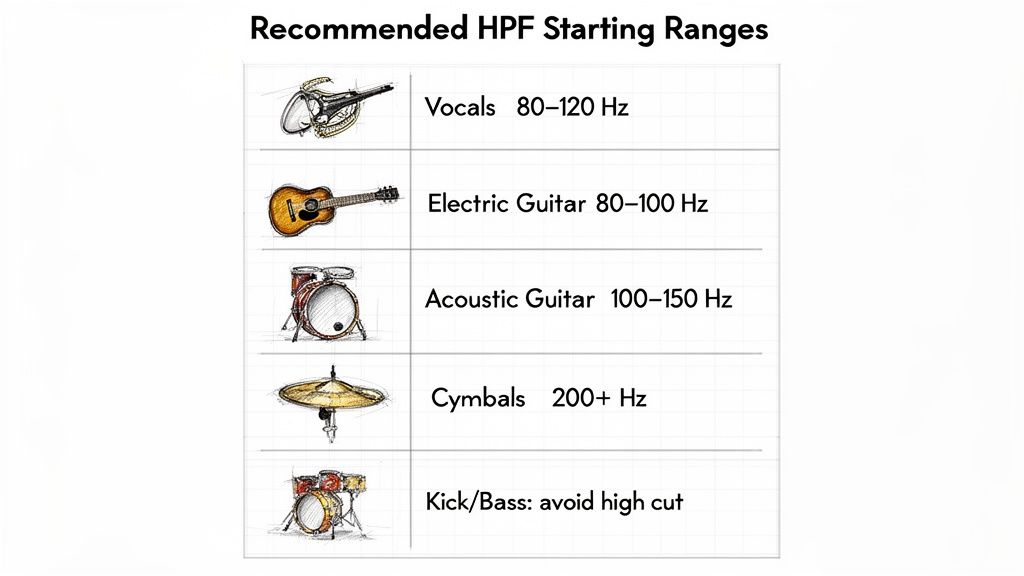
Here's a quick-reference guide showing recommended starting cutoff frequencies for applying a high-pass filter to various instruments and audio sources in a typical mix.
HPF Starting Points for Common Instruments
| Instrument/Source | Recommended Cutoff Frequency (Starting Point) | Reasoning |
|---|---|---|
| Lead Vocals | 80–120 Hz | Removes plosives, mic stand rumble, and low-frequency mud, allowing the vocal to sit clearly on top of the mix without sounding thin. |
| Backing Vocals | 150–250 Hz | A more aggressive filter creates space for the lead vocal and tucks harmonies neatly into the background, preventing midrange clutter. |
| Acoustic Guitar | 80–130 Hz | Tames excessive body resonance ("boom") and muddiness, clarifying the midrange while preserving the instrument's natural warmth. |
| Electric Guitar | 100–200 Hz | Clears out low-end rumble that clashes with the bass guitar, tightening the rhythm section and adding definition to the guitar's tone. |
| Bass Guitar | 30–40 Hz | Filters out inaudible sub-bass frequencies that consume headroom and muddy the kick drum, tightening the entire low end. |
| Kick Drum | 30–40 Hz | Similar to the bass guitar, this removes useless sub-sonic energy, focusing the kick's punch and clarifying its relationship with the bass. |
| Snare Drum | 100–120 Hz | Gets rid of sympathetic low-end resonance from the kick and toms, allowing the snare's "crack" and body to cut through clearly. |
| Toms (Rack/Floor) | 60–100 Hz | Cleans up bleed from other drums. Use a lower cutoff for floor toms (60–80 Hz) to preserve their deep tone. |
| Cymbals & Overheads | 300–500 Hz | An aggressive filter that removes everything but the cymbals, creating a crisp, shimmery top end without any low-frequency mud. |
| Piano & Keyboards | 100–120 Hz | Carves out space for the bass and kick in a dense mix, preventing the piano's lower register from contributing to low-end clutter. |
| Synth Pads & Leads | 150–300 Hz | Allows atmospheric pads to float above the mix without adding mud. For leads, it helps them cut through without clashing with guitars. |
Remember, these are just starting points. The perfect setting will always depend on the specific recording, the arrangement, and what you're trying to achieve in your mix.
Filtering Vocals for Maximum Clarity
Vocals are almost always the star of the show, and an HPF is your best friend for making them sound clean and present. The trick is to cut out all the low-frequency gunk without accidentally making the singer sound thin or weak.
- Tackle Plosives and Rumble: A great place to start is right around 80–100 Hz. This is the sweet spot for getting rid of those annoying "p" and "b" pops (plosives) and any low-end rumble picked up from the mic stand or floor vibrations.
- Carve Out Space for Bass: In a busy mix, you might need to push that filter up to 120 Hz. Doing this creates a nice, clean pocket for the bass guitar and kick drum to live in, stopping the vocal from fighting with the low-end foundation.
- Be Gentle with Male Vocals: Deeper male voices can have fundamental frequencies that dip below 100 Hz. Be extra careful here. Sweep the filter up slowly while listening, and stop the moment you hear the voice start to lose its body and warmth.
For backing vocals, feel free to be more aggressive. Filtering as high as 200–250 Hz can tuck them perfectly behind the lead vocal, adding depth without cluttering up the midrange.
Tightening Up Guitars and Bass
Guitars, both acoustic and electric, are notorious for carrying a surprising amount of low-end mud. Filtering them correctly is the secret to a powerful and defined rhythm section.
A classic rookie mistake is leaving the low end of electric guitars wide open. This almost always leads to a muddy war with the bass guitar for the same sonic space. An HPF is the instant fix.
Electric Guitars:
For a standard rhythm guitar part, start your filter around 100–150 Hz. This will instantly remove any boomy frequencies and let the gritty midrange shine. If you're working with heavily distorted tones, you might even push it up to 200 Hz to keep the low end super tight.
Acoustic Guitars:
Acoustic guitars often have a natural "boom" from the body resonance that can overwhelm a mix. Set your HPF around 80 Hz and gently sweep it up. You'll likely find the magic happens somewhere between 100–130 Hz, where the boom vanishes but all that beautiful warmth remains.
Bass Guitar:
This might sound wrong, but filtering your bass is a non-negotiable step. A gentle HPF set around 30–40 Hz gets rid of inaudible sub-bass mud that just eats up headroom and makes your speakers work overtime for no reason. This one small move makes the entire low end of your mix feel tighter, letting the kick and the true notes of the bass punch through with way more impact.
Cleaning Up Drums and Percussion
Drums are a special case because of all the microphone bleed. An HPF is your primary tool for isolating each piece of the kit and getting that clean, punchy sound we all want.
- Kick Drum: Just like the bass guitar, a subtle filter at 30–40 Hz cleans up sub-sonic rumble without touching the kick's power. This helps focus all the energy into the fundamental "thump."
- Snare Drum: Start filtering the snare around 100–120 Hz. This gets rid of the low-end bleed from the kick drum, making the snare's "crack" pop right out of the mix.
- Toms: For rack toms, start around 80–100 Hz. Floor toms have more low-end body, so be a bit more gentle and start your filter around 60–80 Hz.
- Overheads and Cymbals: Go for it. It's common to set the HPF on overheads anywhere from 300–500 Hz. This cuts out almost everything except the cymbals and hi-hats, giving you a crisp, shimmering high end without any of the low-end mud from the rest of the kit bleeding through.
Synths, Pianos, and Keyboards
Synths, pads, and pianos can hog the entire frequency spectrum, so they're prime candidates for an HPF to make them sit nicely in the mix.
Pianos: A grand piano has a gorgeous low end, but in a crowded mix, it will clash with the bass and kick every time. A filter around 100–120 Hz usually does the trick, keeping the piano's character while making room for everything else.
Synth Pads and Leads: For those big, atmospheric pads, you can filter quite high—sometimes up to 200–300 Hz—to let them float gracefully above the mix. Treat synth basses just like a bass guitar and filter around 30–40 Hz. For synth leads, a starting point of 150–200 Hz will help them slice through the track without adding any mud.
Of course, filtering is just one piece of the puzzle. Once you've cleaned up the low end, you can use other tools to shape your sounds. For instance, knowing how to apply a compressor for music can help you control dynamics and add punch after you've set your filters.
How to Apply a High Pass Filter in Your DAW
Alright, let's move from theory to action. This is where the real magic of a high-pass filter happens. The best part? Applying one in any DAW is incredibly simple once you get the hang of it. Let's walk through how to take those muddy, cluttered tracks and turn them into clean, well-defined parts of your mix.
The whole game here is to listen, not just look. While a frequency analyzer gives you some great visual clues, your ears are always the final judge of what sounds good. Trust me, this process will become second nature in no time.
A Five-Step Guide to Using Your HPF
This little workflow is universal. It doesn't matter if you're using your DAW's stock EQ or a fancy third-party plugin—the core method for cleaning up your low-end and creating space is exactly the same.
Find the Mud: First, listen to your whole mix and find the problem. Is it an acoustic guitar with a bunch of low-end boominess? A vocal that's getting tangled up with the bass guitar? Pinpoint the track that's causing the clutter.
Grab an EQ: Load up an equalizer plugin on that track's channel strip. Every single DAW comes with a perfectly good stock EQ that has a high-pass filter built right in.
Turn On the Filter: Inside your EQ, find the HPF button or icon and click it on. It usually looks like a sloping curve on the far-left side of the frequency graph.
Pick Your Slope: For starters, go with a gentle slope like 12 dB/octave. It’s a great all-around setting that cleans things up effectively without sounding too drastic or unnatural. You can always make it steeper later if you need to be more aggressive.
Sweep and Listen: This is the most important step. Grab the frequency control and slowly drag it up from the bottom. Listen very carefully to how the sound of the instrument changes as you move.
Here's a look at an EQ loaded up in Ableton Live. The tool you see on the selected track is where you'd find and adjust your high-pass filter.
Finding That Sweet Spot
As you sweep that frequency knob upward, your goal is to find the perfect balance. You're trying to slice away all the useless low-frequency rumble without hurting the actual character and body of the instrument.
You’ll hear the mud and noise vanish as you sweep higher. Keep going until the instrument suddenly sounds thin or weak. The second you hear that negative change, you’ve gone just a bit too far. Back it off a little until the warmth and fullness come back. That's it—that's your sweet spot.
Crucial Tip: Never, ever do this with the track in solo. An instrument might sound fantastic on its own, but it could be causing a low-end traffic jam when you hear it with the kick drum and bass. You have to make these filtering decisions in the context of the full mix to get a result that actually serves the song.
A Quick Look Back
This whole idea of carving out frequencies to shape sound isn't new; it has incredibly deep roots. The history of electronic music is filled with high-pass filters, dating all the way back to the 1930s. The 1939 Hammond Novachord, for instance, used formant filters to create tones that "sounded very pleasing," fundamentally shaping early jazz and pop.
By 1955, RCA's massive synthesizer featured digitally controlled high-pass filters that allowed composers to sculpt overtones with incredible precision for TV scores that were broadcast to 50 million American homes. If you're a history buff, you can read more about the fascinating history of these electronic music pioneers.
This long legacy proves just how essential filtering is to making music. Modern DAWs have simply put these incredibly powerful tools at our fingertips.
Of course, sometimes an HPF isn't quite enough for seriously noisy audio. In those cases, you might need to explore more advanced techniques. We've got a great guide on how to reduce background noise from audio that covers more powerful solutions. But for now, mastering this simple filtering workflow is a massive step toward getting pro-sounding mixes that are clear, punchy, and full of impact.
Common High-Pass Filter Traps (And How to Dodge Them)
Using a high-pass filter is one of the fastest ways to clean up a mix, but it's just as easy to do more harm than good. I've seen countless producers, especially early on, fall into the same few traps that can suck the life right out of their tracks.
These mistakes usually happen when we stop listening critically and start relying on a "set and forget" mentality. The good news? Once you know what to listen for, these pitfalls are incredibly easy to avoid. Let's turn that HPF from a potential mix-wrecker into your most dependable cleanup tool.
Mistake 1: Over-Filtering and Making Everything Thin
This is the big one. I guarantee every single one of us has been guilty of this at some point. You get a little too enthusiastic with that frequency knob, pushing it higher and higher to carve out mud, and suddenly you've scooped out the instrument's core sound.
You're not just removing rumble; you're gutting the fundamental frequencies that give an instrument its body, warmth, and power. A rich vocal becomes thin and brittle. A full-bodied acoustic guitar starts to sound like a ukulele. A snare loses all its punch.
The Solution:
Always, always filter while listening to the entire mix, not just the solo'd track. Sweep the frequency up slowly. The moment you hear the instrument start to lose its character and sound thin, stop. Back it off just a touch. Your goal is to surgically remove only what’s necessary, not to perform a sonic lobotomy.
The best high-pass filter work is invisible. If you can distinctly hear that a track has been "filtered," you’ve probably gone too far. It should just create space and clarity without drawing any attention to itself.
Mistake 2: Reaching for a Brick Wall When You Don't Need It
When you see a steep slope like 24 dB/octave or more, it’s easy to think sharper is better. More surgical, right? But these aggressive "brick wall" filters can introduce a whole new set of problems you didn't have before.
Steep slopes can create phase shift and weird, ringing artifacts right around your cutoff point. This can make your audio sound smeared, unnatural, or even introduce a harsh resonant peak that's more annoying than the rumble you were trying to fix.
How to Fix It:
For most general cleanup, stick with a gentler slope like 12 dB/octave. It’s almost always more transparent and musical. Save the steeper slopes for true surgical emergencies—like when you need to completely nuke a specific, nasty low-end noise. Even then, listen very carefully for any strange side effects.
Mistake 3: The "Copy-Paste" Filtering Approach
In a rush to get a mix done, it's tempting to find one HPF setting that works and just paste it onto every track. Slapping a 100 Hz cut on all the vocals, guitars, and synths might feel efficient, but it's a surefire way to get a flat, sterile, and lifeless mix.
Every instrument is different. Every recording has its own unique sonic fingerprint. A one-size-fits-all filter setting completely ignores this reality, stripping your mix of the very depth and character you're trying to build.
The Better Approach:
Give each track the individual attention it deserves. Listen closely. That boomy acoustic guitar might need a cut at 120 Hz, but the lead vocal might only need a tiny bit of cleanup way down at 80 Hz. Customizing your filter settings for each source is what separates an amateur mix from a professional one.
Advanced Filtering with AI Source Separation
Picture this common scenario: you're trying to EQ an acoustic guitar track, but every time you try to clean up the low-end, you're also affecting the kick drum and bass bleeding into the mic. It’s a classic mixing problem. With a traditional high-pass filter, you're stuck making a compromise. You filter the guitar, but you also filter the bleed, often creating weird, unnatural artifacts in the process.
But what if you could isolate the guitar before you even reached for an EQ?
This is exactly where modern AI source separation completely changes the game. Instead of trying to fix a messy, blended signal, you can now pull out a perfectly clean instrument stem first. This gives you an incredible amount of control, letting you apply surgical, no-compromise filtering without messing with any other part of the recording.
A New Workflow for Ultimate Clarity
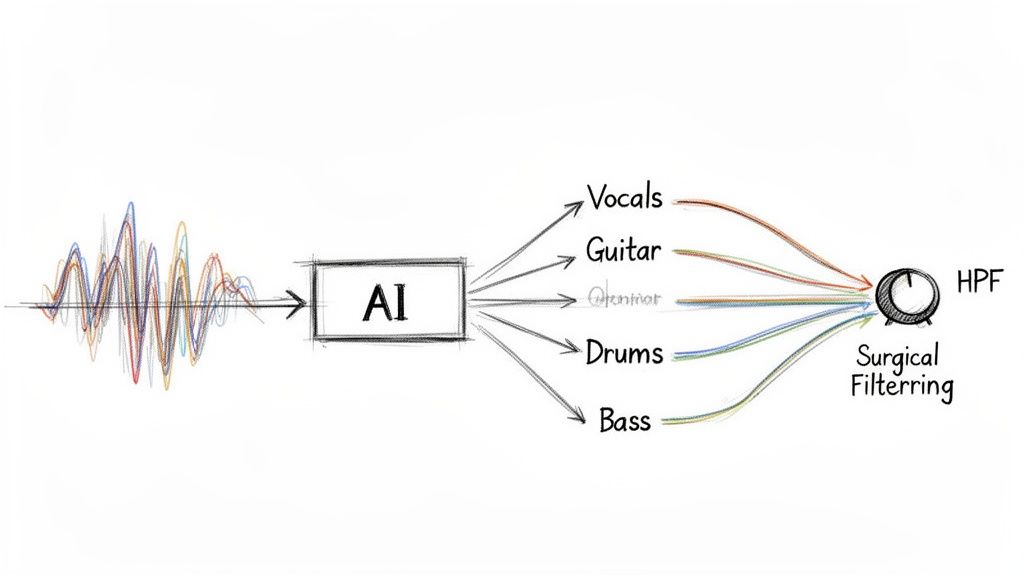
The process is surprisingly simple but incredibly powerful. Instead of slapping an EQ on a cluttered track, you first run the audio through an AI separator to get at the sound you actually want to treat.
- Step 1: Isolate the Source. Start by feeding your mixed recording to the AI and telling it what to extract—the "acoustic guitar," for instance, or maybe the "lead vocal." The tool will generate a clean, isolated audio file containing only that element.
- Step 2: Apply Surgical Filtering. Now, with a perfectly clean stem to work with, you can load up your high-pass filter. You can carve out low-end rumble and mud with total precision, knowing you are only affecting the target instrument.
- Step 3: Reintegrate into the Mix. Finally, just drop the clean, filtered stem back into your project. The result is a kind of clarity and separation that was practically impossible to get with filtering alone.
This approach is a lifesaver for cleaning up live recordings, pulling dialogue out of noisy backgrounds in post-production, or separating a vocal from a wall of instrument bleed to make it pop. AI essentially becomes the ultimate prep tool for professional audio cleanup.
By separating first, you’re no longer just cleaning up audio—you're fundamentally redefining what’s possible with an audio high-pass filter. You move from damage control to creative sculpting.
This is a clear evolution in audio engineering, offering a real solution to problems that have plagued producers for decades. For anyone wanting to dig deeper, our guide on stem separation software offers a closer look at how this technology works and where you can use it.
High-Pass Filter FAQs
Even after you get the hang of high-pass filters, a few questions always seem to come up when you're deep in a mix. Let's run through the most common ones to clear up any confusion and give you some quick answers for your next session.
Nailing these details is what separates just using a tool from truly mastering it.
How High Should I Set My High-Pass Filter?
There’s no magic number here. The one unbreakable rule is to always listen in the context of the full mix, not with the track soloed. Your ears are the only tool that can find the right spot for any given instrument.
Here's a simple technique: start with the filter all the way down and slowly sweep it up. Pay close attention. You're listening for the exact moment that low-end mud or rumble vanishes. If you push it further and the instrument suddenly sounds thin, weak, or hollow, you've gone too far. Just back it off a little until that essential body and warmth return. That’s your sweet spot.
Can I Use A High-Pass Filter On My Master Bus?
You can, but it’s a move that requires a very delicate touch. While not an everyday technique, a gentle HPF on the master bus can be a great finishing move during mastering.
Typically, you'd set a very gentle filter somewhere between 25 Hz and 35 Hz. The goal here is to get rid of inaudible sub-bass frequencies that aren't adding anything musical but are eating up precious headroom. By clearing out that useless energy, you can often make the entire mix feel tighter and achieve a louder, punchier master without hitting the limiter so hard. Tread lightly with this one.
An HPF on the master bus is for tightening, not for fixing mix problems. If your mix is muddy, go back and filter individual tracks instead.
What’s The Difference Between A High-Pass Filter And A Low Shelf?
This is a great question, and it really gets to the core of how different EQ types behave. Let's use a simple analogy to break it down.
- An audio high-pass filter is like a brick wall. It completely removes (or at least aggressively cuts) everything below its cutoff frequency. The sound is just gone.
- A low-shelf EQ is more like a volume knob that only affects the low frequencies. It turns down everything below its target frequency by a set amount, like -3 dB, but it doesn't get rid of it entirely.
The takeaway? Use an HPF when you need to surgically remove rumble, mud, and unwanted noise. Use a low shelf when you just want to gently turn down the low-end without losing it completely.
Ready to get crystal clear mixes? With Isolate Audio, you can separate any instrument from your track with a simple text prompt before you even apply your filter. Stop making compromises and start sculpting sound with surgical precision. Try Isolate Audio for free and hear the difference for yourself.