A Creator's Guide to AI Audio Repair Software
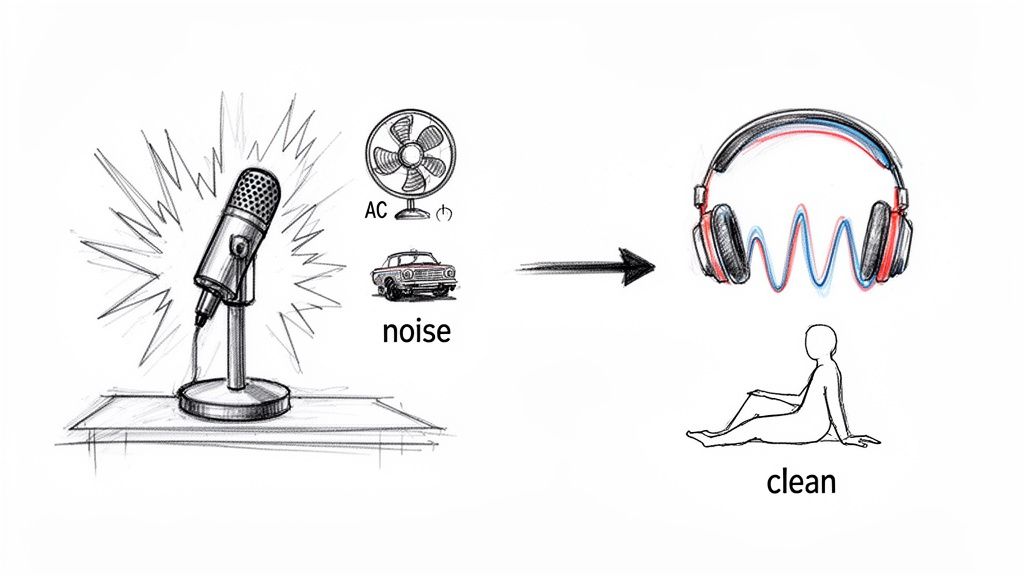
Let's face it—unwanted noise is the fastest way to kill an otherwise perfect recording. Whether it's the constant drone of an air conditioner, traffic bleeding into a crucial interview, or mic spill from a drum kit in a home studio, we're all fighting against audio gremlins.
The End of Bad Audio? Not Quite, But We're Getting Closer
For years, tackling these problems meant diving into a intimidating suite of tools. You needed to get cozy with parametric EQs, multi-band compressors, and fiddly noise gates just to make a dent. It was a tedious, technical process that felt more like surgery than creative work.
This old-school approach put up a huge wall. You either had to sink countless hours into learning the ins and outs of audio engineering or shell out for a professional to clean up your tracks. For most podcasters, indie musicians, and video creators, that just wasn't practical.
A New, Smarter Way to Clean Up Sound
Thankfully, that's all changing. The new generation of audio repair software is built on AI, and it’s completely flipped the script. Instead of wrestling with a dozen digital knobs, you can now get incredible results just by describing the problem in plain English.
This isn't just about convenience; it's about staying in your creative flow. You get to focus on what you want to achieve, not get bogged down by the how.
- Podcasters: That amazing interview you recorded in a noisy coffee shop? It’s salvageable.
- Musicians: You can finally pull a clean bassline out of a muddy live recording to create practice stems.
- Filmmakers: On-location dialogue that got hammered by a sudden gust of wind can actually be rescued.
This shift toward accessible, powerful tools couldn't come at a better time. The demand for high-quality audio has exploded, and the market shows it. Valued at USD 1.2 billion, the audio repair software market is expected to more than double, hitting USD 2.5 billion by 2033. That’s a steady 9.5% annual growth rate, driven almost entirely by creators who need to fix imperfect audio every single day. You can read a bit more about the market growth and its drivers to see the full picture.
The Big Idea: You shouldn't need an engineering degree to produce clean, professional-sounding audio. You just need to know what you want it to sound like.
From Manual Labor to Creative Partner
Let's look at how much the workflow has changed. What used to take hours of painstaking work can now be done in minutes.
Traditional vs AI Audio Repair Workflows
Here's a quick comparison of the old way versus the new way for a few common tasks.
| Task | Traditional Method (Manual) | AI Method (e.g., Isolate Audio) |
|---|---|---|
| Removing background noise | Find a noise-only sample, apply a noise reduction plugin, tweak threshold and reduction settings carefully. | "Remove background noise" or "Isolate vocals." |
| Reducing room echo/reverb | Use a complex de-reverberation plugin, manually adjusting decay times and frequency bands. | "Reduce room echo" or "Make my voice sound less echoey." |
| Fixing microphone bleed | Manually gate tracks or meticulously "paint out" bleed in a spectral editor. | "Isolate drums from bass" or "Remove the keyboard from the vocal track." |
| Cleaning up plosives | Zoom in on the waveform, find each 'P' and 'B' sound, and manually apply a high-pass filter or gain reduction. | "Remove plosives" or "Fix popping sounds." |
As you can see, the difference is night and day. AI turns the software from a clunky tool into a smart assistant that handles the heavy lifting.
This guide will walk you through the practical, step-by-step workflows that make this possible. We'll cover how to use simple prompts and smart techniques to solve your most common audio headaches, letting you get back to creating.
Setting Up Your Audio for Success
Before you even touch a prompt, let’s talk about the single biggest factor in getting a clean, professional result: your source file. It's the absolute foundation of any audio repair work. You can have the smartest AI on the planet, but it can't magically restore audio information that was never there to begin with.
This all starts with the file format. We’ve all used MP3s, but they achieve their small size by permanently throwing away bits of audio data. For casual listening, it's fine. But for repair work, that "missing" data is exactly what the AI needs to tell the difference between a voice and the refrigerator humming in the background.
For any serious project, starting with a lossless format like WAV or FLAC is a must. Think of them as a perfect, bit-for-bit photograph of your sound. This gives the AI a complete picture to work with. The difference is night and day—a vocal isolated from a WAV file sounds rich and present, while one pulled from a low-bitrate MP3 often comes out sounding thin, warbly, and full of weird artifacts.
The Power of Good Habits
Beyond formats, a little bit of organization can save you a massive headache, especially when you're juggling multiple files for a podcast or a music album. Trust me, creating a simple, consistent file naming system is a lifesaver.
Don't just name something Interview_Final.wav. A few months from now, that won't mean a thing. Get descriptive:
Podcast_Ep04_GuestName_RawAudio.wavLiveGig_SongTitle_VocalsOnly_Repaired.wavScene1_Take2_Dialogue_Cleaned.wav
This little habit makes your project folder instantly understandable. You can see at a glance what’s been processed and what’s still raw. It’s a tiny step that helps prevent that heart-stopping moment when you realize you’ve accidentally overwritten your only original take. And if you're starting with a video file, it's crucial to get the audio out correctly. Our guide on how to extract audio from video walks you through that process to make sure you're not losing quality.
Diagnose Before You Operate
Alright, this is the most important part of your prep. You have to know what you're trying to fix before you start. Just telling the software to "fix the audio" is like telling a mechanic "my car is making a sound." You'll get a vague, unhelpful result.
Put on a good pair of headphones, listen carefully, and pinpoint the main problem. Is it a constant low hum from the AC? Or is it an intermittent dog bark that ruins the best take? Knowing exactly what you're targeting is the secret to writing a prompt that actually works.
Key Takeaway: You're not just "removing noise." You're performing sonic surgery on a specific problem. The more clearly you can describe that problem to yourself, the better you can tell the AI what to do.
Listen specifically for these common culprits:
- Steady-State Noise: Think air conditioners, refrigerator buzz, or the whine of a computer fan. This noise is usually consistent in pitch and volume.
- Transient Noise: These are the sudden, short sounds—a cough, a door slam, a keyboard click. They’re unpredictable and stick out like a sore thumb.
- Bleed: A classic studio problem. This is when one sound leaks into another microphone, like the hi-hat cymbals getting picked up by the vocal mic.
Once you’ve identified the gremlin in your recording, you’re ready to stop prepping and start fixing.
Getting Your Hands Dirty: Practical Recipes for Common Audio Headaches
Theory is one thing, but getting great results is what really matters. Now we'll move from prep work to practical, real-world "recipes" for the most common audio problems you're likely to face. Think of these as your playbook for turning messy audio into clean, usable tracks using simple, descriptive language.
Before you even think about applying an effect, a solid pre-processing routine is a must. It's a simple, three-step approach that sets you up for success before the AI even gets a look at your file.
This flowchart maps out the whole process, from grabbing your source file to figuring out exactly what's wrong with it.
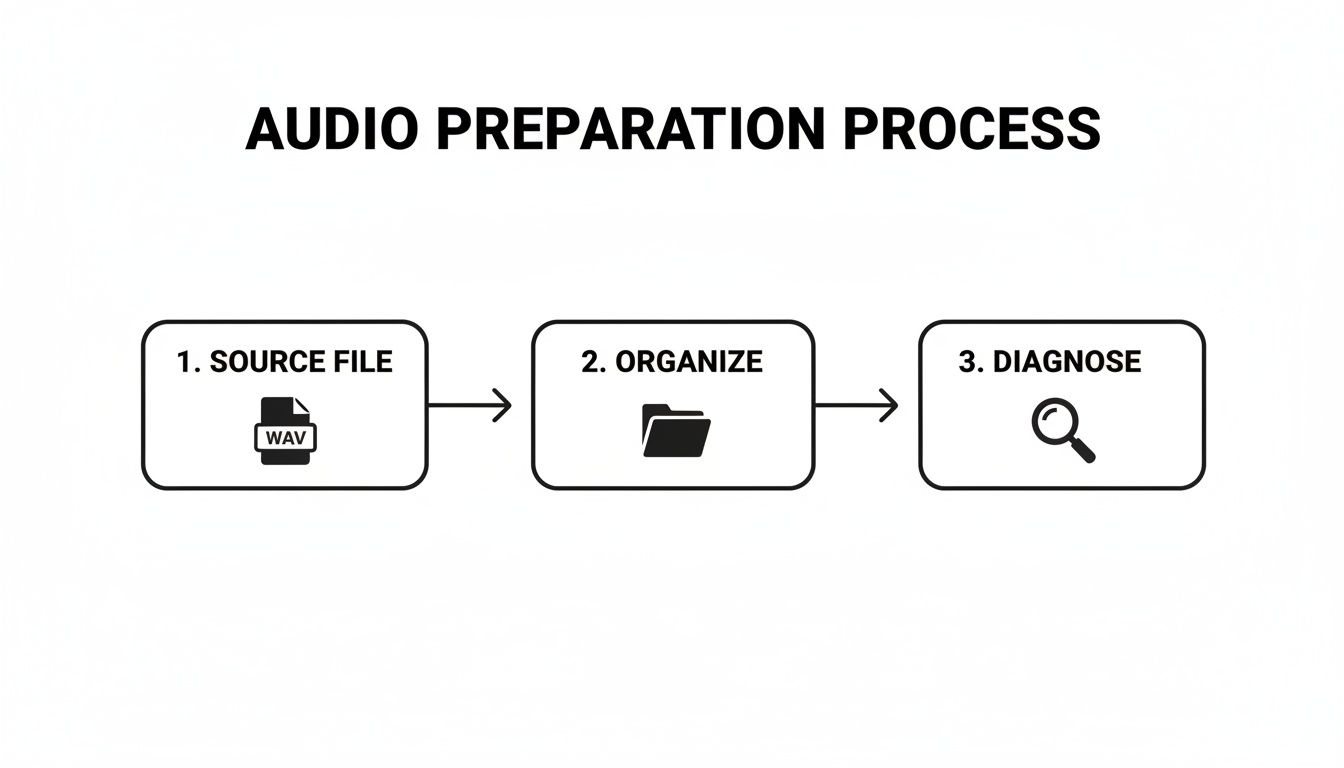
Nailing this sequence—starting with a high-quality source, getting your project organized, and having a clear diagnosis of the problem—will dramatically improve the results you get from any audio repair software.
Recipe 1: Rescuing a Noisy Podcast Interview
Let's be honest, podcasters often have to record in less-than-ideal spots. That interview in a bustling café might be gold for content, but it's a nightmare for audio. The goal here isn't to create sterile silence, but to make the speakers perfectly clear while dialing back the distracting background noise.
So, you’ve got a recording full of background chatter, clinking coffee cups, and the hiss of an espresso machine. Just typing "remove noise" is too blunt—it can easily suck the life right out of the voices. A smarter, multi-pass approach works wonders.
- First Pass: Upload your file and give it a clear instruction: "isolate the main speaker's voice." This tells the AI to zero in on the dialogue and push everything else back.
- Second Pass (if needed): If some annoying sounds are still poking through, take that newly created track and run it through again. This time, be more specific, like: "remove background chatter and clatter."
This layered technique is far more effective than a generic noise reduction filter. It keeps the natural tone of the voice while surgically removing only the most disruptive sounds.
Pro Tip: If you have an interview with two or more people on separate mics, process each person's track individually before you mix them together. This gives you way more control and stops the AI from getting confused about which voice to focus on.
Recipe 2: Creating Practice Stems for Musicians
Musicians are always trying to pull specific instruments out of a crowded mix, whether it's for practicing, transcribing a solo, or creating a remix. Maybe you need to learn a complex bass line or just want a karaoke version of a song to play over. This is where AI-powered audio repair software leaves old-school stem separators in the dust.
Imagine you have a live recording of your band, and the drums are bleeding into every single microphone, making it impossible to hear your guitar part clearly.
- Isolate Your Instrument: Start with a direct prompt like "isolate the lead guitar." The AI will generate a track that focuses just on your part.
- Create the Backing Track: Now, go back to the original full mix. Use the prompt "remove the lead guitar." The software will give you everything except your guitar, creating a perfect, custom-made backing track to practice with.
- Target Other Parts: Want to figure out that killer bass line? Just ask for it: "isolate the funky bass line" or "remove everything except the bass guitar."
This isn't just for standard instruments, either. You can get surprisingly accurate results by asking for a "saxophone solo," a "tambourine," or even specific parts of a drum kit, like the "snare drum." If you want to dive deeper into this, our guide on achieving clean vocal isolation in Audacity covers some great complementary techniques.
Recipe 3: Cleaning On-Location Dialogue for Filmmakers
For anyone working with video, dialogue is king. The problem is, location shoots are wild and unpredictable. Wind, traffic, and random sirens can completely wreck an otherwise perfect take. Your goal is to make the dialogue sound like it was recorded in a quiet studio, but without making it sound fake or processed.
Picture a scene shot outdoors where a gust of wind slams the microphone, creating that awful low-frequency rumble.
- Target the Problem Head-On: Use a very specific prompt. Instead of just "remove wind," try: "remove the low-frequency wind noise from the dialogue." Describing both the sound ("wind noise") and its sonic character ("low-frequency") helps the AI do its job with surgical precision.
- Deal with Sudden Noises: If a police siren suddenly blares in the middle of a line, you can tell the AI exactly where to look: "remove the siren between 10 and 15 seconds." This time-based command focuses the repair on that specific moment.
The market for these tools is huge and only getting bigger. While mainstays like Cedar Studio and Waves have been around for years, iZotope's RX suite alone has brought in over 1 million users. It’s used on everything from restoring old film audio to cleaning up modern podcasts. Broadcasters in Europe, which holds a 25% market share, rely heavily on this tech to restore historical footage, where an estimated 80% of legacy audio needs serious denoising.
Choosing the Right Quality Setting for the Job
Most modern tools give you a few quality settings to choose from. Knowing which one to use can save you a ton of time.
| Setting | Best For... | The Tradeoff |
|---|---|---|
| Fast | Quick previews and simple fixes, like removing a clean electrical hum. | It's quick, but the accuracy is lower. You might be left with some artifacts. |
| Balanced | Your go-to for most jobs. Perfect for cleaning dialogue and basic instrument separation. | This is the sweet spot for speed and quality that works for about 90% of cases. |
| Best Quality | Complex audio with overlapping sounds, professional music production, and final exports. | It takes significantly longer to process, but it delivers the cleanest, most professional results. |
My advice? Always start with Balanced. If the result isn't quite there, then switch over and re-process with the Best Quality setting. This approach keeps your workflow moving and ensures you only use the heavy-duty option when you truly need it.
How to Write Prompts for Surgical Precision
The real magic behind today's best audio repair software isn't just its raw power—it's how you talk to it. Getting truly professional results means moving beyond generic commands. Think of it like this: you wouldn't tell a surgeon to just "fix the patient." You'd tell them exactly which artery needs attention.
When you're trying to clean up audio, your ability to clearly describe the sound you want to get rid of is your most powerful tool.
A vague prompt like "remove noise" is essentially a shot in the dark. It forces the AI to guess what you consider "noise," and it might just pull out subtle room tones that give your recording life. Worse, it could even start eating into the voice or instrument you're trying to save. The result often sounds thin, overly processed, and just… weird.
Specificity is everything. Instead of "remove noise," try something like, "remove the high-pitched whine from my guitar amp." Now we’re talking. That simple change gives the AI three critical clues: the type of sound (whine), its sonic character (high-pitched), and its source (guitar amp). That’s how you get clean, surgical results.
From Vague Ideas to Descriptive Language
To get this precise, you need to learn to describe sounds by their characteristics. This isn't nearly as technical as it sounds. You don't need to know the exact frequency in Hertz; you just need to use descriptive words you already know.
Throw on a good pair of headphones, listen closely to the problem audio, and ask yourself a few questions:
- What does it sound like? Is it a hum, a buzz, a hiss, a rumble, or a squeal?
- What's its pitch? Are we talking about a low-frequency rumble or a high-pitched squeak?
- Is it constant or does it come and go? Does it drone on through the whole recording, or does it pop up randomly like a cough or a door slam?
Using this little framework, a messy recording isn't just "noisy." It might have a "rumbling low-frequency hum from the air conditioner" and some "sharp, intermittent bird chirps outside the window." Describing the problem with that level of detail is how you guide the AI to perform precision repairs.
The goal is to paint a picture of the sound with your words. The more detailed your description, the more accurately the AI can find and remove the garbage while leaving the good stuff untouched.
The Power of Iterative Prompting
Look, you're not always going to nail it on the first try. That’s perfectly normal. The best workflows I've seen all involve a technique called iterative prompting—a simple but incredibly effective process where you refine your commands based on what you hear.
Think of it as a conversation. You make a request, check the work, and then give clearer instructions.
- Run Your First Pass: Start with your best descriptive prompt. Something like, "remove the steady hiss from my vocal track."
- Analyze the Result: Listen back carefully. Did it work perfectly? Or is there still a little hiss left? Maybe it took out too much and now the vocal sounds dull?
- Refine and Repeat: Now you adjust. If some hiss remains, you could try a more targeted prompt: "remove the high-frequency hiss." If the vocal sounds thin, you might have been too aggressive. You could try again but add a qualifier, like "gently reduce the background hiss."
This back-and-forth is where you really dial in the perfect sound. It allows you to make small, controlled adjustments instead of one big, clumsy edit, which is the key to preserving the natural quality of your audio.
Prompting for Precision: A Good vs. Great Prompt Guide
To show you what I mean, here are a few real-world examples demonstrating how a few extra descriptive words can completely change your results. Small tweaks in language make a massive difference.
| Goal | Good (But Vague) Prompt | Great (Specific) Prompt |
|---|---|---|
| Clean up dialogue | "Remove background noise" | "Remove the distant traffic rumble and the fan hum" |
| Isolate an instrument | "Isolate the bass" | "Isolate the clean electric bass line, remove drum bleed" |
| Fix a location recording | "Remove wind" | "Reduce the low-frequency wind buffeting the microphone" |
| Remove mouth sounds | "Fix clicks" | "Remove the sharp mouth clicks and pops from the speech" |
As you can see, the "Great" prompts give the AI so much more to work with. They describe the texture, pitch, and source of the sound, which is the real secret to getting that clean, professional separation you're after. By learning to speak the AI's language, you move from just hoping for a good result to commanding a great one.
Troubleshooting When the AI Gets Stuck
Even the smartest audio repair software can get tripped up by a really messy recording. I've seen it happen plenty of times. An AI might struggle to tell a soft vocal harmony apart from the main vocal, or it might hear the natural decay of a cymbal and mistake it for background hiss. When you hit a wall like this, it doesn't mean the tool has failed—it just means you need to get a little more hands-on.
The first thing I always do is figure out exactly what went wrong. The best way to do this is by listening to the remainder output. Think of it as the ghost track; it's everything the AI removed from your original file, and it’s your secret weapon for troubleshooting.
Let's say you told the AI to "isolate the lead vocal." After it's done, you listen to the remainder and hear not just the instruments, but also little bits of the lead vocal's reverb tails and breath sounds. That tells you the AI was just a bit too aggressive. Now you know precisely what the problem is and can write a smarter prompt to fix it.
Dealing with Audio Artifacts
Audio artifacts are those nasty little sonic leftovers that can pop up after processing. They can sound like watery textures, weird metallic chirps, or a muffled, hollow quality in the audio you were trying to save. This usually happens for one of two reasons: either the source audio is heavily compressed (like a low-quality MP3), or the sounds you're trying to separate are just too similar in frequency and character for the AI to easily untangle.
If you start hearing artifacts creeping into your track, here are a few things I'd try:
- Soften Your Prompt: Instead of a blunt command like "remove the background chatter," try something more nuanced, like "gently reduce the background chatter." This encourages the AI to be less heavy-handed.
- Use the 'Best Quality' Setting: Sure, this mode takes longer to process, but it uses a much more sophisticated model to make finer distinctions between sounds. In my experience, it drastically reduces artifacts.
- Check Your Source File: If you're working with a low-bitrate MP3, you might be fighting a losing battle. Always, always use the highest-quality source file you can get your hands on, preferably a lossless format like WAV or AIFF.
My Key Insight: Don't ignore the "remainder" output. It's the single best diagnostic tool you have. It lets you hear exactly what the AI took out, helping you understand its digital "choices" so you can write a better follow-up prompt.
The Multi-Pass Workflow for Complex Audio
For really tough audio problems, one command is rarely enough. A technique we use all the time in the studio is the multi-pass workflow. Instead of trying to fix everything at once, you run the audio through the AI multiple times, giving it a specific, targeted goal for each pass. It’s like peeling an onion one layer at a time instead of trying to chop straight through the middle.
Imagine you're trying to salvage a live recording of a speaker at a noisy conference. The audio is a mess—there's a loud air conditioner hum, people coughing in the audience, and a ton of room echo.
Here’s how I would tackle that with a multi-pass approach:
- First Pass (Broad Noise Removal): I’d start with the biggest, most constant problem first. My initial prompt would be something simple: "remove the low-frequency air conditioner hum."
- Second Pass (Transient Noise Removal): Next, I'd take the file from that first pass and go after the random, intermittent sounds: "remove the audience coughs and sneezes."
- Third Pass (Clarity and Polish): With the major distractions gone, I'd run the result through one last time to deal with the room's acoustics: "reduce the room echo to make the voice clearer."
This layered method keeps the AI from getting overwhelmed. By breaking the problem down into simple, focused tasks, the software can perform with much greater accuracy than if you gave it one giant, complex command like "remove all background noise and echo."
Of course, once the audio is repaired, a little fine-tuning can make all the difference. Understanding tools like dynamics processors is a huge help here. If you want to dive deeper, check out our guide on using a compressor for music production—many of the same principles apply to cleaning up dialogue. With these troubleshooting techniques in your back pocket, you can solve almost any audio problem and turn unusable recordings into professional-sounding tracks.
Common Questions About AI Audio Repair
Whenever you're getting your hands dirty with new tech, questions are bound to pop up. And when that tech is supposed to fix something as delicate as audio, it's smart to be a little skeptical about what it can and can't do. Let's tackle some of the most common questions I hear from people just starting out.
Can AI Really Remove Any Sound?
Look, modern AI is incredible, but it isn't magic. It excels when there's a clear difference between the sound you want to keep and the one you want to ditch. For most of the usual suspects—annoying background hum, traffic noise, wind, or even instrument bleed in a recording—the results can be astonishingly clean. Honestly, sometimes it feels like a miracle.
But where does it stumble? Heavily overlapping sounds. Picture two people talking over each other at the exact same volume and pitch. Pulling those apart cleanly is still the holy grail of audio separation. The real goal here is massive improvement, and today’s best tools deliver that in seconds.
How Is This Different From a Basic Stem Separator?
This is a great question because it cuts right to the heart of what makes this new wave of software so powerful. A traditional stem separator is pretty rigid. It's designed to sort audio into a few pre-defined buckets, usually just vocals, bass, drums, and other. If the sound you want to isolate doesn't fit into one of those categories, you're out of luck.
These new AI repair tools are different because they understand natural language. You're not stuck with a few buttons. You can literally just describe the sound you want to target:
- "Crowd cheering"
- "Distant dog barking"
- "Annoying refrigerator hum"
- "The squeak from my piano pedal"
This completely changes the game. We're moving way beyond simple remixing and into the realm of true, surgical audio repair.
Does My Original File Quality Matter?
Yes, a thousand times yes. This is probably the single most important factor for getting professional-sounding results.
Think of it like this: a compressed MP3 has already thrown away a ton of audio data to keep the file size small. When you feed that to an AI, you're asking it to solve a puzzle with missing pieces. Always start with a high-quality, lossless file like a WAV or FLAC if you can. You're giving the AI so much more information to work with, which directly translates to cleaner, more natural-sounding separations.
Sure, the tools can still work wonders on an MP3, but feeding them lossless audio is the best thing you can do for a pristine final product.
How Do I Avoid My Repaired Audio Sounding Robotic?
Ah, the dreaded "watery" or "robotic" artifact. That's a classic sign of overly aggressive processing. It happens when the tool doesn't just remove the noise, but also strips out the subtle, natural frequencies and ambiance that make audio feel real.
The key is to be gentle. Instead of trying to remove 100% of a background sound, dial it back a bit. Leaving just a hint of the original ambience can make the final result sound far more believable.
Also, don't jump straight to the highest quality setting. Start with a "Balanced" or "Fast" preset to get a baseline, then adjust from there. Most importantly, always A/B your isolated track with the full mix. Make small, careful tweaks until it sits perfectly. The goal is seamless integration, not sterile silence.
Ready to stop fighting with noisy audio and start creating? With Isolate Audio, you can remove any sound from your recordings using simple text prompts. Clean up dialogue, create practice stems, or rescue that perfect take in minutes. Try Isolate Audio for free and hear the difference for yourself.