How to Clean Up Audio for Professional Sound
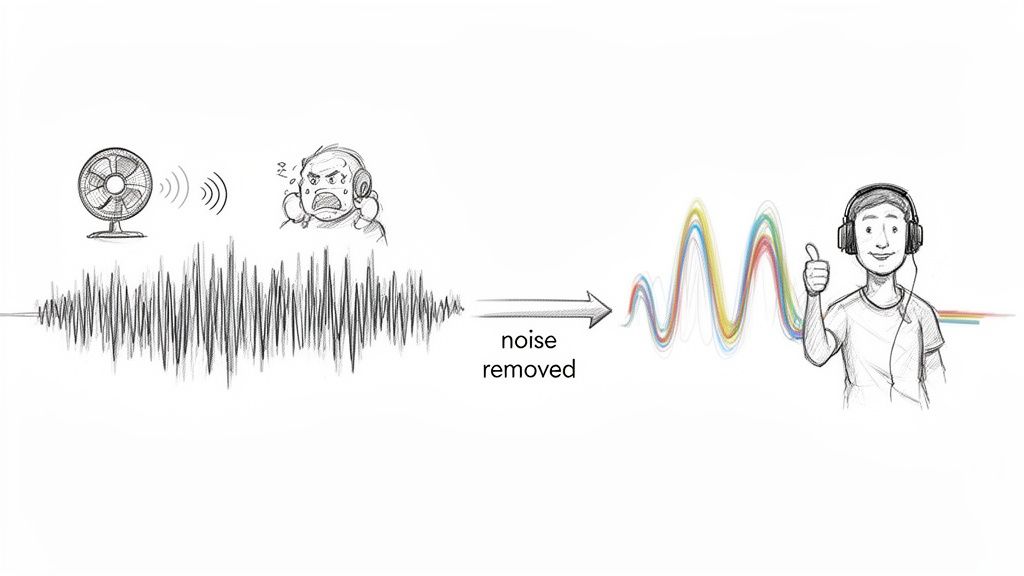
When we talk about how to clean up audio, we're really talking about a few key things: hunting down and eliminating unwanted background noise, smoothing out any weird tonal issues, and getting the volume levels just right. The end goal is always to make your main audio—be it a voice, a vocal track, or an instrument—sound as clear and professional as possible. This used to be a dark art, but now, a mix of specialized software and smart AI tools can zap everything from annoying hums and hisses to the neighbor's dog barking in the background.
Why Clean Audio Is Your Most Important Asset
Let’s be real for a second. In a world overflowing with content, bad audio is the fastest way to lose an audience. People might put up with a slightly blurry video, but they will absolutely bail on a podcast that’s buzzing or an interview that’s swimming in echo. Clean, crisp sound isn't just a nice bonus anymore; it's the price of entry for keeping people engaged and building trust.
Building Trust Through Clarity
Your audio quality is a direct reflection of your professionalism. When a listener is trying to focus on what you're saying but keeps getting distracted by a humming AC unit, a passing siren, or even just the clatter of your keyboard, it creates a mental hurdle. It just feels unpolished and can make even the most brilliant content come across as amateur.
On the flip side, when you take the time to clean up the audio, you're removing those barriers. You’re creating a clean, direct line to your listener's ears, which feels more intimate and personal. This attention to detail shows you respect their time, and that's huge for building a loyal following.
The Growing Demand for Clean Sound
This isn't just a hunch; the market is screaming for better audio. The global market for noise suppression components hit USD 24.15 billion in a single year and is on track to balloon to USD 73.04 billion by 2033. That kind of explosive growth tells you everything you need to know: consumers want, and now expect, immersive, noise-free experiences from everyone. You can dig deeper into this trend in the noise suppression market research from Straits Research.
The best audio cleanup is the one your audience never notices. The goal isn't to make your recording sound sterile or processed; it's to make it sound as if the distracting noises were never there in the first place.
Thankfully, modern AI-powered tools are making this level of quality way more accessible. They can surgically remove specific problems without requiring a degree in audio engineering, helping you turn raw, messy recordings into something that sounds genuinely professional.
Setting the Stage for a Perfect Audio Cleanup
Trying to fix audio by slapping on a noise reduction plugin right away is a classic rookie mistake. It’s a bit like painting over a dirty wall—sure, you'll cover things up, but you're not fixing the underlying issues. Taking just a few minutes to prepare your files will make the entire cleanup process smoother, faster, and way more effective. This first pass is all about getting organized and figuring out exactly what you're up against.
Before you touch a single setting, get your files in order. I can't stress this enough: create a dedicated project folder and immediately make a copy of your original, raw audio. Tuck those untouched files safely into a subfolder named something like "Originals" or "RAW." This is your safety net. If you edit yourself into a corner or a file gets corrupted, you can always go back to the source. It’s a simple habit that has saved me from disaster more times than I can count.
Listen Like an Engineer
Okay, files are safe. Now, grab a good pair of studio headphones—not your everyday earbuds—and just listen. Close your eyes if you have to. Listen through the entire track from start to finish, but don't pay attention to the words or the performance. You're on a mission to hunt down imperfections.
What are you listening for? Hiss, hum, clicks, mouth noises, sudden volume jumps, weird room echo—anything that distracts from the main recording. Make a mental (or even a physical) checklist of every problem you hear. This diagnostic listen is crucial because it helps you choose the right tool for each specific problem instead of just throwing a generic filter at it and hoping for the best.
The biggest mistake I see people make is trying to use a single "noise reduction" effect to solve every problem. Great audio cleanup is surgical. You have to identify and treat each issue—the hum, the hiss, the clicks—individually to get clean, professional results.
Identifying Common Audio Problems
As you listen, you’ll start to recognize recurring culprits. Knowing what to call them and what causes them is the first step toward fixing them for good.
Here’s a quick checklist to help you identify what you might be hearing in your own audio.
Common Audio Problems and Their Sources
| Problem Type | What It Sounds Like | Potential Cause |
|---|---|---|
| Hum | A low, constant drone (like a refrigerator) | Electrical interference, poor grounding, AC units |
| Hiss | A high-frequency "ssss" sound | Preamp noise, high gain settings, analog tape |
| Clicks & Pops | Sharp, brief, and random sounds | Mouth noises, digital errors, vinyl crackle |
| Plosives | A burst of air on "p" or "b" sounds | Microphone too close to the speaker's mouth |
| Clipping | Harsh, distorted, and fuzzy audio | Recording level was set too high (in the red) |
Once you’ve got your list of offenders, you'll know exactly which tools to reach for in the next steps.
Get Your Levels Right with Gain Staging
Before you start applying any fixes, you need to check your audio levels. This is called gain staging, and it's all about making sure your audio signal is at an optimal volume as it passes through your software. The goal is to get the signal loud enough to be well above the noise floor but not so loud that it distorts.
Take a look at your track's meter. You want the loudest parts—the peaks—to fall somewhere between -12dB and -6dB. This range is the sweet spot. It gives you plenty of headroom, which means your plugins can do their work without introducing new digital distortion. If you get this right now, you won't accidentally boost a bunch of noise along with the voice or instrument, making the rest of the cleanup process so much easier.
Using AI to Surgically Remove Unwanted Noise
For years, noise reduction was a blunt instrument. You could get rid of a steady air conditioner hum or a low-level hiss, but it often came at a cost, leaving the audio you wanted to keep sounding thin, watery, and unnatural. It was like trying to perform surgery with a butter knife. Modern AI tools, on the other hand, are like a surgeon’s scalpel. They let you clean up audio by targeting specific, unwanted sounds without causing collateral damage to the main recording.
This completely changes how we approach audio problems. Instead of fighting with complex filters and frequency bands, you can now literally tell the software what to fix. Imagine you've recorded a podcast interview in a busy coffee shop. You can just tell the tool, "isolate the speaker's voice and remove the background chatter and clinking cups." The AI actually understands the context, separates those elements, and hands you back a clean vocal track that would have been completely unusable just a few years ago.
A Real-World AI Cleanup Scenario
Let's break down a common situation. You're recording an interview outdoors, and right in the middle of a perfect take, a distant siren starts wailing. In the past, you either had to live with it or scrap the take entirely. With an AI tool like Isolate Audio, fixing this becomes almost trivial.
You start by uploading your audio or video file right into your web browser. There's no complicated software to install or configure, which is a huge win for creators who need powerful results without a massive learning curve.
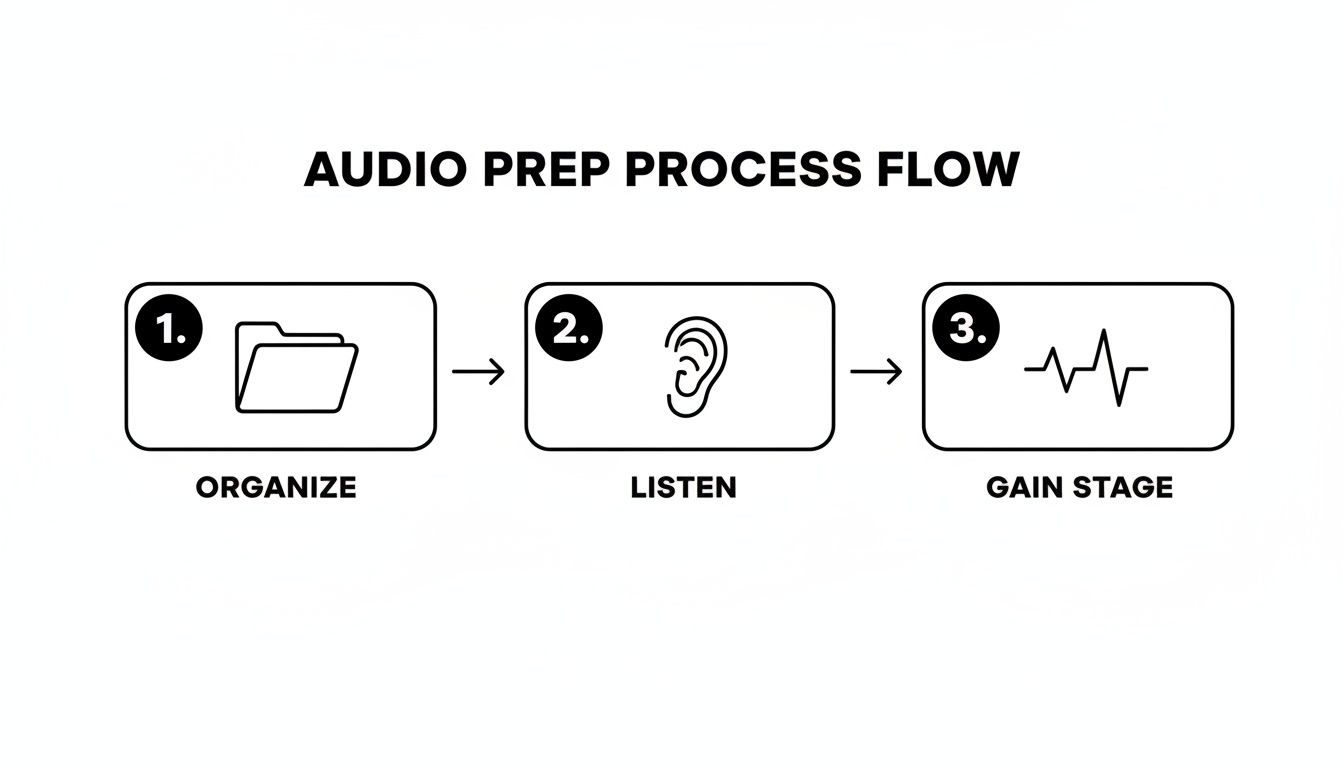
This workflow shows the simple prep work that sets you up for success before you even get to the AI.
Writing an Effective Prompt
The magic really happens in the prompt. Instead of twisting knobs, you just write a clear description of the sound you want to remove. For that siren problem, you could type:
- "Remove the high-pitched siren sound."
- "Isolate the man's voice."
- "Separate the emergency vehicle siren from the dialogue."
The AI gets to work and gives you two separate audio files: one with just the isolated sound (the siren) and another with everything else (your clean dialogue). This gives you total control. You can ditch the siren track completely or even mix a tiny bit of it back in if you want to retain a hint of the original environment.
The real breakthrough here is the AI's ability to understand context. It doesn't just hunt for "noise"—it identifies specific sonic events based on what you tell it, whether that's a "dog barking," "wind noise," or "keyboard typing."
Balancing Quality and Speed
Most of these AI tools let you choose between processing speed and final quality. A "fast" mode is perfect for getting a quick preview in seconds to see if your prompt worked. For the final version you'll use in your project, you’ll want to choose the "best quality" setting. It takes a bit longer, but it uses more processing power to deliver a much cleaner separation with fewer digital artifacts.
This approach—from proper file prep to AI-driven separation—empowers you to solve audio headaches that were once considered impossible. For a closer look at the different platforms out there, check out our guide on the best audio repair software on the market. By learning to use these tools effectively, you can salvage recordings and achieve a level of clarity that truly makes your content stand out.
Going Deeper with Advanced Restoration Tools
Once you've used AI to take care of the big, obvious problems like background chatter or a constant electrical hum, it's time to get surgical. The heavy lifting is done, but now we're shifting from broad fixes to fine-tuning. This is where classic restoration plugins really shine, letting you polish the audio and fix the little imperfections AI might have missed.
Think of it like detailing a car after it’s been through the car wash. You're no longer trying to get rid of a huge swath of noise. Instead, you're targeting specific, isolated sounds to enhance clarity without leaving behind any digital artifacts. The goal is a final track that sounds completely natural and clean.
Pinpoint Fixes with Spectral Repair
One of the most powerful tools in your arsenal for this kind of detailed work is spectral repair. A standard waveform just shows you volume over time, which is useful but limited. A spectral editor, on the other hand, gives you a visual spectrogram—a colorful map of frequency, time, and amplitude. You can literally see every sound.
Let's say you're editing a podcast, and right in the middle of a perfect sentence, someone coughs. On the spectrogram, that cough will stick out like a sore thumb—a bright splash of energy across the frequency spectrum. With a spectral repair tool, you can:
- Visually spot the unwanted sound with laser precision.
- Draw a box around it, just like you would in Photoshop.
- Remove or reduce it, and the software will intelligently patch the hole using the audio surrounding the edit.
This technique is a lifesaver for getting rid of chair squeaks, keyboard clicks, mouth noises, or any other short, annoying sound that can ruin an otherwise great take.
Taming the Room with De-Reverb
Sometimes, the problem isn't a single noise but the space you recorded in. An untreated room with bare walls and hard floors can create a ton of echo, or reverberation, making dialogue sound distant and unprofessional. That's where a good de-reverb plugin comes in.
By carefully adjusting a de-reverb tool, you can tighten up the sound, making it feel closer and more direct. The trick is to be subtle. You want to reduce the room’s character, not completely erase it—that can leave the audio sounding sterile and unnaturally dry.
This demand for crystal-clear audio isn't happening in a vacuum. It’s driven by what listeners are used to. The market for Active Noise Cancellation (ANC) headphones was valued at over USD 20 billion and is projected to nearly double by 2030. This has trained audiences to expect a noise-free experience, pushing creators to clean up audio to a higher standard. You can dig into the ANC headphone market's growth trends to see just how much consumer tech is shaping production quality.
Smoothing Out Sibilance
One last thing to listen for is harsh "s" sounds, a problem we call sibilance. With certain voices or microphones, these high-frequency sounds can be really sharp and grating to the ear.
A de-esser is the tool for this job. It's basically a very specific compressor that only clamps down on those piercing sibilant frequencies, softening them without dulling the rest of the vocal. A touch of gentle de-essing is one of those final polishing steps that separates amateur audio from a truly professional, smooth-sounding final product.
Shaping Your Sound with EQ and Compression

Now that you’ve stripped away all the distracting noise, it’s time to move from cleanup to polish. This is where we stop taking things away and start enhancing what’s left. For this job, our two most trusted tools are the equalizer (EQ) and the compressor.
Think of an EQ as a precision tone control, letting you turn up the good frequencies and turn down the bad ones. A compressor, on the other hand, is your automatic volume fader, making sure everything stays at a consistent level so your listeners don't have to constantly reach for their volume knob. Getting comfortable with these two is non-negotiable for producing professional-sounding audio.
Carving Out Clarity with an Equalizer
When we're cleaning up audio, the EQ's main job is to get rid of frequencies that cause problems—the ones that make a recording sound muddy, boomy, or harsh. It's less about dramatic, sweeping changes and more about making small, precise cuts to let the good stuff shine through.
One of the first moves I almost always make is applying a high-pass filter (HPF). It’s a beautifully simple tool that just chops off all the low-frequency rumble below a point you set. For dialogue, this is a game-changer. All that low-end noise from traffic, air conditioning, or even just bumps on the mic stand lives in a range where the human voice has almost no useful information.
By setting a high-pass filter somewhere around 80-100 Hz on a voice recording, you can clean up an incredible amount of mud without touching the natural character of the voice. It's one of the most effective tricks in the book for instant clarity.
Once the rumble is gone, you can use the EQ for more targeted tweaks. For instance, if a voice has a nasally quality, a small, narrow cut somewhere between 800 Hz and 1.2 kHz can work wonders. If it needs a bit more presence to stand out, a gentle boost around 3-5 kHz will often do the trick. Truly, learning how to properly apply an audio high-pass filter is a foundational skill that will serve you on every single project.
Taming Dynamics with a Compressor
With the tonal balance sorted, the next hurdle is volume. In any natural recording, especially with spoken word, some phrases will be louder than others. A compressor is what we use to smooth out those inconsistencies and create a more polished, even performance.
It works by automatically lowering the volume of any sound that crosses a level you define (the threshold). This brings the loudest and quietest parts closer together, tightening up the dynamic range. For podcasters and video editors, this is absolutely crucial. A well-compressed track is easy to follow whether someone is listening in a quiet room or a noisy car.
For a typical vocal track, here's a solid starting point for your compressor settings:
- Ratio: Begin with something gentle, like 3:1. This tells the compressor that for every 3 decibels the audio goes over the threshold, it should only let 1 decibel out.
- Attack: A medium attack of 10-20 ms is fast enough to catch sudden loud peaks without flattening the natural start of words.
- Release: A medium release around 50-100 ms allows the compressor to stop working smoothly after the loud sound passes.
Now, just lower the threshold until you see the compressor kicking in and reducing the loudest peaks by about 3-6 dB. This subtle approach will even out the volume beautifully, adding that final layer of professional sheen without making the audio sound squashed or unnatural.
You've put in the hours, meticulously cleaning and shaping every second of your audio. Now comes the final, critical step: exporting. Get this part wrong, and all that hard work can be undone in an instant, leaving you with a file that's distorted, quiet, or just won't play nicely with certain platforms.
The trick is knowing how to export for your specific destination. Think of it like this: you wouldn't send a high-resolution master painting to be printed on a t-shirt. You need the right format for the job.
Lossless vs. Lossy: Your Master vs. Your Delivery File
First, let's talk file types. There are two main categories you'll be working with.
Lossless Formats (WAV, AIFF): This is your digital master copy. These files are uncompressed, meaning they contain every last bit of audio data. For archiving or passing the project along to another engineer, always export a 24-bit, 48 kHz WAV file. This is your gold standard.
Lossy Formats (MP3, AAC): These are the workhorses of streaming. They use smart compression to shrink file sizes dramatically, which is exactly what platforms like Spotify, Apple Podcasts, and YouTube need for fast delivery.
Hitting the Loudness Target
Ever notice how you don't have to constantly adjust the volume when jumping between songs on Spotify or videos on YouTube? That's because they normalize everything to a specific loudness level. If your file is too loud, they'll just turn it down, sometimes with a nasty-sounding limiter. If it's too quiet, they’ll boost it, bringing up any leftover noise along with it.
To get around this, you need to aim for a specific LUFS (Loudness Units Full Scale) target before you export.
A common pitfall is exporting a single, "one-size-fits-all" file. To make sure your audio sounds exactly as you intended, you really need to tailor your export for each platform's specific LUFS target, like -14 LUFS for Spotify and YouTube.
My Go-To Export Settings
Here are the settings I use day-in and day-out for some of the most common platforms. They're a great starting point.
| Platform | Target Loudness | File Format | Bit Rate |
|---|---|---|---|
| Spotify | -14 LUFS | MP3 | 320 kbps |
| Apple Podcasts | -16 LUFS | M4A (AAC) | 192 kbps |
| YouTube | -14 LUFS | M4A (AAC) | 320 kbps |
Mastering these final steps is becoming an increasingly vital skill. The market for Audio Noise Reduction Software is expected to jump from over US$ 1,400 million to nearly US$ 1,900 million by 2032, which shows just how much value is being placed on clean, professional audio. You can find more insights into the noise control system market and its growth.
And if your project originated from a video file, don't forget you can learn how to extract audio from video right here on our site before you even start the cleanup process.
Still Have Questions About Audio Cleanup?
Even with a step-by-step guide, you're bound to run into specific questions once you start applying these techniques to your own projects. Let’s go over a few of the most common hurdles that podcasters, musicians, and video editors face.
Can I Clean Audio Directly from a Video File?
Yes, and thankfully, it's easier than ever. You no longer have to go through the tedious process of stripping the audio, cleaning it, and then painstakingly re-syncing it.
Modern tools, including Isolate Audio, let you drop video files like MP4 or MOV right into the application. The software intelligently grabs the audio track for you, so you can start isolating dialogue or zapping noise immediately. Once you're happy with the result, just export the clean audio and replace the original track in your video editor.
Noise Reduction vs. AI Sound Isolation: What's the Difference?
This is a really important distinction to make, as each tool is designed for a different kind of problem.
Traditional noise reduction is your go-to for constant, steady background sounds. Think of things like the low hum of an air conditioner, a persistent electrical buzz, or the hiss from a preamp. It works by learning a "fingerprint" of that noise and then subtracting it from the entire track.
AI sound isolation is a whole different beast. It’s built to tackle unpredictable, complex sounds. A dog barking in the middle of an interview, a car horn blaring during a crucial take, or even two people talking over each other—these are the jobs for AI. It doesn't need a constant sound profile because it's been trained to recognize what a human voice, a siren, or a drum sounds like and can separate them intelligently.
How Do I Keep My Audio from Sounding Unnatural?
This is the million-dollar question. The single most important principle in audio cleanup is "less is more." Your goal isn't to create a perfectly silent, sterile recording; it's to make the audio sound like the noise was never there in the first place.
Always, and I mean always, A/B test your processed audio against the original. Listen for any weird artifacts. Does it sound thin, watery, or have a metallic, "phasey" quality? If so, you’ve pushed the processing too far. Dial it back.
Start with subtle settings and nudge them up just enough to solve the problem without creating a new one. A light touch is what separates a clean, professional sound from something that just sounds obviously processed.
Ready to take on any audio challenge with some AI muscle? Isolate Audio lets you remove unwanted sounds just by describing them. Clean up dialogue, pull out specific instruments, or get rid of background noise in minutes. Give it a shot for free at https://isolate.audio.