How to Make Acapella Tracks That Sound Professional
Gone are the days when pulling a clean vocal from a finished track felt like a dark art, reserved for audio engineers with expensive gear and an obscene amount of patience. Back then, we relied on clunky methods like phase cancellation and surgical EQ, which often left the vocal sounding thin, hollow, and full of artifacts. It was a frustrating, hit-or-miss game.
Today, everything has changed. The process of creating a professional-sounding acapella is now within reach for anyone, whether you're a bedroom producer, a working DJ, or just a curious creative.
A New Era for Vocal Isolation
The real game-changer has been the rise of intelligent AI audio separation tools. Instead of wrestling with frequencies and phase issues, you can now simply upload a mixed song, and a sophisticated algorithm does the heavy lifting, identifying and separating the vocal performance from the instrumental bed. It’s a massive leap forward that has blown the doors wide open for creativity.
But why is this so important right now? Because clean acapellas are the currency of modern music culture. They're the essential ingredient for:
- Viral Remixes: Producers can put their own spin on hit songs without waiting for official stems to drop.
- Creative DJ Mashups: DJs can seamlessly layer the vocals from one track over the beat of another for unique live sets.
- High-Quality Karaoke Tracks: Stripping the vocals from a song to create an instrumental version is now incredibly simple.
- Music Education and Sampling: Aspiring singers and producers can isolate vocals to study technique or chop them up for new beats.
This simple flowchart shows just how much the workflow has shifted from the old, manual grind to today's far more efficient, AI-driven process.
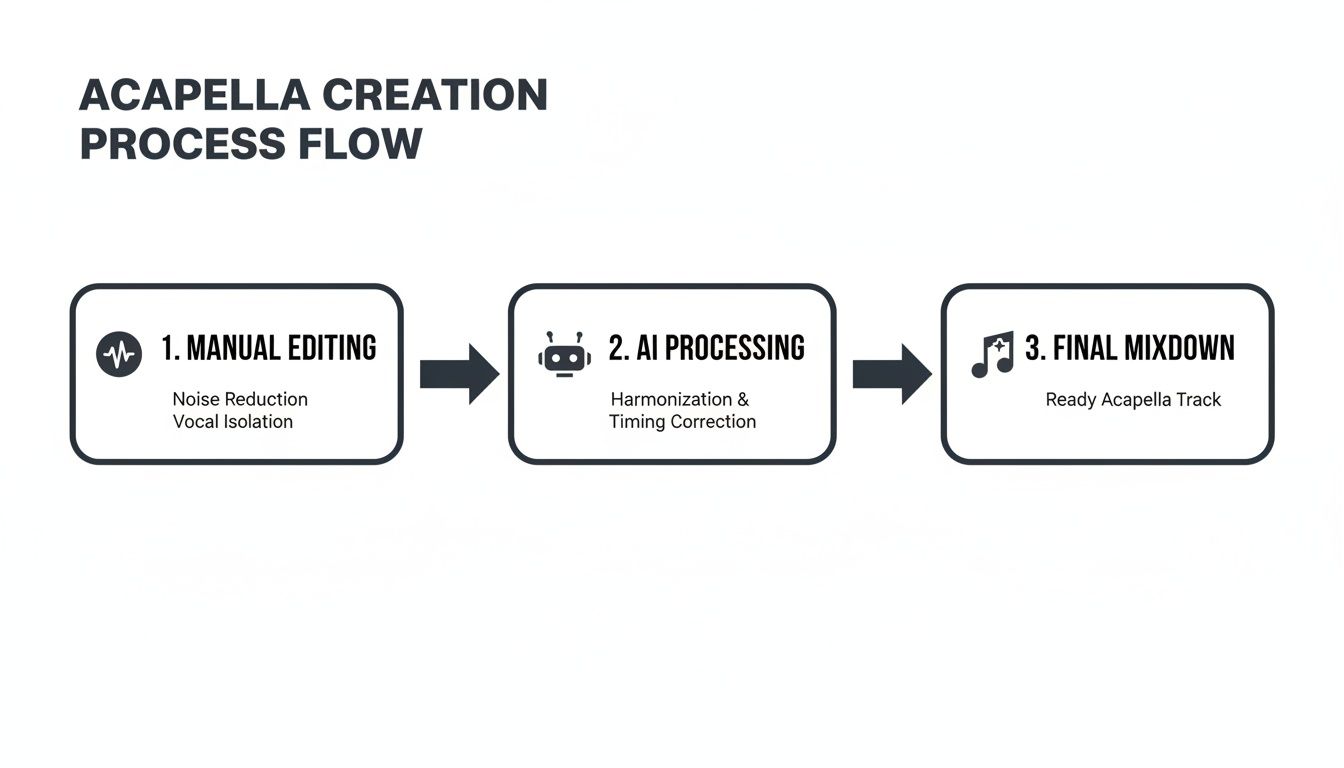
As you can see, the focus has moved from tedious, manual separation to using AI as the primary tool, followed by targeted cleanup and polishing.
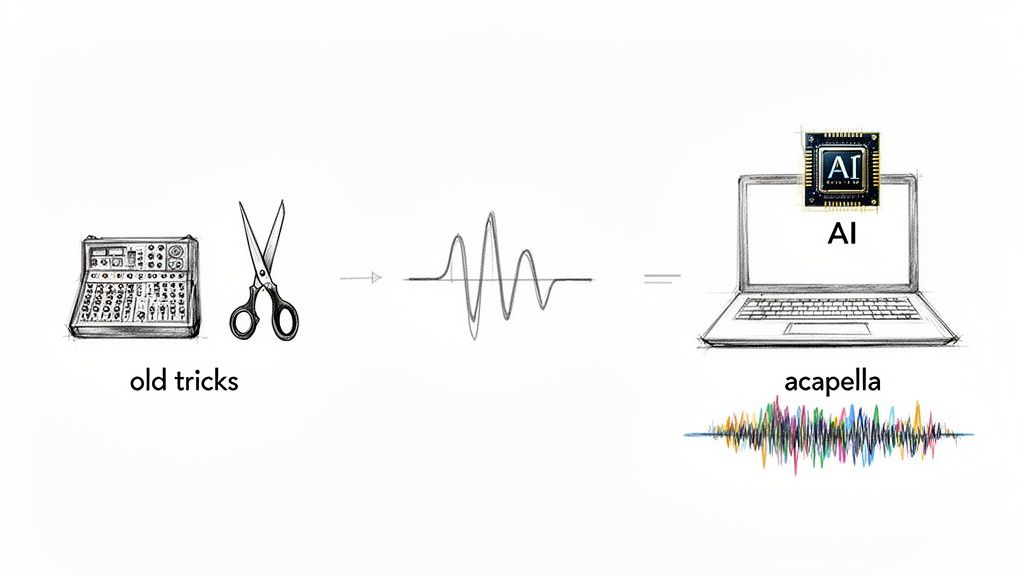
From Manual Labor to Intelligent Tools
The difference between the old ways and the new is night and day. A decade ago, trying to manually isolate a vocal was a time-consuming chore with a pretty low success rate—you’d be lucky to get a usable result 30-40% of the time. Now, the AI vocal remover market has ballooned to USD 180 million, with North America leading the charge at a 34.2% market share.
This isn't just a niche trend. The market is projected to skyrocket to USD 880.1 million by 2034, fueled by the explosion of user-generated content on platforms like TikTok, where acapella-related videos have racked up over 5 billion views. If you want to dive deeper, you can discover more about the growth of AI in audio production and its market impact.
The table below really drives home how much things have improved.
Acapella Creation Methods Then vs Now
| Method | Average Time Per Track | Success Rate | Required Skill Level | Example Tools |
|---|---|---|---|---|
| Traditional (Manual) | 2-5 hours | 30-40% | Advanced | Adobe Audition (Phase Inversion), iZotope RX (Spectral Editing) |
| Modern (AI-Powered) | 2-10 minutes | 85-95% | Beginner | Isolate Audio, Lalal.ai, Audacity (OpenVINO) |
It's clear that AI hasn't just made the process faster; it has fundamentally improved the quality and accessibility for everyone.
This shift is more than just a technical upgrade—it’s a creative revolution. The ability to quickly and cleanly extract a vocal empowers a new generation of artists and producers to experiment in ways that were simply out of reach before.
In this guide, I’ll walk you through the modern workflow, step-by-step. We'll cover how to leverage AI tools and then apply the essential editing and mixing techniques to get a polished, professional acapella that sounds like it came straight from the multitrack session.
Getting Clean Vocals with AI Tools
Alright, you've got a great-quality source file and the right mindset. Now comes the fun part: actually making the acapella. This is where modern AI really shines, but don’t just hit a button and walk away. The choices you make here are what separate a clean, usable vocal from a muddy, artifact-filled mess.
Getting a clean extraction from the very beginning will save you hours of painful cleanup work down the line. It's all about moving past the basic, one-click "stem splitters" and using a more intelligent approach. A tool that can understand what you're asking for will give you results that were once impossible without the original multitrack recordings.
Why Your Source File Is Everything
Before you even think about uploading your track, we need to talk about the audio file itself. This is, without a doubt, the single biggest factor in getting a clean acapella. If you feed the AI a crusty, low-bitrate MP3, you’re basically asking it to build a castle out of sand.
Pro Tip: Always, always start with a lossless audio file. We're talking WAV or FLAC. These formats contain 100% of the original audio data, giving the AI algorithm every last bit of information to work with. A compressed MP3 has already thrown data away to save space, creating artifacts that can easily fool an AI into thinking they're part of the vocal.
Think of it this way: a WAV is like the original photo negative, while an MP3 is a photocopy of a photocopy. You’ll always get a clearer, more detailed result from the negative. Taking a moment to find a high-quality source makes a night-and-day difference.
Going Beyond a Simple "Vocals" Button
Most stem splitters offer a generic "vocals/instrumental" split. That’s fine for simple tracks, but what about a song with a powerful lead, layered harmonies, and ad-libs flying all over the place? This is where getting descriptive with your instructions becomes your secret weapon.
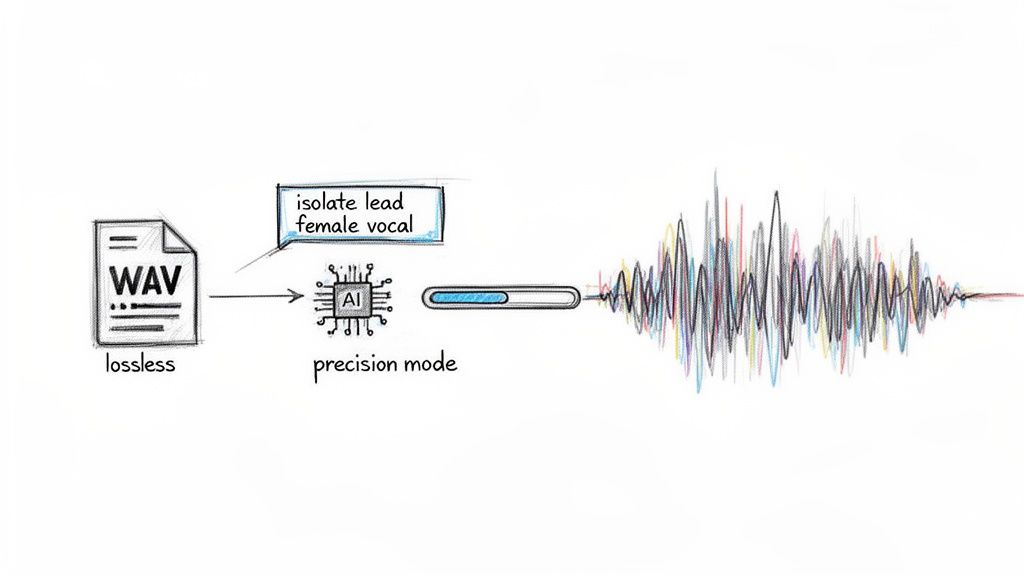
If you're trying to isolate a female lead vocal from a track that also has male backing vocals, a simple "isolate vocals" command is going to mush them all together. A smarter tool, like Isolate Audio, lets you be far more specific.
Instead of just clicking a button, you can type exactly what you want to hear. This gives you a level of control that was previously unthinkable.
By using a precise prompt like "isolate lead female vocal," you’re telling the AI to focus its analysis on the specific frequencies, timbre, and performance characteristics of that one singer. This drastically reduces the bleed from those male backing vocals or other instruments competing in the same range. If you want to dive deeper into how this technology works, our guide on the different types of stem separation software is a great resource.
Here are a few other real-world examples where this matters:
- Dense Choir Music: Instead of a generic split, try "isolate the soprano harmony line" to pull out just one specific part.
- Live Recordings: A prompt like "extract the main speaker's voice" is way more effective at filtering out crowd noise than a simple vocal isolator.
- Hip-Hop Tracks: Use "isolate the main rap verse" to cleanly separate it from the ad-libs and hype man in the background.
Learning to think like this is what will take your acapellas from decent to truly professional.
Choosing the Right Settings for the Job
Your work isn't done after you type the prompt. Most professional AI tools give you options to balance processing speed against output quality. I know it's tempting to pick the fastest option every time, but for your final acapella, that's almost always the wrong move.
Let's break down what you'll typically see:
- Fast Mode: This is perfect for a quick preview to see if a vocal is even worth working with. It's quick, but it often leaves behind more instrumental bleed and artifacts.
- Balanced Mode: A solid middle ground. It's a good compromise between speed and quality for most everyday tasks.
- Best Quality Mode: This is your go-to for the final extraction. It takes longer because the AI is doing a much deeper, more meticulous analysis of the audio. The payoff is a significantly cleaner separation.
For really tough tracks—songs with tons of reverb, busy instrumentation, or vocals buried deep in the mix—keep an eye out for a Precision Mode. This setting is specifically designed for these complex scenarios and can be the difference between a usable stem and a garbled mess. It essentially tells the AI to be extra cautious when separating the vocal from similar-sounding instruments like synth pads or fuzzy guitars. By taking a moment to select the right settings, you're guiding the AI to give you the absolute best starting point for your acapella.
Refining and Cleaning Your Vocal Stem
Running a track through an AI tool gets you 90% of the way to a clean acapella. But that last 10%? That’s where the real work—and the real magic—happens.
Even the best algorithms can leave behind tiny imperfections. You might hear subtle artifacts, a whisper of instrumental bleed, or faint clicks between phrases. This cleanup phase is what elevates an amateur-sounding vocal lift into a professional acapella ready for a serious remix.
Trust your ears above all else. Put the isolated vocal on a loop and just listen. Your mission is to hunt for anything that isn't the lead voice.
And don't just rely on your fancy studio monitors. Check the track on everything you can get your hands on: good headphones, cheap earbuds, your laptop speakers, even your phone. A faint cymbal wash that’s barely noticeable on monitors can become a distracting hiss on earbuds.
Surgical Removal with a Spectral Editor
Once you’ve scouted out the problem spots, it’s time to perform some audio surgery. A typical waveform editor is fine for basic cuts, but it only shows you volume over time. For this kind of detailed work, you need a spectral editor. Think of it as an MRI for your audio, giving you a visual map of all the frequencies in your track.
This visual layout lets you see sounds that are tough to isolate by ear alone. That pesky hi-hat hit? It’ll show up as a clear burst of high-frequency energy, even if it's mostly masked by the vocal. From there, you can literally select and erase these unwanted sounds without damaging the core vocal performance.
Here are a few common issues that a spectral editor makes short work of:
- Cymbal Bleed: Those high-frequency splashes that often sneak in on "s" and "t" sounds.
- Reverb Tails: The lingering ambience from the original song that hangs around after a vocal phrase has ended.
- Snare Ghost Notes: Faint, punchy little snare hits that leak through in the gaps between words.
This might seem intimidating, but it’s a surprisingly intuitive process once you see it in action. You're basically using a visual eraser on your sound file, which is infinitely more precise than trying to get rid of artifacts with a heavy-handed EQ. If you want to go deeper, there are some fantastic audio repair software options built specifically for this kind of task.
Correcting Pitch and Tuning
Let’s be real: no vocalist is perfect. Even the pros deliver notes that are a little sharp or flat here and there. While you absolutely want to keep the performance feeling human, a bit of subtle tuning correction can make a world of difference when you drop that acapella into a new production.
Tools like Melodyne or Cubase's VariAudio are perfect for this, letting you nudge individual notes without destroying the audio. The goal is correction, not perfection. Pushing every note into perfect pitch will give you that robotic, over-processed "auto-tune" sound, and that’s not what we’re after.
Focus only on the notes that genuinely sound off. Gently guide them closer to the center of the pitch, but don’t snap them to a rigid grid. This approach preserves the singer's natural vibrato and character while making sure the whole performance is musically solid. A light touch is always the right move.
Fixing Timing and Rhythm
Pitch is only half the battle; timing is just as crucial. A vocalist’s rhythmic feel, or their "pocket," is what gives the performance its groove. If you're planning to use this acapella in a remix with a new tempo or a different beat, you'll probably need to adjust the timing of certain words or phrases.
Almost every DAW has flexible time-stretching tools that allow you to get in and manually edit the timing of your vocal. You can use these to:
- Tighten up a phrase that drags just a little behind the beat.
- Stretch out a word to fill a space or for dramatic effect.
- Fix small rhythmic inconsistencies so the vocal locks in perfectly with a new drum loop.
Just like with tuning, subtlety is your best friend. Work on small sections, make tiny adjustments, and always listen back in the context of your new track. You want the vocal to feel effortlessly in sync, not like it’s been forced onto a grid. This is one of the most important final steps when learning how to make acapella tracks that sound completely seamless and professional.
Polishing Your Acapella: The Final Mix
So, you've done the hard work of isolating a clean vocal stem. What you have now is the raw performance—the diamond in the rough. The next step is turning that raw audio into a polished, professional acapella that can either stand proudly on its own or slide perfectly into a new track. This is where the magic of mixing comes in, using a strategic chain of effects to add clarity, control, and just the right amount of space.
Think of it like finishing a piece of custom furniture. The AI and your editing did the heavy lifting, shaping and sanding the wood. Now, it's time for the final varnish and polish. A great acapella feels powerful and present, but never sounds over-processed or artificial. Let's walk through the standard vocal chain that'll get you there.
Sculpting with Subtractive EQ
Your first move should almost always be some surgical EQ work. The goal here isn't to start boosting frequencies to make it sound "better"—it's to carve away the junk that’s cluttering up the sound. Even the best AI extractions can leave behind a little bit of low-end rumble or some muddy frequencies from the original instrumental.
Start with a high-pass filter (HPF). This is non-negotiable. It cuts out all the low-frequency garbage that the human voice doesn't even produce, instantly cleaning up the track.
- For a typical male vocal, you can start around 80-100 Hz.
- For a female vocal, you can usually push it a bit higher, somewhere around 100-120 Hz.
Next, you'll want to go hunting for any "boxy" or "muddy" tones. These nasty frequencies usually live somewhere between 200 Hz and 500 Hz. Use a narrow EQ band and sweep through that area. When a specific frequency jumps out and sounds particularly ugly, just pull it down by a few decibels. This one move creates so much more room for the vocal's character to shine through.
Taming Dynamics with Compression
Once the frequency spectrum is cleaned up, it's time to get the dynamics under control. Singers are human—their volume naturally goes up and down. Some words are whispered, others are belted out. Compression is the tool that evens out those fluctuations, making the entire performance feel more consistent and powerful.
A compressor basically turns down the loudest parts of the audio, which then lets you turn up the overall volume of the entire track. The result? The quieter, more nuanced parts of the performance are brought forward without the loud parts blowing out your speakers. For a vocal that still sounds natural and breathes, moderate settings are key. You can get a much deeper look into this with our guide on choosing the right compressor for music.
A Word of Advice: Don't kill it with compression. The idea is gentle control, not squashing the life out of the performance. A good target is to see your compressor's meter showing about 3-6 dB of gain reduction on the loudest peaks. This will give you a balanced, polished sound that still feels human.
The art of vocal processing has become a huge part of modern production. With the global market for vocal processors now valued at USD 1,192.2 million, and AI tools boasting over 95% fidelity, producers can work faster than ever. But these classic techniques are what separate the good from the great. You can find more data on the growth of vocal effects processors and their market.
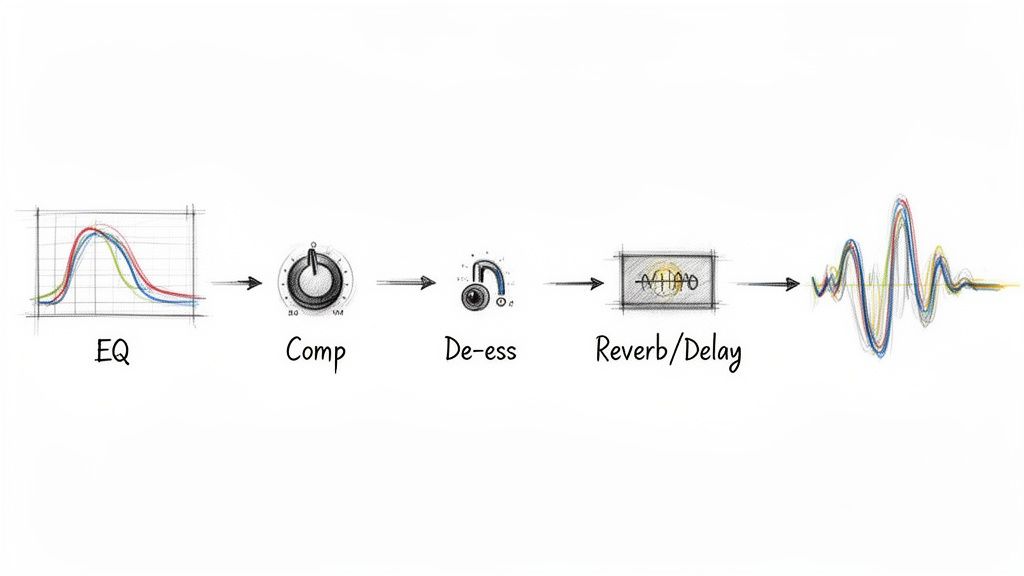
Essential Vocal Processing Chain
Here’s a quick-reference table outlining the typical signal chain for processing a vocal. Think of these as reliable starting points—always let your ears be the final judge.
| Processor | Purpose | Typical Starting Point Setting | Pro Tip |
|---|---|---|---|
| Subtractive EQ | To remove unwanted low-end rumble and muddy frequencies. | High-Pass Filter @ 80-120 Hz; Narrow Cut @ 200-500 Hz. | Find the "ugly" frequencies by boosting with a narrow Q, sweeping, then cutting. |
| De-Esser | To tame harsh "s," "sh," and "t" sounds (sibilance). | Target Frequency: 5-10 kHz; Threshold: ~3-5 dB reduction. | Place it before the main compressor if sibilance is extreme to prevent over-triggering. |
| Compression | To control dynamic range and add punch. | Ratio: 3:1 or 4:1; Attack: Medium (5-10ms); Release: Fast (40-60ms). | Aim for 3-6 dB of gain reduction on the loudest parts for a natural sound. |
| Reverb/Delay | To add space and ambience so the vocal doesn't sound sterile. | Reverb: Short decay (<1.5s), low mix; Delay: Slapback, low feedback. | Send the vocal to a separate effects bus for more control over the wet/dry balance. |
This chain provides a solid foundation for nearly any acapella, giving you a clean, controlled, and professional-sounding result every time.
Controlling Sibilance with a De-Esser
Ever notice those piercingly sharp "s," "sh," and "t" sounds? That's called sibilance, and it can get really aggressive after you've used EQ and compression, which tend to accentuate high frequencies. A de-esser is your secret weapon here. It's basically a special-purpose compressor that only clamps down on those specific harsh frequencies, taming them without dulling the rest of the vocal.
Most de-esser plugins let you zero in on the problem area, which is usually somewhere between 5 kHz and 10 kHz. You just need to apply enough reduction to soften the harshness. Be careful, though—too much, and you'll make the singer sound like they have a lisp. A light touch is all you need.
Adding Space with Reverb and Delay
Last but not least, let's give the vocal a place to live. A completely "dry" acapella with zero effects often sounds sterile and disconnected from any real-world space. A little bit of reverb or delay is all it takes to place the vocal in a natural-sounding environment.
The key here is subtlety. You're trying to create a sense of ambience, not drown the vocal in a cavernous echo.
- Reverb: A short "plate" or "room" reverb works wonders. It adds a subtle sheen and sense of dimension. Keep the decay time short (under 1.5 seconds) and the mix level low. You should feel it more than you hear it.
- Delay: For a different flavor, a simple slapback delay (just one quick, tight echo) can add a ton of depth and character without the long, muddy tail of a big reverb.
By carefully moving through each of these steps, you build a processing chain that elevates your raw acapella into something truly professional and ready for anything.
What to Do With Your Finished Acapella
So, you've gone through the whole process. You’ve isolated, cleaned, and polished your vocal track, and now you’re holding a powerful creative asset. A clean acapella isn't just a vocal part; it's a blank canvas, a starting point for something entirely new.
This is where the real fun begins. Once a vocal is freed from its original track, the possibilities are practically endless. Let's dig into some of the cool things you can do, from full-blown remixes to wild sound design experiments.
Getting an Acapella Ready for a Remix
Before you even think about dropping that vocal into a new project, a little prep work will save you a world of headaches. There are two pieces of information you absolutely need: the original song’s tempo (BPM) and its musical key.
Getting these right is the difference between a pro-sounding remix and an amateurish mess.
Most DAWs have a tap tempo feature, but I find it's often better to use an online BPM analyzer for a more precise reading. Once you know the tempo, you can decide whether to warp the acapella to fit your new project's speed or build your entire track around the vocal's original timing.
Finding the key is just as critical. Tools like Mixed In Key are fantastic for this, but plenty of free plugins can get the job done, too. Knowing the key means you can write new basslines, chords, and melodies that actually work with the vocal, making your remix sound musically intentional and coherent.
A Quick Word on Legality: This is the perfect time for a reminder. It's one thing to make an acapella for your own DJ set or just to practice remixing. But if you plan to release a remix or mashup using someone else's copyrighted vocal, you absolutely need to get permission from the copyright holders. Always clear your samples before you post your work publicly.
Beyond the Remix: Vocal Sampling and Chopping
Don't feel like you have to use the entire acapella. Some of the most iconic sounds in modern music come from producers who slice and dice short vocal phrases into something new.
- Vocal Chops as Instruments: Grab a single word or even just one syllable. Load that into a sampler, and you can literally play it like a keyboard to create a brand-new melodic hook. It's amazing how you can build an unforgettable riff from a tiny piece of the original vocal.
- Rhythmic Stutters: Find a key phrase from the chorus and chop it up to create a rhythmic pattern. By repeating the first syllable of a word—think "I-I-I-I love you"—you can build incredible tension and energy that feels right at home in electronic music.
- Creating Vocal Pads: Take one long, sustained note from the vocal performance. Stretch it out, loop it, and drench it in reverb and delay. The result is a unique, atmospheric pad that’s derived directly from the main vocal, adding a cohesive texture to your track.
Expanding Your Creative Toolkit
The skills you've picked up learning how to make acapella tracks are surprisingly versatile and can be applied in other audio fields.
Dialogue Isolation for Post-Production Filmmakers and video editors are constantly battling noisy location audio. The same AI tools we use for music can be pointed at dialogue to "isolate the speaker's voice," which is a lifesaver for cleaning up background noise and saving takes that would otherwise be unusable.
Creating Backing Tracks You can also just flip the process on its head. Instead of keeping the vocal, you isolate everything but the vocal. This leaves you with a pristine instrumental track, perfect for karaoke nights or for singers who need a backing track for practice or a live performance. It's a simple, brilliant use of the exact same technology.
Questions You'll Probably Ask Along the Way
Even when you have the best tools at your fingertips, making a truly clean acapella is going to throw you a few curveballs. As you get deeper into it, you’ll run into specific problems that need clear-cut answers. Let's tackle some of the most common questions that pop up for producers working on vocal tracks.
What's the Best Audio Format for Vocal Isolation?
I get asked this all the time, and the answer is refreshingly simple: always, always start with the highest quality source file you can possibly get your hands on. For professional results, a lossless format like WAV or FLAC is non-negotiable.
Think of it this way: lossless files contain every last bit of the original, uncompressed audio data. It’s like giving the AI a super high-resolution photograph to work with. Every tiny detail is there, which makes it infinitely easier for the algorithm to tell the vocal apart from the instruments. On the other hand, a compressed file like an MP3 has already thrown away a bunch of that data to save space, creating artifacts that can seriously confuse the AI and leave you with a muddy, imprecise vocal stem.
How Can I Get Rid of Reverb or Delay on an Isolated Vocal?
Ah, the dreaded "baked-in" reverb. This is one of the toughest challenges because effects like reverb and delay essentially become part of the vocal itself. While modern AI tools are getting much better at this, they still have a hard time stripping these effects away completely without messing with the vocal's natural tone.
Your best bet is to reach for a dedicated de-reverberation plugin after you’ve isolated the vocal. Tools like iZotope RX or Acon Digital DeVerberate 3 are built for exactly this job. They analyze the audio, figure out what's reverb and what's not, and let you dial back the ambient tail.
The real secret here is to be gentle. Don't try to obliterate the reverb entirely. Pushing these tools too hard will leave you with a sound that’s thin and weirdly unnatural. Just aim to reduce it enough so it won't clash with the new effects you're planning to add.
Is It Legal to Make an Acapella from a Copyrighted Song?
This is where you need to be smart. Making an acapella from a copyrighted track for your own private use—say, for practicing your remixing skills or for a DJ set nobody else hears—is generally fine. In most places, this falls under the umbrella of "fair use."
But the second you decide to share that work publicly, the game changes entirely. If you upload, sell, or perform a remix using an uncleared acapella, you're committing copyright infringement. Period. To do things by the book, you need to get official permission from the copyright holders, a process often called "clearing the sample." That usually means getting a green light from both the music publisher (who owns the song itself) and the record label (who owns the recording).
Why Do I Still Hear Faint Drums in My Acapella?
You're not going crazy—this is a classic issue called "instrument bleed," and it happens all the time with high-frequency sounds like cymbals and hi-hats. The problem is that these sharp, percussive sounds live in the same frequency neighborhood as vocal sibilance (those "s" and "t" sounds). This overlap makes it incredibly tough for any AI to draw a perfect line between them.
The most effective fix is to roll up your sleeves and do some manual cleanup with a spectral editor.
- First, load your acapella into a tool that gives you a spectral view of the audio.
- Next, look for those tell-tale vertical streaks of high-frequency energy that line up with where the cymbal hits would be.
- Finally, use the editor's eraser or attenuation tool to gently reduce the volume of just those little artifacts, especially in the quiet spaces between words.
It's a bit of surgical work, for sure. But taking the time to do this is what separates a decent acapella from a truly professional one.
Ready to create incredibly clean acapellas with just a few clicks? Isolate Audio uses advanced AI that understands your plain English prompts to extract any sound from any track. Stop wrestling with generic stem splitters and start isolating vocals with precision. Try Isolate Audio for free and hear the difference for yourself.