Making a Remix From Start to Finish A Producer's Guide
Remixing is a craft. At its heart, you're taking a finished song, breaking it down to its core components, and then rebuilding it into something that's entirely yours. It's a process of deconstruction and creative reconstruction—transforming a track to fit your own artistic voice.
Choosing and Prepping Your Source Track
Every killer remix begins with the right raw material. This isn't just about picking a song you love; it's about finding a track that has the potential to become something new and exciting in your hands. Think of it like a chef choosing the perfect ingredients—the quality of what you start with will absolutely define the final dish.
Listen with a Producer's Ear
Before you even think about downloading a file, listen actively. I mean really listen. Don't just hum along to the melody; dissect the track. What parts jump out at you? Is it a killer vocal hook? A quirky synth line? Maybe a specific rhythmic groove?
You're searching for that "golden nugget"—the one piece of the original you can build your entire remix around. For instance, you might hear a faint, almost-buried vocal ad-lib in a busy pop song. That tiny piece, once isolated, could become the hypnotic, looped centerpiece of a deep house banger. Or maybe the syncopated hi-hat pattern from an old funk record is all you need to spark the foundation for a blistering drum and bass track.
The most memorable remixes almost always re-contextualize a single, powerful element from the original. Your first job is to find that element and imagine a new world for it to live in.
Sourcing High-Quality Audio
This part is non-negotiable. The quality of your source audio will make or break your remix. Starting with a low-quality, compressed file is like trying to build a house on a shaky foundation. It's just not going to hold up.
Always, always go for lossless audio formats like WAV or FLAC. These formats contain 100% of the original audio data, giving you the cleanest, most flexible material to work with when it comes time to separate and process.
Here are a few places I consistently look for top-notch audio:
- Beatport & Bandcamp: These are my go-to spots. You can buy lossless files directly from artists and labels, which is perfect, especially if you're working in electronic genres.
- Remix Competitions: Keep an eye on sites like SKIO Music and Metapop. They frequently host competitions where they provide the official multitrack stems. Getting your hands on the original stems is the holy grail—it saves you the entire separation step. If you're new to the term, you can learn more about what stems are and why they're so valuable.
- SoundCloud & YouTube: These are great for discovery, but you have to be careful. Most of the audio is heavily compressed. Your best bet is to look for official artist pages that offer free downloads, which are often high-quality 320kbps MP3s. It's not lossless, but it's a solid plan B.
Legal and Creative Considerations
Finally, a quick but important note on the legal side of things. You need to know the difference between an official remix and an unofficial one.
An official remix is one you're actually commissioned to do by the artist or their label. They give you permission and, more often than not, the original stems. An unofficial remix, also known as a "bootleg," is done without that permission.
While bootlegs are a fantastic way to practice your skills and build a portfolio, you can run into copyright trouble when you try to share them publicly. When you're just starting out, I'd strongly suggest sticking to remix competitions or working on tracks from artists who have openly encouraged remixes. That way, you can share your hard work without worrying about legal headaches.
2. Isolate Stems with Surgical Precision
Once you’ve got your track, it’s time to break it down. This used to be the biggest hurdle in remixing. If you didn’t have the official studio multitracks, cleanly grabbing a vocal or a synth line was basically impossible. Thankfully, AI has completely changed the game.
Modern tools give us the power to deconstruct any stereo file into its core ingredients. We're way past just splitting a song into vocals, bass, and drums. The tech has gotten incredibly precise, letting us perform surgical extractions that producers just a few years ago could only dream of.
Go Beyond Basic Splitting
The real creative breakthrough happens when you move past the standard four-stem separation. Let's say you're working on a dense, layered house track. The main melody might be a mix of a pluck, a pad, and an arpeggio all happening at once. A basic splitter would just lump them all into a single "other" or "melodic" stem, leaving you with a tangled mess.
This is where precise control is everything. Instead of dealing with generic categories, you can now get specific. Imagine telling the software to "isolate the lead synth" or "remove the kick but keep the rest of the drums." This granular control is what unlocks truly unique remixing ideas.
For anyone making remixes, tools that can pull out specific elements—like just a 'piano melody' or even 'background crowd noise'—have leveled the playing field. It can reduce the need for expensive studio time by up to 90% and deliver results that are on par with what a professional engineer could do.
The track you choose to remix often dictates how you'll approach it, whether you're working with official stems from a competition or ripping an MP3 for a bootleg.

As you can see, the path you take to get your audio directly impacts the creative—and legal—freedom you have with your project.
Picking the Right Quality Preset for the Job
When you’re separating stems, you’ll often face a choice: speed or quality. Most solid tools, including Isolate Audio, give you presets to manage this trade-off. Knowing which one to use at the right time will save you a ton of headaches.
Isolate Audio Preset Selection Guide
Choosing the right preset in Isolate Audio depends entirely on what you're trying to accomplish at that moment. This quick guide breaks down the options to help you balance speed with fidelity.
| Preset | Best For | Key Feature |
|---|---|---|
| Fast | Quickly trying out an idea or grabbing a stem for a last-minute DJ set. | Delivers results in seconds, perfect for rapid-fire creative sessions. |
| Balanced | Your go-to setting for most day-to-day remixing work. | Hits the sweet spot between high-quality audio and a reasonable processing time. |
| Best | Final production when you need the cleanest, most artifact-free stems possible. | Pushes the processing to its limit for maximum audio fidelity. |
A good workflow is to use Fast to see if that vocal chop idea even works. Once you know it’s a keeper, run the separation again on Best to get the pristine audio you’ll actually use in your final track.
Tackling Complex Mixes with Precision Mode
Every so often, you'll come across a track where everything feels mushed together. This happens a lot in orchestral music, busy jazz arrangements, or heavily layered electronic stuff where frequencies are all fighting for the same space. A standard separation might struggle to cleanly tell the difference between, say, a cello and a viola playing a similar line.
This is the exact scenario where a feature like Precision Mode is a lifesaver. It’s built to do a much deeper, more detailed analysis of the audio, giving the AI a better shot at untangling those complex sonic knots. It takes a little longer to process, but the improvement in separation can be the difference between a usable stem and a muddy, artifact-riddled mess.
Pro Tip: I switch on Precision Mode anytime I hear noticeable "bleeding" in my first set of stems—like when bits of the hi-hats are still faintly audible in the isolated vocal track. It’s my go-to for cleaning up those stubborn overlaps.
The whole point of this stage is to arm yourself with the cleanest possible building blocks for your remix. The quality of your separated stems directly affects every single decision you make down the line, from EQ to the final mixdown. For a closer look at what's out there, check out our guide on the best stem separation software available today. Taking the time to get this step right gives you the freedom to take your remix in any direction you can imagine.
3. Build Your New Arrangement and Sound
Alright, you've got your clean stems. The deconstruction is done. Now comes the fun part—the actual creation. This is where you take those raw ingredients and cook up something that has your unique signature all over it, transforming the original into a track that feels completely new.
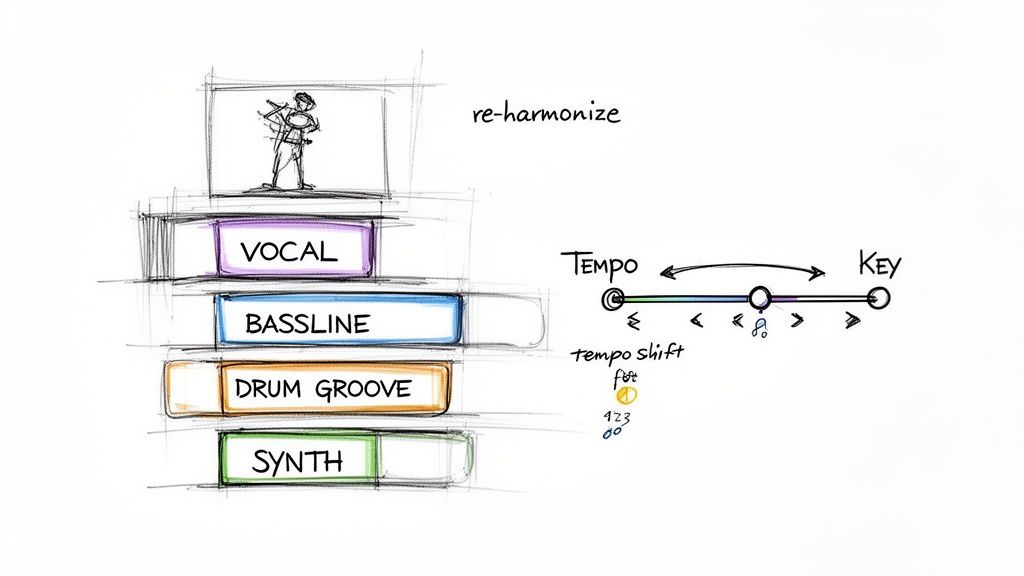
The first thing to do is mess with the song's DNA. Your two most powerful tools right out of the gate are tempo and key. Even a small adjustment to either can totally reshape the emotional core of a song.
For instance, that high-energy 128 BPM pop anthem? Try slowing it down to 90 BPM. You might just uncover a hidden, melancholic vibe in the vocals you never would have noticed otherwise. On the flip side, speeding up a slow ballad can turn it into an absolute dance floor monster. Don't be afraid to get a little weird here—the goal is to find a completely new home for those original elements.
Forge a New Foundation
Once you've landed on a new tempo and key, it's time to build your foundation. This almost always means creating a new drum groove and a fresh bassline. These two elements are the backbone of your entire remix.
Your approach here is what will define the genre and overall feel. You could program a driving four-on-the-floor kick for a house track, chop up a syncopated breakbeat for a drum and bass version, or craft a laid-back, swinging pattern for a lo-fi hip-hop flip. The most important thing is that the groove you create works with the vocal or melody you plan to feature, not against it.
A killer bassline should lock in perfectly with your drums while supporting everything else. A few ideas to get you started:
- Follow the Root: The simplest approach is to write a bassline that follows the root notes of the original chords. This helps maintain some of the original song's harmonic feel.
- Create a Counter-Melody: Get more creative by writing an intricate bassline that weaves in and out of the vocal, adding a whole new layer of melodic interest.
- Go Rhythmic: Use a punchy, percussive bass sound that’s more about the groove than the notes. This is perfect for high-energy genres.
Your new rhythm section is the canvas. Everything else gets painted on top of it. A strong, compelling groove isn't just nice to have; it's non-negotiable. It’s what makes people move.
With this solid foundation in place, you can start dragging in the stems you isolated from the original. But you’re not trying to recreate the original song structure. Think of it more like a puzzle: how can you rearrange these pieces to tell a completely different story?
Reimagine the Vocals and Melodies
One of the most powerful techniques in a remixer’s toolkit is re-harmonization. This is where you take an isolated vocal and write a totally new set of chords underneath it. A vocal that was once sung over a happy, major chord progression can suddenly sound dark and introspective when you place it over minor or more complex, jazzy chords.
This is a true game-changer for flipping the entire mood of a track. You’re not just changing the music; you're changing how the listener interprets the lyrics themselves.
Beyond that, here are a few other classic techniques to manipulate the original parts:
- Chop and Slice: You don't have to use full vocal phrases. Chop up individual words or even single syllables and rearrange them into a new, rhythmic hook. This is a signature sound in countless electronic and hip-hop tracks.
- Get Creative with Loops: Find one tiny, interesting sound—a breath, a guitar pluck, a single synth note—and loop it. This can create a hypnotic, textural layer that glues your whole track together.
- Pitch and Formant Shifting: Getting aggressive with pitch or formant shifting can create some wild effects. You can turn a lead vocal into a gnarly bassline or a ghostly background harmony.
Build Atmosphere with Your Own Sounds and FX
The final layer is adding your own personal touch with new sounds and effects to create space, depth, and atmosphere. Start by layering in your own synths, pads, or samples to flesh out the sonic world and support your new chord progression.
Next, open up your effects plugins. Use reverb to place different elements in a specific "space," whether it's a tight, dry room or a massive, echoing cathedral. Use delay to create echoes and rhythmic patterns that add complexity and movement, especially on vocals and synths.
Think of your effects as storytelling tools. A long, washed-out reverb on a vocal can make it feel distant and nostalgic. A sharp, rhythmic delay can inject a ton of energy and drive. Try automating these effects—making them change and evolve over time—to keep your arrangement dynamic and interesting from the first beat to the last.
Mixing and Mastering Your Remix for Release
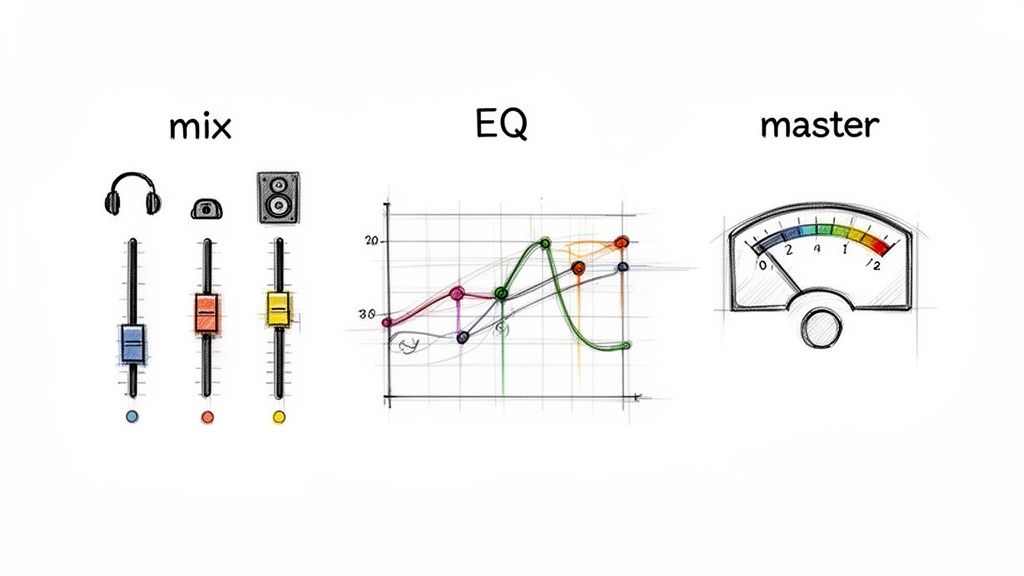
A killer remix isn't just about a clever arrangement; it needs that final, professional sheen to truly hit hard. This is where mixing and mastering come into play. These final steps are the technical craft that transforms your creative ideas into a track that's clean, loud, and powerful on any sound system.
Think of mixing as creating the perfect sonic balance where every single element gets its own space to breathe. It’s all about clarity and making sure everything glues together, so the listener can hear every detail exactly as you intended.
The Art of the Mixdown
First things first: get your levels right. This is more than just sliding faders up and down; you're building a hierarchy for your sounds. The most important parts of your track—usually the kick, bass, and lead vocal—should be the foundation. Everything else gets balanced around them.
Once the levels feel good, it's time to start carving out space with an equalizer, or EQ. Every sound has its own frequency range, and the whole point of EQ is to stop them from fighting each other.
For example, your kick drum and your bassline are both trying to own the low end. If they're clashing, the result is a muddy, undefined mess. A classic trick is to use your EQ to gently cut the bass at the frequency where your kick has its most punch (often around 60-80 Hz). This creates a neat little pocket for each element, letting them both hit hard without stepping on each other's toes.
A great mix isn't about making everything loud; it's about making everything clear. Use your EQ like a sculptor's chisel, carefully carving away frequencies to reveal the shape of your track.
With your track balanced and clean, the next tool to reach for is a compressor. Compression is basically an automatic volume knob that tames the difference between the loudest and quietest parts of a sound. It’s the secret to making things sound punchy, consistent, and glued-together.
- Drums: Add some snap and punch to your kick and snare.
- Bass: Smooth out any wild volume peaks for a solid, unwavering low end.
- Vocals: Even out the vocal performance so every word comes through clearly.
- Glue Compression: A touch of gentle compression on your main output can help “glue” the entire track into a cohesive-sounding whole.
Getting a feel for compression is a huge step forward in production. If you want to go deeper, our guide on choosing the right compressor for music production is a great place to start.
Mastering for Modern Platforms
Okay, your mix is done. The final step before release is mastering. This is the last quality control check, making sure your remix sounds awesome everywhere, from giant club PAs to tiny earbuds. The main goals here are to get your track to a competitive volume and ensure it translates well across all playback systems.
Mastering usually involves a final chain of processors on your finished mix, including things like:
- Final EQ: Making broad, subtle tonal adjustments to the whole track.
- Multiband Compression: Applying targeted compression to different frequency bands for surgical control.
- Stereo Widening: Carefully enhancing the sense of space and width.
- Limiting: This is how you achieve modern loudness. A limiter raises the track's overall volume without letting the loudest parts clip and distort.
When you're setting your limiter, keep streaming services in mind. Platforms like Spotify and Apple Music use loudness normalization, aiming for a target of around -14 LUFS (Loudness Units Full Scale). If you slam your limiter and make your track way louder than this, their algorithms will just turn it down, and it can often end up sounding worse.
The best mastering is transparent. You’re not there to fix big mix problems; you're just enhancing what’s already great. A well-mastered track should sound like a bigger, more polished, and more powerful version of your original mix, ready to stand up against any other professional release.
What To Do With Your Finished Remix
Alright, your remix is exported, mastered, and sounding massive. The creative part is over, but now you’re probably asking yourself, "What do I do with it?" This next step is all about navigating the world of music rights and getting your work heard without landing in hot water.
Everything hinges on one simple question: is your remix official or unofficial? If the original artist or their label asked you to create it, you're in the clear. But if you made it on your own, it's what's known as a "bootleg," and that puts it in a bit of a legal gray area. Bootlegs are an amazing way to sharpen your skills, but you can't treat them like an official release.
Getting a Grip on Copyright
To put it simply, every song is protected by two main copyrights: one for the song itself (the composition) and another for the actual recording (the master). When you create a remix, you're making a "derivative work," which legally means you need a green light from both of the original copyright owners to sell it.
This is a big deal. Global music copyright revenues recently hit a staggering $47.2 billion, and a huge chunk of that comes from streaming platforms where remixes are essential for playlists and viral moments. Without getting the proper clearance, you can't legally upload your track to stores like Beatport or get it distributed to Spotify. You can find more details about current music industry trends on musicmake.ai.
The golden rule of remixing is this: if you don’t have permission, you can't legally make money from it. Trying to cash in on an unofficial remix can lead to takedown notices, legal trouble, and a serious blow to your reputation.
How to Share Your Unofficial Remixes
So, does your bootleg have to die on your hard drive? Absolutely not. You just have to shift your mindset and treat it as a promotional tool, not a product for sale.
SoundCloud and YouTube are your best friends here. They're the go-to spots for sharing unofficial work. Here’s how to do it right:
- Give Credit Where It's Due: Always name the original artist in your track title and description. Something like "Artist Name - Song Title (Your Name Remix)" is perfect. It’s respectful and helps people find the original.
- Don't Even Think About Monetization: Never try to make money from an unofficial remix. The platform's content ID system will probably flag it anyway, and it's a surefire way to get in trouble.
- Offer It Up for Free: A classic move is to offer your bootleg as a free download. This is an awesome strategy to grow your following and give something back to the community that supports you.
Just be aware that these platforms have automated systems. Your track might get a copyright claim, which usually just means the original artist collects any ad revenue. In some cases, it might get taken down completely. It’s all part of the game when you're in the bootleg world.
Turning Your Remix into a Career Move
At the end of the day, every remix you finish—official or not—is another piece in your creative portfolio. It shows off your production chops, your taste, and what makes your sound unique.
Here's how to make that work for you:
- Get it Out There: Share your track on all your socials. Post it in producer forums on Reddit or in Discord servers dedicated to your genre. Start a conversation.
- Shoot Your Shot: If you’re really proud of what you made, why not send it to the original artist? A polite, professional message with a private streaming link can sometimes open doors you never expected.
- Build Your Showcase: Keep your best work curated on a SoundCloud profile or a personal website. This becomes your resume when you're trying to get noticed by labels, A&Rs, or other artists for collaborations.
By handling the release process smartly, you can use your remixes to build your name, find new opportunities, and make sure your creative vision connects with the audience it deserves.
Common Questions About Making a Remix
Even with the best plan, you're bound to hit a few snags when you're deep in a remix project. Let's walk through some of the most common questions and hurdles that pop up for producers, from source file headaches to making sure your track actually gets heard.
What If I Can't Find a High-Quality Song Version?
This is the classic remixer's dilemma. We all want to start with a pristine WAV or FLAC file, but let's be real—that's often not possible. If you can't get a lossless version, your next best bet is a 320kbps MP3.
Thankfully, today's AI separation tools are surprisingly robust and can work wonders even with compressed audio. The key is to find the absolute cleanest version available. You want to avoid anything with obvious digital artifacts or distortion from the get-go. And whatever you do, steer clear of ripping audio from low-quality streaming videos; the sonic flaws are usually baked right in and impossible to remove.
Your remix can only ever sound as good as its source material. Starting with a clean file gives you the best shot at pulling clean, professional stems.
How Do I Make My Remix Stand Out?
A truly great remix isn't just about adding a new beat. It’s about transformation. Slapping a four-on-the-floor kick under an acapella is easy, but the remixes that stick with you are the ones that completely reimagine the original's world.
Want to make something truly memorable? Try thinking along these lines:
- Flip the Genre: Take a ballad's vocal and build a gritty, driving techno track around it. Turn a high-energy rock song into a laid-back, lo-fi groove. The contrast is what grabs people's attention.
- Rewrite the Harmony: Once you have the vocal isolated, try writing a brand new chord progression for it. You can completely change the emotional core of the song just by shifting the harmony from major to minor, or by introducing more complex, jazzy chords.
- Zoom In on a Detail: Use an AI tool to grab one tiny, almost unnoticeable piece of the original—a breath, a weird synth texture, a single percussive hit—and make that the central motif of your remix.
Ultimately, your own sound design is your secret weapon. That custom synth patch you've been perfecting or that weird effects chain you built? That’s where your unique voice as a producer really comes through.
Is It Legal to Upload an Unofficial Remix?
Let's be direct: uploading an unofficial remix without getting permission is technically copyright infringement. Platforms like SoundCloud and YouTube have automated systems that are incredibly good at flagging copyrighted material. When they find it, your track could be removed, muted, or have its monetization redirected to the original copyright holder.
Now, it's true that many artists and labels turn a blind eye to bootlegs, seeing them as a form of free promotion. But the risk of a takedown is always there. The most professional (and safest) routes are to either participate in official remix competitions or to reach out directly to the artist or their label to get the green light.
Ready to deconstruct your next track with surgical precision? Isolate Audio lets you pull apart any song using simple text prompts. Get the clean, high-quality stems you need to bring your creative vision to life. Try it for free at isolate.audio.