Music Production Software for Beginners: A Practical Guide
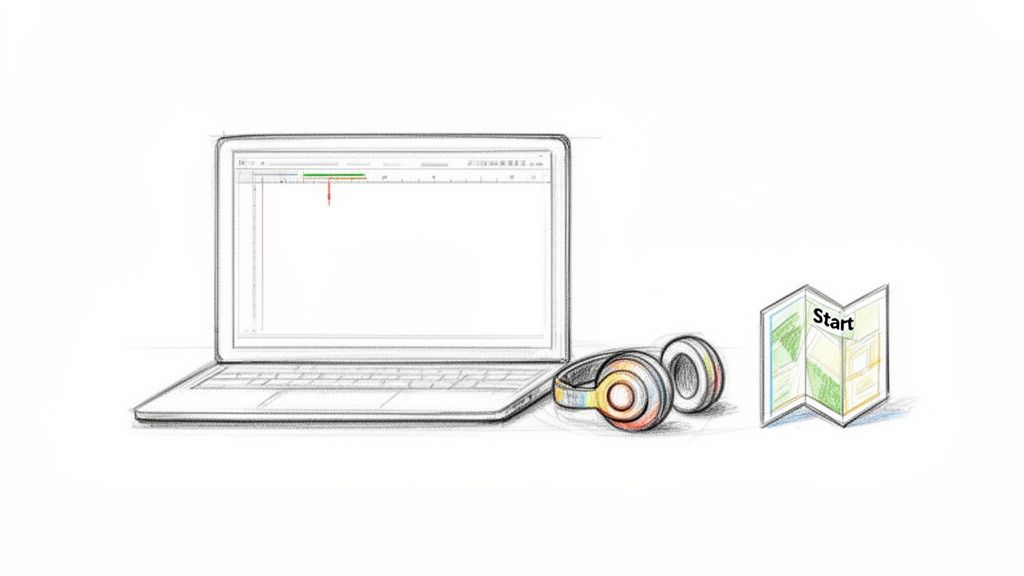
Diving into music production for the first time can feel overwhelming. There's a whole world of gear, tech, and lingo to learn. But don't worry—this guide is your road map. We'll start with the most important piece of your setup: your music production software.
This software is often called a Digital Audio Workstation, or DAW for short. It's the heart of any modern studio.
Think of a DAW as a complete recording studio packed into your computer. It’s the digital space where you’ll record audio, arrange your ideas, mix all the parts together, and ultimately bring your tracks to life.
Your First Step Into Digital Music Creation
The best part? You don't need a six-figure studio budget or a music degree to get started. Creating professional-sounding music from your bedroom is more achievable today than ever before, all thanks to incredible software.
We'll walk you through picking the right music production software for a beginner, understanding the essential tools you'll use every day, and even building your first song from the ground up.
Your journey starts by choosing the right creative command center. Whether you're making electronic beats, recording a podcast, or scoring a film, there's a DAW out there that fits what you want to do. This guide is all about cutting through the noise and giving you clear, practical advice.
We're going to focus on:
- Breaking Down the Jargon: We'll explain key terms in plain English, using simple analogies to make sure everything clicks.
- Giving You Actionable Steps: Forget dry theory. We'll provide a real workflow you can follow to create your first track.
- Helping You Make Smart Choices: We’ll help you decide between free and paid software so you can find the perfect tool for your goals and budget.
The Growing Accessibility of Music Tools
Music creation has exploded in recent years, putting pro-level tools into the hands of anyone with a laptop. According to market analysis, the global music production software market is expected to grow by USD 432.8 million between 2025 and 2029, climbing at a rate of nearly 7.7% each year.
This boom is driven by a huge wave of new creators—over 50 million aspiring artists worldwide are now building their own home studios with these digital tools. You can dig into more of the numbers in Technavio's market report.
For you, this growth means more choices, better software, and more innovation.
A Digital Audio Workstation is your digital canvas. It’s the single most important tool in your arsenal, allowing you to capture, shape, and finalize every sound in your composition.
We'll also look at how game-changing AI tools like Isolate Audio can simplify tricky tasks and open up new creative doors from day one. By the time you finish this guide, you’ll have the confidence and know-how to start making your own music.
What a Digital Audio Workstation Actually Does
So, what exactly is a Digital Audio Workstation? Let's cut through the tech talk.
Think of a DAW as the ultimate creative studio, all packed into your computer. If you were a painter, it’d be your canvas, your brushes, and every color imaginable, all in one place. For a filmmaker, it's the editing suite where all the scenes, sounds, and effects come together.
Essentially, it's the digital environment where you record, arrange, mix, and finalize your music. Every single sound—from the quietest hi-hat to the loudest vocal—lives and breathes inside your DAW. This is the heart of any music production software for beginners.

While they all have their own unique look and feel, nearly every DAW is built around three core areas. Get comfortable with these, and you'll be well on your way to making music.
The Three Pillars of a DAW
Picture these three sections as the main rooms of your virtual studio. You'll constantly move between them as you build a track from a simple idea into a polished song.
The Timeline (or Arrangement View): This is where your song takes shape. It’s like a big, open grid where time flows from left to right. You'll drag and drop your sounds—drum loops, synth melodies, vocal takes—onto this timeline, arranging them like building blocks to form verses, choruses, and bridges. It gives you a bird's-eye view of your entire track.
The Mixer: Welcome to your sound-balancing command center. Every instrument and vocal track gets its own channel here, complete with a volume fader, a pan knob (to place sounds left or right), and spots to add effects. This is where the real magic of mixing happens, letting you make sure the bass sits just right and the vocals cut through clearly.
The Library (or Browser): Think of this as your sonic treasure chest. It's where you'll find all your tools: virtual instruments, audio effects, and your collection of sound clips (often called samples). Need a piano? A heavy 808 kick drum? You’ll find it in the library and pull it right into your project.
Your DAW is so much more than a simple recording device. It’s a creative playground that lets you not just capture sound, but mold it, reshape it, and transform it in ways that once required a room full of expensive hardware.
Audio vs. MIDI: The Two Languages of Sound
Before you dive in, there’s one last crucial concept to grasp: the two types of information your DAW works with. Understanding this difference is a game-changer for any producer.
First, you have audio. This is exactly what it sounds like—a direct recording of sound waves. When you sing into a microphone or record an electric guitar, you're creating an audio file. Your DAW captures that sound wave and displays it visually, letting you see and edit the actual recording.
Then, there’s MIDI (Musical Instrument Digital Interface). This is where things get really interesting. MIDI isn't sound; it's data—a set of instructions that tells a virtual instrument what to do. Think of it like a digital player piano roll that says, "play a C note, this hard, for this long." You can change the notes, fix mistakes, or even swap out the piano for a synthesizer, all without having to re-record a thing.
Getting your head around this is a huge first step. You'll be using audio for things you record from the real world and MIDI to compose and program parts with the incredible world of virtual instruments at your fingertips.
Choosing Your First Music Production Software
Jumping into the world of Digital Audio Workstations, or DAWs, can feel like trying to pick a car without knowing how to drive. The sheer number of options is overwhelming, and every company claims their software is the one you need. But here’s a secret from someone who's been there: the "best" music production software for beginners isn't about having the most features. It's about finding the one that actually makes you want to create.
Forget the hype and the endless spec-sheet comparisons for a moment. Your first DAW should feel less like a complex spreadsheet and more like a creative playground. It needs to get out of your way and let your ideas flow freely.
Let's cut through the noise and focus on what really matters when you're just starting. I'll give you a clear framework to make a smart choice that fits your goals and, most importantly, your workflow.
Focus On These Four Essential Features
When you're looking at different DAWs, it's easy to get lost in technical jargon or long lists of obscure plugins. Don't fall into that trap. Your decision should really hinge on four key areas that directly impact how quickly you can learn and start making music.
An Intuitive Interface: First impressions matter. Does the layout make sense to you? A good beginner DAW has a clean, logical design that doesn’t bury essential tools under layers of confusing menus. If you can't figure out how to create a new track or add a simple effect within a few minutes, it might be more frustrating than it's worth.
Versatile Built-in Instruments: You won’t have a massive library of expensive third-party plugins when you start. That makes your DAW's own "stock" instruments incredibly important. Look for software that comes with a decent variety of sounds—things like synthesizers for basslines and melodies, drum machines for beats, and maybe some sampled instruments like pianos and strings. This lets you compose full arrangements right out of the box.
A Solid Set of Core Effects: Effects are what you'll use to shape and polish your sounds. Your first DAW should absolutely come with the essentials. That means a good EQ (for balancing frequencies), a compressor (for controlling volume), and reverb (for adding a sense of space and depth).
Simple Editing Tools: Making music involves a ton of arranging, cutting, and pasting. The software needs to make it easy to edit both MIDI notes and recorded audio. Ask yourself: can you easily fix a wrong note or trim the silence from a vocal take? These are the simple, repetitive tasks you'll be doing constantly.
Community and Learning Resources Matter Most
A DAW’s feature list is only one part of the equation. As a beginner, you will have questions and you will run into roadblocks. It's inevitable. This is where the community around the software becomes your most valuable asset.
A large, active user base means you'll find an almost endless supply of tutorials on YouTube, helpful threads on forums like Reddit, and detailed guides all over the web. Choosing a popular DAW like Ableton Live or FL Studio ensures that whenever you're stuck wondering, "How do I do X?", a clear answer is just a quick search away. This support system is arguably more important than any single fancy feature.
A feature-packed DAW with no community support is like a powerful spaceship with no instruction manual. You might have all the tools, but you’ll have no idea how to get off the ground.
Free vs. Paid Music Production Software: A Snapshot for Beginners
One of the biggest hurdles for any new producer is deciding whether to start with free software or invest in a paid platform right away. Honestly, there's no single right answer here—each path has its own pros and cons. Free DAWs are fantastic for getting your feet wet without any financial risk, but paid options often provide a more complete, long-term solution.
To help you decide which route is better for you right now, here’s a simple breakdown.
Free vs Paid Music Production Software: A Snapshot for Beginners
| Feature | Free Software (e.g., GarageBand, Cakewalk) | Paid Software (e.g., Ableton Live, FL Studio) |
|---|---|---|
| Initial Cost | $0. Perfect for starting with zero budget. | $99 - $700+. Represents a significant upfront investment. |
| Core Features | Includes all essential recording and editing tools. | Offers advanced features, premium instruments, and effects. |
| Limitations | Often has track count limits or lacks advanced mixing tools. | Virtually no limitations, built for professional workflows. |
| Best For | Absolute beginners who want to learn the basics without commitment. | Serious beginners ready to invest in their long-term growth. |
Ultimately, free tools let you learn the ropes without the pressure of an investment. If you're exploring that path, our guide on the best free DAWs for Windows offers a deeper dive into some excellent starting points. Paid software, on the other hand, is a commitment to a platform you can grow with for years.
A Simple Workflow for Creating Your First Song
All the theory in the world is great, but the real fun begins when you roll up your sleeves and start making noise. Think of this as your first hands-on lesson, designed to walk you from that scary, blank project screen to your very first musical loop. We're going to put the concepts aside and focus on the exact, repeatable steps producers take every single day.
The goal right now isn't to create a masterpiece. It's to build a little momentum and prove to yourself that you can take an idea from your head and make it real. By following this simple five-step workflow, you'll gain that crucial bit of confidence that only comes from hearing your own creation play back through your speakers.

Step 1: Set Your Project Tempo
Before a single note is played, you have to decide how fast your song is going to be. This is the tempo, and it’s the heartbeat of your track. Measured in Beats Per Minute (BPM), the tempo sets the entire mood and energy level.
A slower tempo, maybe around 60-80 BPM, is perfect for a chilled-out, soulful vibe. Something faster, like 120-140 BPM, is the sweet spot for upbeat dance and pop music. For this first go, let's start with a nice, round 120 BPM. Find the BPM setting in your DAW—it's almost always in plain sight at the top of the screen—and just type in "120." That one small action lays the entire rhythmic groundwork for your song.
Step 2: Create a Compelling Drum Beat
With the tempo locked in, it's time for the backbone: the drums. The drums provide the pulse and groove that make people want to nod their heads. As a beginner, you’ve got two great ways to get a beat going fast.
The first is to use drum loops. Most DAWs come packed with libraries of pre-made drum patterns. Just browse through them, find one that sounds good to you, and drag it onto a new audio track. It will automatically snap to your 120 BPM tempo. It's an instant way to get a professional-sounding rhythm going.
Your other option is to build the beat yourself using a virtual drummer or step sequencer. This is where you get to be the drummer.
- Create a New MIDI Track: Add a fresh track and load a drum kit instrument onto it.
- Draw a MIDI Clip: On the timeline, create a short, four-beat (one-bar) empty clip.
- Program the Pattern: Inside that clip, you'll see a grid or piano roll where you can place drum hits. A classic four-on-the-floor dance beat is the perfect place to start:
- Place a kick drum on every main beat (1, 1.2, 1.3, 1.4).
- Add a snare drum on beats 2 and 4.
- Finally, put a closed hi-hat on every eighth note in between the kicks.
Now, just loop that one-bar pattern for four bars, and you have a solid, foundational beat.
Step 3: Program a Groovy Bassline
You've got rhythm, now you need some low-end. The bassline works hand-in-hand with the drums to create the core groove of the song. It fills out the sound and gives the track a sense of power.
Create another new MIDI track and load up a bass sound—a simple synth bass is a great choice. Using the same piano roll editor you used for the drums, program a simple, repeating bassline. Don't get hung up on music theory; just focus on finding a couple of notes that sound good together. A fantastic trick is to have your bass notes hit at the same time as some of the kick drums. This locks them together rhythmically for a tight, punchy foundation.
Step 4: Add a Simple Melody
With the foundation set, it’s time to add the part people will hum later. The melody is often the most memorable part of a song.
Make one more MIDI track and pick an instrument that inspires you—a piano, a basic synth, whatever catches your ear.
Don't have a MIDI keyboard? No problem. Most DAWs have a feature that lets you use your computer keyboard as a piano. It's the perfect way to noodle around and find a melody without any extra gear.
Seriously, don't overthink this part. Try playing just two or three notes over your beat and bassline. A simple, catchy melody is almost always better than something complicated. Record your idea or punch it into the piano roll, and loop it over your four-bar section.
Step 5: Arrange Your Parts
Believe it or not, you now have all the core building blocks of a song: drums, bass, and a melody. In the production world, these individual tracks are often called "stems," and arranging them is how you turn a loop into a full track. If you want to dive deeper, we have a whole guide on what stems are in music.
For now, let's just build a simple mini-arrangement to bring it all together.
- Bars 1-2: Let's start with just the drum beat playing by itself.
- Bars 3-4: Now, bring in the bassline to get the groove going.
- Bars 5-8: Finally, introduce the melody over the top of everything.
And that's it! By following these five steps, you’ve turned a blank project into a structured musical idea. This isn't just a one-off exercise; it's a fundamental process you can use to start every single track you make from here on out.
AI Audio Tools: Your Secret Weapon for Creativity
Think of your DAW as your main studio, the command center for everything you create. But even the best studios have specialized gear for specific jobs. That's where AI audio tools come in—they're like having a super-fast, incredibly skilled assistant who can handle the tricky stuff, letting you focus on the fun part. For anyone just starting out with music production software for beginners, these tools are an absolute game-changer.
Instead of spending hours manually chopping up audio or trying to EQ out a specific sound, you can now let smart software do the heavy lifting. This isn't just a fleeting trend; it’s a real shift in how music gets made. It smashes through technical roadblocks and puts the creative power right back where it belongs: with you. This is especially true for tasks that used to be incredibly difficult, like pulling a single instrument out of a fully mixed song.
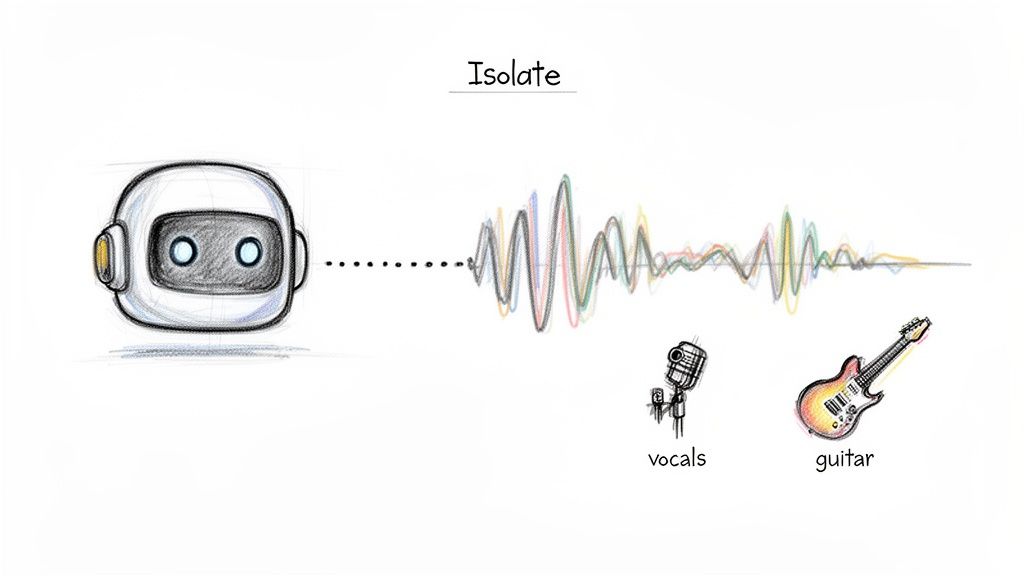
This idea of "un-mixing" a track is exactly what the image above shows. AI can dive into a single audio file, listen intently, and intelligently pull out just the vocals or just the guitar. Suddenly, any song file becomes a source of new creative material.
AI Is Your Creative Assistant, Not Your Replacement
The rise of AI in music is making it possible for anyone to create high-quality tracks without needing a decade of technical training. The proof is in the numbers. The AI music generation market is expected to rocket from USD 1.18 billion in 2026 to a staggering USD 7.29 billion by 2036, all thanks to a new wave of creators jumping in. You can see the full breakdown in Meticulous Research's market analysis.
This explosion is being fueled by tools like Isolate Audio, which use simple, everyday language to get complex jobs done. Imagine just typing "isolate the vocals" or "remove the bass" and getting a perfect audio file back in moments. No more wrestling with confusing plugins or watching hours of tutorials. You just say what you want and get back to making music.
AI audio tools aren't here to replace your creativity; they’re here to amplify it. They handle the tedious, technical work so you can spend more time experimenting and less time fighting with your software.
This approach unlocks a ton of practical uses that were once out of reach for beginners. You can deconstruct your favorite songs to see how they were made, create totally unique samples, or rescue a recording you thought was unusable—all with just a few clicks.
Practical Ways to Use AI Tools
So, how does this actually work in the real world? Let's get practical. Here are a few ways an AI tool can become your go-to partner alongside your DAW.
Create Remixes and Mashups: Ever wanted to remix a classic track but couldn't find the official vocal-only version (the "acapella")? Now you don't have to. With an AI stem separator, you can upload the original song and pull out the vocals yourself. Drop that clean vocal track into your DAW, and you're ready to build something entirely new around it.
Make Custom Backing Tracks: Practicing your instrument is way more fun with a backing track. Instead of hunting online for a generic one, make your own. Take any song, tell the AI to "remove the lead guitar," and you've got a perfect practice version with everything but the part you're about to play.
Isolate Sounds for Sampling: Every producer's secret sauce is their unique sound library. You can find amazing sonic textures everywhere—in movie dialogue, on old vinyl records, or from recordings you make yourself. Use an AI tool to grab just the sound you want, like the sound of rain from a film scene or a single snare hit from a classic funk song. Instant one-of-a-kind samples.
Clean Up Your Recordings: We've all been there. You record a perfect vocal take, but a dog starts barking halfway through. Or maybe you're editing a podcast plagued by the hum of an air conditioner. AI-powered audio repair can identify and surgically remove that unwanted noise, saving an otherwise great recording. For a deeper dive, check out our guide on audio repair software.
By weaving these kinds of specialized AI tools into your process, you’re not just learning to make music—you’re building a smarter, faster, and more creative workflow from day one.
Common Beginner Mistakes and How to Avoid Them
Every single producer I know, from bedroom hobbyists to chart-topping pros, has stumbled along the way. It's just part of the process. But while making mistakes is how you learn, you can sidestep some major headaches by knowing what trips most people up at the start.
Think of it this way: mistakes aren't failures; they're lessons. By picking up a few good habits early on, you build a much stronger foundation, keep your motivation high, and get back to what really matters—actually finishing your music.
The Trap of More Gear and Software
The number one pitfall for new producers is what we call ‘gear acquisition syndrome’ (GAS). It’s that nagging feeling that the next plugin, the next sample pack, or that shiny new synth is the one thing you need to make your tracks sound amazing. It’s a tempting lie.
Here’s the truth: getting really, really good with one piece of music production software for beginners is a million times more effective than barely knowing how to use ten. The stock plugins and instruments that came with your DAW are incredibly powerful and more than capable of creating professional-sounding music.
Don't confuse collecting tools with making progress. A master chef can cook a world-class meal with one sharp knife, but a beginner will struggle in a kitchen packed with expensive, unused gadgets. Master the tools you already have first.
Why Less Is Often More in Production
Another classic rookie move is drowning everything in effects. The first time you hear a lush reverb or a cool-sounding delay, the temptation is to slap it on every track. The result? A muddy, cluttered mess where no instrument can breathe and everything fights for attention.
Before you start piling things on, try taking things away first.
- Start with Volume: Get as far as you can with just the volume faders. A good "static mix" where the basic levels are balanced is the bedrock of a great track. Don't touch an EQ or compressor until you've done this.
- Use Effects with Intent: Always ask yourself why you're adding an effect. Is this delay creating a cool rhythmic bounce, or is it just making the synth sound blurry? Be purposeful.
- Organize Your Projects: A messy project is a creative dead end. Take a few seconds to name your tracks ("Kick Drum," "Gritty Bass," "Verse Vocal") and color-code them. A clean workspace helps you think clearly and work faster.
It's never been easier to get into making music. What was once exclusively professional gear is now accessible to everyone, and beginners now make up about 60% of all users. This massive shift is being driven by user-friendly software and cloud-based tools that help people get results in minutes, not months. You can dive deeper into these trends in this report on the growth of the music production market.
By sidestepping these common traps, you can stop chasing software and start investing in your skills—and that's the only thing that will truly make your music better.
Answering Your Biggest Questions About Making Music
Stepping into the world of music production can feel a bit like trying to navigate a spaceship for the first time. There are a lot of buttons, a lot of new terms, and it's completely normal to feel a little lost. So, let's clear up a few of the most common questions that trip up beginners.
Getting these answers straight will help you cut through the noise and focus on what you're actually here to do: make music.
Do I Really Need a Ton of Expensive Gear to Start?
Let’s bust this myth right now: absolutely not. The idea that you need a studio packed with thousands of dollars of hardware is one of the biggest misconceptions in music production. Honestly, you can get started making incredible-sounding music with just three things: a reliable computer, a decent pair of headphones, and a DAW you're willing to learn.
Plenty of chart-topping hits were made entirely "in the box"—a term we use for creating music completely inside a computer. You can always add things like a MIDI keyboard or an audio interface down the road as you figure out what you truly need. Don't let gear hold you back.
What’s the Best Music Production Software for a Beginner?
This is the million-dollar question, but the answer is simpler than you think. There's no single "best" software for everyone. The right one for you depends on your budget, your computer's operating system, and the kind of music you're excited to create.
The most important decision isn't which software you pick, but that you actually commit to learning one inside and out. Constantly switching between different DAWs is a classic beginner mistake that will stall your progress faster than anything else.
If you're on a Mac, GarageBand is a phenomenal free starting point. For paid options, many electronic producers swear by Ableton Live, while FL Studio has a massive following in the hip-hop and EDM worlds. Just pick one and dive in.
How Long Does It Take to Get Good at This?
You can genuinely learn the basics and sketch out your first simple song in an afternoon. But becoming truly proficient? That’s a lifelong journey, and that's the fun part! The secret isn't cramming for hours but staying consistent.
Forget about trying to produce a complex masterpiece right out of the gate. Instead, focus on finishing small, simple tracks regularly. Celebrate every little victory, whether it's programming your first drum beat or finally figuring out a keyboard shortcut. The key is to enjoy the process and learn one new thing at a time.
Ready to unlock new creative possibilities and streamline your workflow? Isolate Audio uses AI to help you extract vocals, create backing tracks, and clean up audio with simple text prompts. Try it for free and see how it can transform your music production process.