Remove Background Noise Audio: Practical Guide to remove background noise audio
We’ve all been there. You nail the perfect take, only to discover a persistent hum, the distant rumble of traffic, or a coworker’s conversation bleeding into the background. Unwanted noise can completely ruin an otherwise great recording.
The good news is that you don't have to live with it. The best way to remove background noise from audio these days involves using smart, AI-powered software. These tools can surgically target and cut out distracting sounds without degrading the voice or music you want to keep. It's a game-changer compared to the old, manual methods that often took hours and produced mixed results.
Why Clean Audio Is a Non-Negotiable
For anyone creating content—whether you're a podcaster, video editor, or musician—clean audio isn't just a "nice-to-have." It’s everything. Distracting background noise is the audio equivalent of a shaky camera; it instantly makes your work feel amateurish and pulls your audience out of the experience.
This guide is built around a practical, real-world workflow to fix this common headache. We’ll lean on modern tools like Isolate Audio that simplify the entire process, often down to simple text prompts. You no longer need to be a seasoned audio engineer to get that crisp, studio-quality sound.
The Rush for Clearer Sound
The demand for high-quality audio has absolutely exploded, driving huge innovation in this space. The global background noise reduction software market, valued at USD 2.31 billion in 2025, is projected to skyrocket to USD 45.02 billion by 2034. That’s not just growth; it’s a clear signal that pristine audio is becoming the standard for everyone. You can see the full industry analysis from Business Research Insights to get a sense of just how fast this is moving.
What You'll Learn Here
My goal is to give you a straightforward, actionable plan to take back control of your sound. We'll walk through the entire process, from prepping your files to applying the final polish.
You'll learn how to:
- Get your audio files ready for the best possible results.
- Use AI to pinpoint and erase unwanted sounds with surgical precision.
- Add the finishing touches for a truly professional-grade result.
Mastering these techniques isn't just about cleaning up a file. It’s about making sure your message is heard, loud and clear, and delivering a polished experience that keeps your audience hooked.
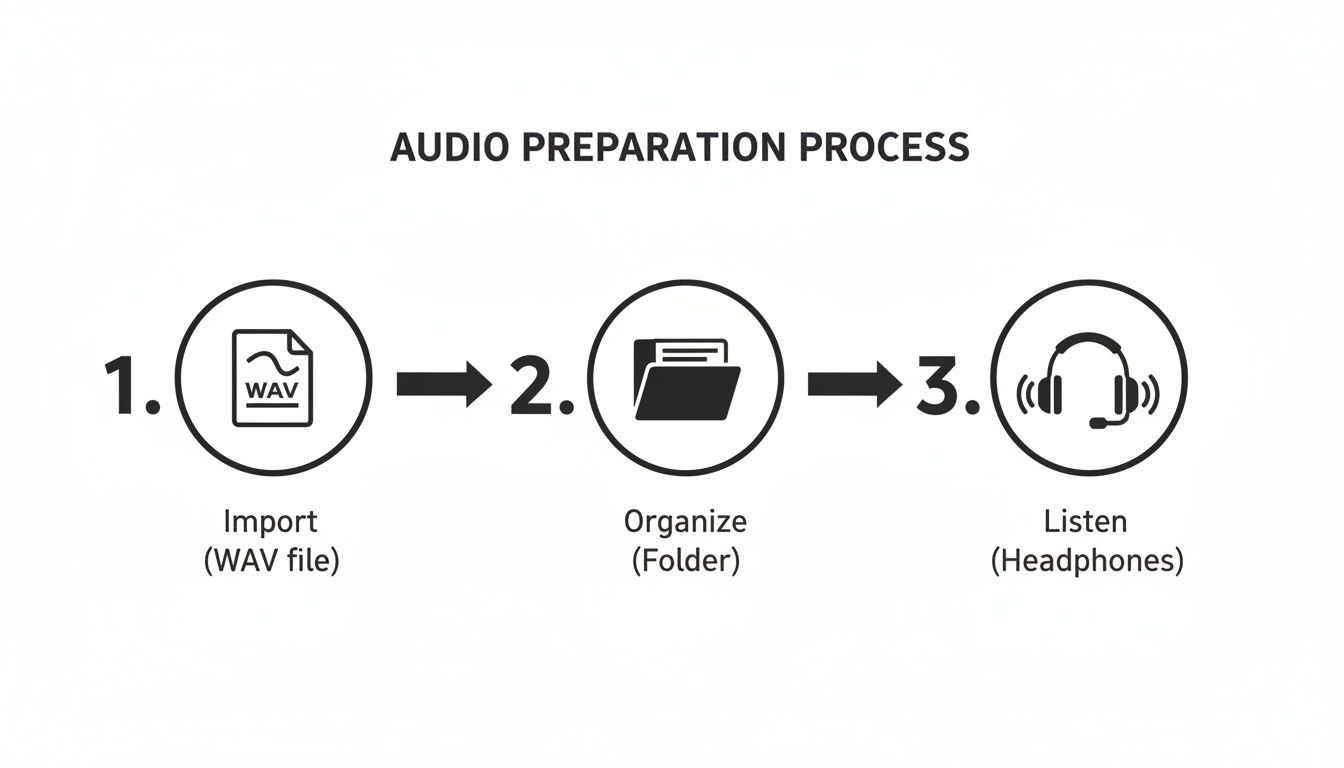
Setting Your Audio Up For Success
Before you even touch a noise reduction tool, we need to talk about your source file. It’s a simple truth that often gets overlooked: the quality of the audio you start with dictates the quality you end up with. Trying to clean up a low-quality file is an uphill battle that often leaves you with strange, artificial-sounding results.
Think of it like trying to edit a blurry, pixelated photo. No amount of sharpening can bring back detail that was never there in the first place. Heavily compressed audio, like an MP3, works the same way—it has already thrown out a ton of sonic information to keep the file size small. An AI tool needs all that original data to intelligently separate your voice from the background hum.
Why Uncompressed Audio is Non-Negotiable
If you have the option, always work with a high-quality, uncompressed audio format. This gives any noise reduction process the best possible chance to work its magic cleanly.
- WAV (Waveform Audio File Format): This is the gold standard for uncompressed audio, especially on Windows. It's what most pros use.
- AIFF (Audio Interchange File Format): Essentially the macOS equivalent to WAV, offering the same pristine, lossless quality.
When you use one of these formats, you’re giving the software a complete sonic picture to analyze. It can see (and hear) the fine details, making the distinction between a voice and a fan infinitely more accurate.
The clean interface of a tool like Isolate Audio really highlights this point. The process is straightforward because the real work happens inside the AI, and it relies entirely on the quality of the file you feed it.
Become an Audio Detective: Critical Listening
Got your high-quality file ready? Great. Now, put on a good pair of studio headphones—not your everyday earbuds—and find a quiet spot. It's time to listen critically. Your job is to identify exactly what you're fighting against.
Your ears are the most important tool you have. Listen critically and think to yourself, "Does this sound natural?" If you only focus on whether it sounds better than before, you can lose sight of the ultimate goal which is sounding like yourself.
Get specific with your analysis. Ask yourself:
- Is the noise a constant, steady drone, like an air conditioner or a computer fan?
- Does it come and go, like a dog barking outside or a door closing down the hall?
- Is it a specific frequency, like a high-pitched hiss from a cheap preamp or a low-end rumble from street traffic?
Pinpointing the problem is half the battle. Knowing you’re dealing with a “60Hz electrical hum” is far more useful than just labeling it “noise.” This level of detail helps you choose the right tool and apply it with precision, ensuring you remove only the bad stuff without damaging the good.
Using AI for Precise Noise Removal
Once your audio file is prepped and ready, it’s time for the real magic. Gone are the days of manually tweaking complex EQs, noise gates, and spectral editors for hours on end. Modern AI has completely changed how we remove background noise from audio, often boiling the entire process down to just describing the problem in plain English.
Think about it. Instead of hunting for the exact frequency of an annoying air conditioner hum, you can now just tell a tool like Isolate Audio to "remove fan noise." The AI knows what a fan sounds like and surgically removes it without you ever touching a dial.
This is a lifesaver in more chaotic environments, too. If you’re editing a video shot in a bustling cafe, a simple prompt like "isolate dialogue from cafe chatter" can work wonders, cleanly separating your subject's voice from the background clatter. A few years ago, that kind of fix would have been a nightmare.
Finding the Right Balance Between Speed and Quality
When you upload your audio, you’ll usually get a few processing options to choose from. These presets are built for different needs—from a quick check to the final, polished product. Knowing which one to pick can save you a ton of time.
Choosing the Right AI Processing Preset
This little table breaks down the common presets in Isolate Audio to help you decide what's best for your current task.
| Preset | Best For | Processing Speed | Key Feature |
|---|---|---|---|
| Best Quality | Final exports for podcasts, videos, or music releases where sonic integrity is paramount. | Slower | Delivers the most accurate and artifact-free audio separation. |
| Balanced | General use, such as cleaning up internal review clips or draft versions. | Moderate | A solid middle ground, offering good results without a long wait. |
| Fast | Quick previews to confirm the AI can identify and isolate the correct sound. | Fastest | Provides a rapid result to check your prompt's effectiveness. |
For most final projects, I always recommend starting with the Best Quality preset. It might take a few extra minutes to process, but the crystal-clear result is almost always worth it. If you're unsure your prompt is specific enough, run a quick test with the Fast setting first to see what happens before committing to the full render.
Tackling Complex Audio with Precision Mode
But what about those truly gnarly recordings? I’m talking about a live music track where the guitar amp buzz is bleeding into the vocal mic, or a podcast interview where two people accidentally talk over each other.
That's where a more advanced feature like a Precision Mode comes into play. This setting tells the AI to dig deeper, performing a much more detailed analysis of the audio. It works to carefully untangle overlapping frequencies and deliver a cleaner separation, making it the perfect tool when the standard modes just can't handle the mess.
The simple prep work we discussed earlier is what sets the stage for this kind of powerful processing.
This foundational workflow gives the AI the best possible starting point, which is crucial for getting a precise and effective result.
By describing sounds with simple text, you are essentially guiding the AI's focus. The more specific your description, the more accurate the result. This natural language approach is a significant leap forward from traditional audio repair software.
The technology has gotten shockingly good. Thanks to recent breakthroughs in machine learning, some systems can now separate speech from background noise with up to 95% accuracy. This is what makes modern AI tools so powerful and reliable for everyday audio work.
Refining and Exporting Your Cleaned Audio
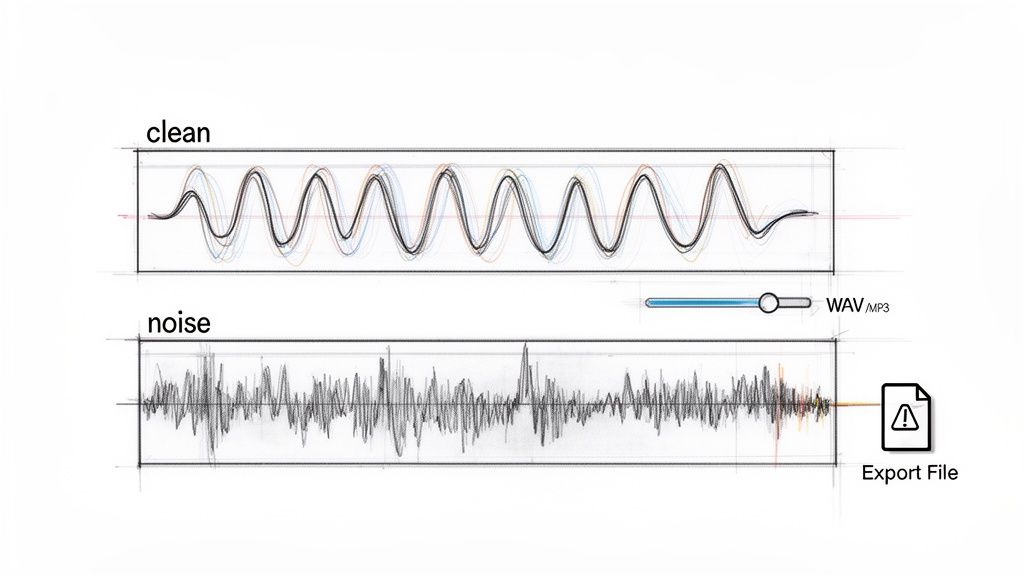
After the AI has worked its magic, you’re left with audio that’s dramatically cleaner. But the job isn't quite done. These final steps are what separate good results from truly professional ones, ensuring your audio is polished and ready for its final destination. Think of it as the crucial quality control stage that should never be skipped.
Most AI tools, Isolate Audio included, give you two separate tracks after processing. You'll get one file with the clean, isolated audio (like dialogue or a specific instrument) and a second file containing only the background noise that was removed. It might seem odd, but listening to that "noise only" track is one of the most important checks you can do.
Verifying the Separation
Put on your headphones and give that noise-only track a careful listen. Does it contain just the unwanted sounds? Every now and then, a tiny fragment of a word or a hint of a musical note might get caught in the crossfire. If you hear bits of your main audio in the noise track, it’s a signal that the AI might have been a little too aggressive.
This verification step is your safety net. It confirms you haven't accidentally stripped out critical parts of your primary recording. If you find something important was removed, you can simply run the process again, maybe with a slightly different preset or a more precise selection.
Your ears are the ultimate judge. The goal is audio that sounds completely natural, not just "cleaner" than the original. If a recording sounds overly processed or artificial, the listener will notice, even if they can't quite put their finger on why.
Blending and Polishing the Audio
Once you've confirmed the separation is clean, it's time to bring that purified audio back into your project, whether that's a video editing timeline or a multi-track music session.
Sometimes, just dropping the clean track back in is all it takes. Other times, though, a few subtle adjustments can help it sit perfectly in the mix. You might find that removing all the background hum makes the dialogue feel a bit too sterile or disconnected. A simple trick I often use is to mix a tiny amount of the original room tone back in—just enough to give it a natural sense of space without reintroducing distracting noise.
Choosing Your Final Export Format
The last piece of the puzzle is exporting your work in the right format. Your choice here depends entirely on what’s next for your project.
- For Further Professional Mixing (in a DAW): Always export as a lossless WAV or AIFF file. This preserves 100% of the audio quality, giving you or another engineer maximum flexibility for additional processing like compression or reverb.
- For Direct Publishing (Podcasts, YouTube): A high-quality compressed format is your best bet. An MP3 at 320 kbps or an AAC file strikes an excellent balance between quality and a manageable file size for streaming.
This careful attention to detail in the final stages is what truly elevates your project. If your workflow involves video, you might want to check out our guide on how to extract audio from video to make things even smoother.
Proactive Tips For Cleaner Recordings
While powerful AI tools make it easier than ever to remove background noise from audio, the best strategy is always to capture the cleanest sound possible right from the start. Preventing noise at the source saves you a ton of time in post-production and lets you focus on the creative stuff. Honestly, a little bit of foresight goes a very long way.
This proactive mindset doesn’t mean you need to drop a fortune on a professional studio. A few simple, smart adjustments to your recording environment and technique can make a massive difference. You'll end up with a richer, more professional-sounding track to work with.
Master Your Recording Space
Think of your room as the most important piece of gear you own—it’s also the one people overlook the most. Hard, flat surfaces are the enemy of clean audio. Things like bare walls, wood floors, and big windows bounce sound waves all over the place, creating echo and reverb that muddy up your recording.
But you can tame your room with a few easy tweaks:
- Soften Your Surfaces: Try recording in a room with a carpet, thick curtains, or even just a comfy couch. These materials absorb sound instead of reflecting it.
- Go Smaller: There's a reason walk-in closets are a classic DIY vocal booth. All that hanging clothing acts as a natural sound absorber.
- Kill the Hum: Before you hit record, do a quick sweep. Turn off the air conditioner, the buzzing refrigerator, and any noisy computer fans. That low-frequency hum they produce can be a real headache to remove later.
The goal is to create a "dead" space where your mic only hears what you want it to—your voice or your instrument. Every bit of echo you can eliminate at this stage is one less problem for your software to solve later.
Optimize Your Microphone Technique
How you use your microphone is just as critical as which one you're using. Good mic placement and technique are fundamental skills for capturing pristine audio.
For Podcasters and Voiceover Artists
Get pretty close to your microphone, around 6 to 8 inches away. This maximizes the sound of your voice and minimizes the ambient noise of the room, a principle known as the proximity effect. The only catch is that getting too close can create "plosives"—those harsh, poppy sounds on "p" and "b" words. A simple pop filter is a cheap and absolutely essential tool to stop this from happening.
For Musicians
If you're recording an amplified instrument, watch out for electrical hum. It's often caused by ground loops or cables that aren't properly shielded. A good first step is to plug all your gear into a single power strip. Also, try to keep your audio cables from running alongside power cables to reduce interference. A high-pass filter can also be your best friend for cutting out unwanted low-end rumble. We have a whole guide on using an audio high-pass filter that digs into this technique.
For Videographers on Location
Shooting outdoors? Wind is your number one enemy. Using a windscreen—often called a "dead cat"—on your shotgun or lavalier mic is completely non-negotiable. It works by physically blocking wind from hitting the mic’s diaphragm, saving your audio from becoming an unusable mess.
The effort to get clean audio at the source is a big deal. The market for noise suppression components, from physical hardware to advanced software, was valued at a staggering USD 24.15 billion in 2024. It's even projected to hit USD 73.04 billion by 2033. This boom, detailed in market trends at Straits Research, shows just how critical clear sound is in every field. By adopting these simple habits, you put yourself in control of your audio quality from the very first step.
Got Questions About Audio Cleanup? We’ve Got Answers.
Even with the best tools in your hands, a few questions always pop up. Let's tackle some of the most common things creators ask when they need to remove background noise from audio, so you can get past the hurdles and get better, more reliable results.
Can AI Really Get Rid of Any Background Noise?
It’s amazing what modern AI tools can do. They've gotten incredibly good at pinpointing and eliminating a huge range of unwanted sounds. We’re talking about everything from the constant, low drone of an air conditioner to the random stuff you can’t predict, like a dog barking down the hall, traffic noise, or even chatter in a busy café.
What's really changed the game is the ability to use natural language prompts. Instead of fiddling with complex filters, you can just tell the software what you want: "remove the wind noise" or "take out the guitar bleed from the vocal track."
Of course, there are limits. If the background noise is way louder than the voice or instrument you're trying to save, you might still need to do some manual work. But for the vast majority of situations creators face, AI is a much faster and more precise fix than anything we had before.
Will Cleaning Up the Noise Degrade My Main Audio?
This is the big one, and it's a totally valid fear. Go too heavy with noise reduction, and you can suck the life right out of your recording. The result is often a thin, warbly sound filled with weird digital artifacts—sometimes even more distracting than the original noise.
A good noise reduction tool is designed to be a scalpel, not a sledgehammer. It’s built to surgically remove only the unwanted frequencies, leaving the main audio source—your voice, a guitar, whatever it is—sounding natural and untouched. The AI models behind these tools have been trained on massive libraries of sound, which has taught them to tell the difference between a human voice and a refrigerator hum with incredible accuracy.
Pro Tip: Look for tools that let you listen to the "remainder" track. This is just the sound that was removed from your file. Hearing it is the ultimate quality check; it proves that no important parts of your performance were accidentally thrown out with the noise.
What's the Best Audio Format to Use for This?
Always, always start with a lossless format if you can. WAV or AIFF are your best friends here. Think of them like a raw photo from a high-end camera—they contain 100% of the original audio information. This gives the software the maximum amount of data to analyze, leading to a much cleaner separation.
Compressed files like MP3s are "lossy," which is just a technical way of saying they throw away some data to keep the file size small. When that data is gone, it’s much harder for any software to cleanly distinguish the noise from what you want to keep. Plus, the compression process can create its own digital weirdness that only gets worse when you start editing.
You can definitely still clean up an MP3, but you'll get a far more professional and polished result when you remove background noise from audio that began its life as a high-quality, lossless file. It's a simple step that makes a huge difference.
Ready to hear the difference AI can make on your own recordings? Isolate Audio lets you remove unwanted noise and zero in on any sound just by describing it. Try it for free today at Isolate Audio.