Remove background noise from audio: Quick AI Tricks for Crystal-Clear Sound
Let's be honest—nothing torpedoes a great recording faster than unwanted background noise. That persistent hum, the distracting hiss, or a sudden, unexpected sound can be a nightmare for any creator.
The good news? Getting rid of it is easier than ever. You can either lean on smart AI-powered tools for a quick fix or roll up your sleeves with a Digital Audio Workstation (DAW) for a more hands-on, surgical approach.
Your Guide to Achieving Flawless Audio
Whether you're podcasting from a bustling apartment or laying down tracks in a home studio, clean audio isn't just a nice-to-have; it's essential. Bad sound quality can completely pull your audience out of the moment, killing the impact of your message.
Thankfully, you don't need a million-dollar studio to get pristine results anymore. This guide will walk you through the entire audio cleanup process, showing you exactly how to rescue your recordings from the brink. We’ll cover everything from simple one-click fixes to the fine-tuned control you get in professional software.
We'll even dive into some incredibly powerful new tools, like prompt-based editors, that turn complex audio tasks into simple text commands. It's a game-changer for podcasters, musicians, and video editors who want to elevate their work without a steep learning curve.
The Growing Demand for Clean Sound
The world is getting louder, and the demand for clean audio has skyrocketed. The Background Noise Reduction Software Market tells the story, projected to jump from a few billion in 2026 to a massive $45.02 billion by 2034.
This isn't just a niche trend. With the boom in remote work and content creation, more than 50% of businesses are making audio quality a top priority. It’s clear that clean sound is no longer an option—it’s an expectation.
Just look at a tool like Isolate Audio. The interface is incredibly simple: you upload a file and just tell it what to do.
The real magic here is how it translates complex audio engineering into plain English. This kind of accessibility puts professional-grade editing power into anyone's hands, regardless of their technical background.
Before we dive deep into the specific techniques, let's get a high-level view of your options. Choosing the right method often comes down to balancing speed, control, and the type of noise you're dealing with.
Comparing Methods to Remove Background Noise
Here’s a quick rundown of the most common approaches to help you decide which path to take. Each has its strengths, and the best one for you will depend on your specific situation.
| Method | Best For | Speed | Control Level |
|---|---|---|---|
| AI-Powered Tools | Quick fixes, unpredictable noises (e.g., traffic, dogs barking), and ease of use for beginners. | Very Fast | Low to Medium |
| DAW with Plugins | Consistent noise (e.g., hiss, hum), fine-tuning, and professional post-production workflows. | Slower | High |
| Spectral Editing | Isolating and removing specific, brief sounds like coughs, clicks, or phone rings. | Slow | Very High |
| Preventative Recording | Achieving the best source quality by using proper microphones and sound treatment. | N/A | Highest (Proactive) |
As you can see, there's a trade-off. AI is fantastic for speed, while a DAW offers surgical precision. And of course, nothing beats getting it right at the source with good recording practices. Now, let's get into the specifics of how to use these methods.
Get an Instant Audio Cleanup with AI Tools
Forget spending hours fiddling with complex plugins. The quickest way to kill background noise these days is to let AI do the heavy lifting. Modern AI-powered tools have completely changed the game, turning what was once a tedious, technical chore into a simple process that literally takes seconds.
Picture this: you've just wrapped up a fantastic podcast interview, but your guest's air conditioner was humming along the whole time. In the past, that meant a long, painful editing session. Now? You can just upload the file and type something like, "remove the air conditioner hum and keep the speaker's voice."
This is the magic of prompt-based audio editing, a method pioneered by tools like Isolate Audio. It’s not just noise reduction; it’s source separation. The AI doesn't just try to muffle the unwanted sound—it intelligently identifies it, separates it from the audio you want to keep, and discards it.
How AI Actually Understands Your Audio
Traditional noise reduction software usually needed a "noise print"—a clean sample of just the background noise—to work. It would then try to subtract that sound from the entire track. This worked okay for consistent sounds like tape hiss, but it fell apart with anything that changed, like passing traffic, a barking dog, or a random phone notification.
AI models are a different beast entirely. They’re trained on massive datasets with thousands of hours of audio, learning to recognize the unique sonic fingerprints of different sounds. The AI can spot the complex patterns of human speech and tell them apart from the whir of a fan, a car horn, or even another person talking in the background.
This capability delivers some seriously impressive results. Recent advancements in AI audio processing have hit an incredible 95% accuracy in separating speech from background noise. That level of precision is a lifesaver for creators, especially when you consider that muffled or noisy audio can cause viewer drop-off rates to spike by 30% on video platforms. You can dig into more data on this trend in the Online Audio Noise Reduction System Market report.
Real-World Scenarios Where AI Is a Lifesaver
The applications for this technology are huge, solving real problems for all kinds of creators. Let's walk through a couple of common situations.
For the Podcaster
You’re recording remotely, and your guest’s laptop fan is roaring. Instead of awkwardly asking them to stop and fix it, you can just clean it up afterward with a simple prompt: isolate the guest's voice and remove the fan noise. The AI handles it all, giving you a clean vocal track that sounds like it was recorded in a proper studio.
For the Musician
You've just nailed the perfect acoustic guitar take for your demo, but your neighbor decided that was the perfect time to fire up their lawnmower. Instead of ditching the take, you can use AI to rescue it. A command like isolate the acoustic guitar can surgically remove that engine rumble while keeping every delicate nuance of your performance intact.
The screenshot below shows just how straightforward this can be.
The whole interface is built around a simple text box. It drives home the point that your words are now the main editing tool, tearing down the technical barriers that used to keep people away from high-level audio repair.
The Big Idea: AI audio tools are all about making complex editing accessible to everyone. By translating plain English into sophisticated audio processing, they empower anyone to get pro-quality results without needing an engineering degree.
Writing AI Prompts That Get the Job Done
While these tools are powerful, the quality of your prompt definitely affects the final result. Being clear and specific is the name of the game.
Here are a few pointers for writing effective prompts:
- Be Specific: Instead of a vague "clean up the audio," try "remove the keyboard typing and the coffee shop chatter."
- Focus on What to Keep: Sometimes it’s easier to tell the AI what you want to save. "Isolate the lead vocal" can work better than trying to list every single background sound you want gone.
- Try Different Phrasing: If your first attempt isn't quite right, rephrase it. "Remove the wind" might give you a different result than "reduce the low-frequency rumble from the wind."
This new wave of AI represents a massive leap forward for anyone working with audio. For a deeper look at different software options out there, check out our comprehensive guide on the best audio repair software. By taking advantage of these smart platforms, you can spend less time fighting with noisy recordings and more time creating something great.
Gaining Full Control with a Digital Audio Workstation
While one-click AI tools are fantastic for speed, sometimes you need to roll up your sleeves and get surgical. For anyone who wants total, granular control over their sound, a Digital Audio Workstation (DAW) is the ultimate toolkit.
DAWs like the free and powerful Audacity or the industry-standard Adobe Audition provide a whole suite of tools that let you precisely remove background noise. It's less about a quick fix and more about a thoughtful, layered approach. This is how you make nuanced adjustments that preserve the good stuff while peeling away the unwanted noise.
Let's dive into three foundational techniques that are the bread and butter of professional audio cleanup.
Mastering Noise Reduction with a Noise Print
The most common way to tackle consistent, steady background noise—like the drone of an air conditioner or the hiss from an audio interface—is with a noise reduction plugin.
The whole process hinges on a simple concept: you have to teach the software what the noise sounds like. You do this by capturing a noise print (sometimes called a noise profile). This is just a short, isolated sample—a few seconds is all you need—of only the background noise you want to get rid of.
This is why recording a few seconds of "room tone" before you start talking is a pro habit worth picking up. Once you've selected that snippet of pure noise, the plugin analyzes its unique frequency characteristics. It then scans your entire audio file and intelligently turns down those specific frequencies everywhere else. The key is to be gentle; going too hard is what creates that dreaded "underwater" or robotic sound.
Pro Tip: Always start with the gentlest settings. Apply a small amount of noise reduction, listen back, and then slowly increase it until the noise is no longer distracting. The goal isn't total silence—it's just pushing the noise so far into the background that it stops being a problem.
Performing Sonic Surgery with Spectral Editing
But what about noises that aren't constant? A random cough, a door slam, or a phone notification can't be fixed with standard noise reduction because there's no consistent profile to sample. This is where spectral editing comes in, and it's as close to performing surgery on sound as you can get.
Most DAWs have a spectrogram view. Instead of just a waveform showing volume, it gives you a colorful heat map that visualizes frequencies over time. In this view, different sounds create distinct visual shapes. A low-frequency hum looks like a solid horizontal line, while a sharp, high-pitched click appears as a tiny, bright vertical speck.
With spectral editing, you can literally see the problem. A cough might show up as a bright, dense blob. Using selection tools that feel a lot like Photoshop, you can draw a box around that specific sound and simply delete or quiet it down. It’s a meticulous process, but for saving an otherwise perfect take, it’s invaluable. For those just getting started in this environment, a good guide on DAWs for beginners can be a huge help.
Automatically Silencing Gaps with Noise Gates
A noise gate is a dynamic tool that acts like an automatic mute button. Its job is simple: cut off any sound that falls below a certain volume level, which we call the threshold. This makes it incredibly useful for cleaning up the silent gaps between words, sentences, or musical phrases.
Imagine you’ve already used noise reduction on a podcast narration, but there's still a faint, residual hiss in the pauses. A noise gate will automatically silence those gaps, making the whole track sound tighter and more professional.
You set the threshold just a little bit higher than the background noise. When you're speaking, your voice is loud enough to pass through the "gate." The moment you pause, the volume drops below the threshold, and the gate slams shut, cutting off the noise. Be careful, though—if the threshold is too high, it can clip off the quiet beginnings or ends of your words. Most gates give you attack and release controls to smooth out these transitions and make them sound natural.
For anyone looking for a faster workflow, this is where the AI approach really shines.
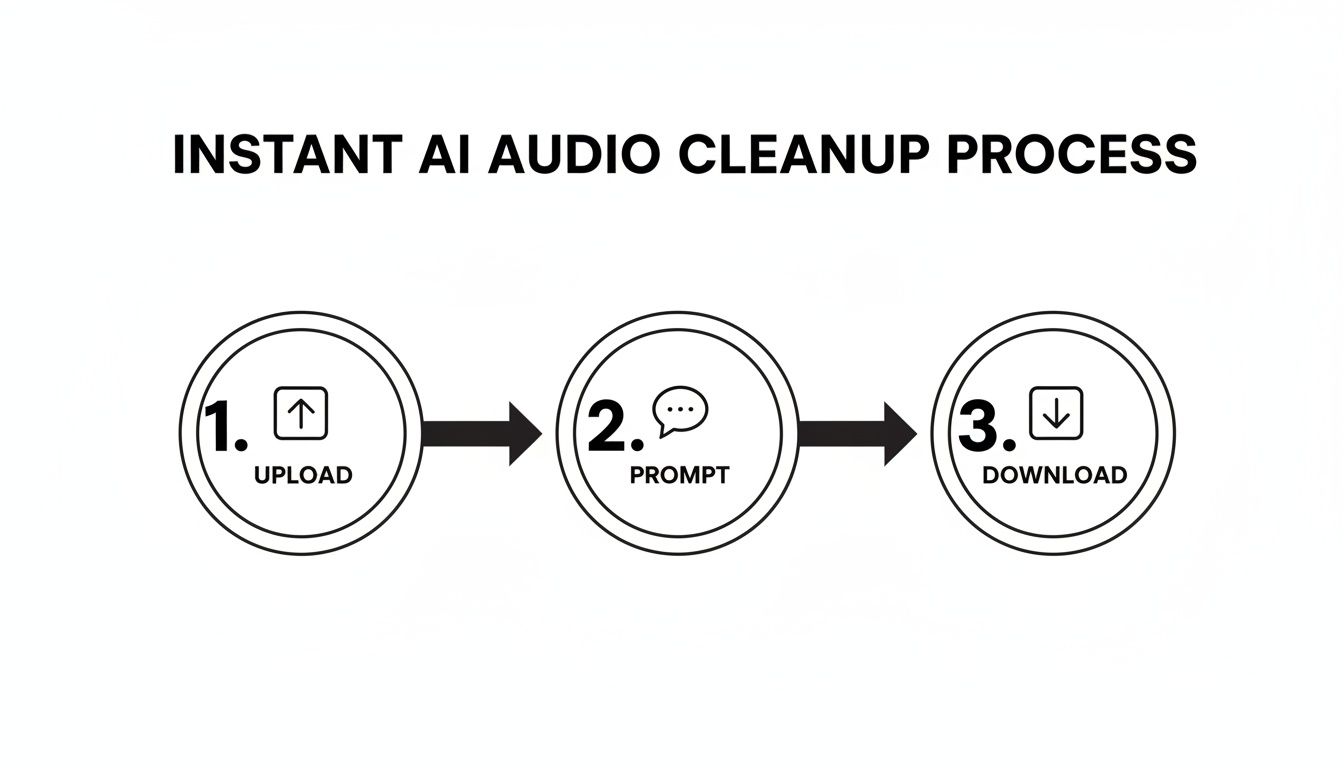
The diagram above shows how AI tools condense these complex processes into just a few actions, offering a great alternative when you don't have time for the manual precision of a DAW.
DAW Noise Reduction Tool Comparison
To help you decide which tool to reach for, here's a quick breakdown of the main players you'll find in most DAWs.
| DAW Tool | Primary Use Case | Pros | Cons |
|---|---|---|---|
| Noise Reduction Plugin | Removing consistent, steady noise (hum, hiss, air conditioning) | Highly effective for constant sounds; can sound very natural when used subtly. | Requires a clean sample of "room tone"; aggressive settings create artifacts. |
| Spectral Editing | Removing isolated, unexpected sounds (coughs, clicks, bumps) | Extremely precise; can remove specific noises without affecting surrounding audio. | Can be very time-consuming; requires a good eye and a steady hand. |
| Noise Gate/Expander | Cleaning up silence between phrases; reducing low-level noise | Fast and automatic; great for tightening up vocals and drum tracks. | Can sound unnatural if not set carefully; may clip the start or end of words. |
| Dynamic EQ | Reducing noise only when desired audio is not present | Very flexible; targets specific frequencies dynamically. | More complex to set up; has a steeper learning curve than a simple gate. |
Each of these tools has its place in a professional workflow. Often, the best results come from using a combination of them to gently tackle different types of noise.
As powerful as today's software is, nothing beats capturing clean audio right from the source. The old saying holds true: garbage in, garbage out. Getting it right at the recording stage will always give you a more professional, natural-sounding result and save you from hours of tedious editing down the line.
It all starts with thinking about your recording space as another instrument in your setup.

Choose the Right Microphone for Your Space
The type of microphone you use has a massive say in how much background noise ends up on your track. Condenser mics are fantastic for capturing incredible detail, but that sensitivity is a double-edged sword. In a less-than-perfect room, they'll pick up everything—the hum of your refrigerator, the traffic outside, you name it.
For most people recording at home, a dynamic microphone is a much safer bet. They are inherently less sensitive and built to reject sound coming from the sides and rear. This design naturally puts the focus squarely on your voice (or whatever is directly in front of it) and pushes ambient room noise into the background before it ever becomes a problem.
Master Your Mic Placement
Once you've got the right mic, where you put it is just as critical. The whole game is about maximizing your signal-to-noise ratio. You want your voice (the signal) to be significantly louder than any background distractions (the noise).
Here are a few simple placement rules I always follow:
- Get Closer: Aim to be about 4-6 inches away from the microphone. Getting up close gives you a fuller vocal presence and makes the room's ambient noise seem much quieter by comparison.
- Use a Pop Filter: This is non-negotiable. Placing a pop filter between you and the mic will catch those harsh bursts of air from 'p' and 'b' sounds (known as plosives) that can easily ruin a perfect take.
- Angle for Clarity: Try aiming the mic toward the corner of your mouth instead of directly at it. This little off-axis trick helps minimize distracting breath sounds and sharp 's' noises (sibilance) without losing any vocal clarity.
These small tweaks can make a world of difference.
Tame Your Room with Simple Sound Treatment
You don't need to build a professional studio to dramatically improve your room’s sound. The biggest offender in home recordings is almost always reverb—those echoes created when sound bounces off hard, flat surfaces like walls, ceilings, and wood floors. It’s what gives audio that hollow, amateurish feel.
The secret is absorption. Your goal is to surround your recording area with soft, dense materials that can soak up those pesky sound waves. You can get creative here. Drape heavy blankets over a couple of mic stands to build a makeshift vocal booth. Record in a walk-in closet where the clothes act as natural sound dampeners. Even propping up a few couch cushions around your desk can help.
Listeners have grown accustomed to pristine sound, partly because high-end audio gear is now mainstream. With 65% of premium audio devices featuring active noise cancellation (ANC), the bar for audio quality is higher than ever. It's a massive industry; the market for the Noise Suppression Components that make this tech possible is expected to jump from USD 27.23 billion in 2025 to an incredible USD 73.04 billion by 2033. You can dive deeper into this trend by checking out the full market research on noise suppression components.
Set Correct Recording Levels
Setting your recording level, or "gain," is a delicate balance. If it's too low, you’ll have to crank the volume later in your editor, which also amplifies the quiet hiss from your equipment's electronics (the noise floor).
But if you set it too high, you risk clipping. That's the harsh, crackly digital distortion you hear when the signal is too loud for the recorder to handle, and it's nearly impossible to fix. As a rule of thumb, aim for your audio levels to peak somewhere between -12dB and -6dB. This sweet spot gives you a strong, clean signal with plenty of headroom to avoid any accidental clipping.
One last pro tip: before you start your actual recording, capture about 30 seconds of pure room tone. Just hit record and be silent. This gives you a clean fingerprint of your room's unique ambient noise, which is invaluable if you need to perform manual noise reduction in a DAW later on. It makes the process far more accurate and effective.
Even with the best recording setup, some noise always seems to find its way in. This is where the real work begins. Let's walk through how to identify and fix the most common audio gremlins, turning those frustrating noises into something you can easily manage.

Whether you’re a fan of surgical DAW editing or prefer the speed of AI, there’s a solution for just about every problem.
Tackling Electrical Hum and Buzz
You know that low, constant drone? That’s almost always an electrical hum. It’s usually caused by something called a ground loop or just poorly shielded cables picking up interference. The good news is that it’s incredibly consistent, hanging out at either 50 Hz or 60 Hz, depending on where you live.
In a Digital Audio Workstation (DAW), the go-to fix is an EQ notch filter. Think of it as a laser-guided missile for audio frequencies. You just pinpoint the exact frequency of the hum and cut it out. Since the cut is so narrow, you can usually kill the hum without affecting the quality of a voice or other important sounds.
AI tools are also brilliant at this. A simple prompt like, remove the 60 Hz hum from the recording is all it takes. The AI will hunt down that frequency and its related harmonics, cleaning up the audio in just a few seconds.
Taming Troublesome Wind Noise
Recording outdoors is great until a gust of wind decides to ruin your perfect take. It creates a low, rumbling sound that can completely swamp everything else.
Your first line of defense in the edit is a high-pass filter (HPF). This simple tool just lops off all the frequencies below a point you set. Since most wind noise lives in the low-end, setting an HPF around 80-100 Hz can work wonders on the rumble without making voices sound thin and weak. We cover this in more detail in our guide to using an audio high-pass filter.
But an HPF only gets you so far. It tackles the low-end rumble but does nothing for the more complex, whooshing sound of a real gust. This is where AI really shines. It can differentiate the chaotic sound of wind from human speech and separate them in a way a simple filter never could.
Key Takeaway: For a constant hum, a precise EQ notch is your best bet. For wind, start with a high-pass filter for the low rumble, then let an AI tool handle the complex, gusty textures that filters can't touch.
Eliminating Clicks and Pops
Those sharp, sudden clicks and pops are incredibly distracting. They can be caused by anything from a bad digital edit to a plosive that got past your pop filter.
For these, spectral editing in a DAW is your best friend. When you look at the audio in a spectrogram view, a click shows up as a bright vertical line—a short, intense burst of energy. You can literally draw a box around it and delete it, or use a "healing" tool to patch it up seamlessly.
If your audio is full of tiny mouth clicks (a common issue with voiceovers), a dedicated de-clicker plugin can automate the process. Just be careful not to push the settings too hard, or you risk making the audio sound unnatural and processed.
Reducing Excessive Reverb
Recording in an empty room with hard surfaces? You’re going to get reverb. That echoey, distant sound is a dead giveaway of an amateur recording. While acoustic treatment is the best solution, you can still clean it up in post-production.
Here are a few ways to tackle it:
- DAW De-Reverb Plugins: Tools from iZotope or Adobe have plugins designed to analyze and reduce reverb tails. It's a tough job, and if you're too aggressive, you can end up with hollow, robotic-sounding audio.
- Noise Gates/Expanders: A gate can be a clever workaround. It closes the audio channel during silent moments, effectively chopping off the reverb tail between words. This can make the entire recording feel much cleaner.
- AI Source Separation: This is often the most impressive modern fix. A prompt like
isolate the speaker's voice and reduce room echotells the AI to distinguish between the direct sound of the voice and the reflected sound of the room, then remove the latter.
Once you can identify the specific type of noise you’re hearing, you can pick the right tool for the job and get your audio sounding clean and professional.
Frequently Asked Questions About Audio Cleanup
Diving into audio cleanup can bring up a lot of questions. Once you start getting the hang of the tools, you’ll naturally wonder about the finer details—like how to get the absolute best results or which technique is right for a specific problem.
Let's tackle some of the most common questions head-on. My goal here is to clear up any confusion and give you the confidence you need to remove background noise from audio and produce clean, professional-sounding tracks every time.
Can AI Truly Remove Background Noise Without Damaging the Main Audio?
This is the big one, and it’s a perfectly valid concern. The short answer is yes, modern AI tools are incredibly good at surgically removing noise with minimal, and often completely unnoticeable, impact on the audio you want to keep. It's a massive improvement over older tools that often left your audio sounding thin, robotic, or like it was recorded underwater.
Of course, pushing any tool to its absolute limit can cause problems. But advanced platforms like Isolate Audio are built to intelligently distinguish human speech from everything else. They analyze the sonic fingerprints of different sounds, allowing them to separate them cleanly. The result is often far more natural than what you could ever achieve with traditional methods alone.
My go-to advice: Always start with a light touch. Use a gentle preset or a low-intensity setting first, then listen back carefully. Only increase the processing if you absolutely need to. Finding that sweet spot is the real key to preserving the warmth and character of the original voice.
What Is the Difference Between Noise Reduction and Noise Removal?
You'll hear these terms thrown around a lot, sometimes interchangeably, but they actually refer to two different philosophies for cleaning up audio. Knowing the difference helps you pick the right tool for the job.
Noise Reduction: This is the classic approach. It’s designed to quiet down consistent, steady background noise—think of the hiss from an old tape machine, the hum of a refrigerator, or the drone of an air conditioner. It works by taking a "fingerprint" of the noise and then turning down just those frequencies across the track.
Noise Removal: This is a more modern, often AI-powered process that can identify and completely eliminate complex, unpredictable sounds. We're talking about things like a dog barking, a siren wailing past, or background chatter. It isn't just lowering the volume of the noise; it's intelligently separating the audio you want from everything you don't.
So, think of it this way: reduction lessens a constant problem, while removal can surgically extract a random, disruptive one.
Should I Use an Online AI Tool or a DAW Plugin?
There's no single "best" answer here—it all comes down to your project, your deadline, and your personal workflow.
An online AI tool is your best bet when speed and simplicity are what you need most. If you have to quickly fix a recording with a crying baby or a sudden door slam, an AI tool is a lifesaver. It does all the complex work for you in just a few clicks.
A DAW plugin, on the other hand, gives you detailed, hands-on control. It's the right choice when you're dealing with subtle, consistent issues like hiss or static and you want to dial in the settings just right. Honestly, most pros I know use a hybrid approach: they’ll use an AI tool for the initial heavy lifting and then switch to their favorite DAW plugins for the final polish.
How Can I Fix Wind Noise in My Recordings?
Ah, wind noise. It’s notoriously tricky because it’s so chaotic and spreads across the entire frequency spectrum. The absolute best fix is prevention—using a good windshield (often called a "deadcat") on your microphone is non-negotiable for outdoor recording.
But what if you have to fix it after the fact?
Your first move in post-production should be a high-pass filter in your DAW. This will instantly cut out the low-frequency rumble that makes wind sound so boomy and overwhelming. That alone can make a huge difference, but it won't solve the whole problem.
For the whistling and whooshing sounds in the mid and high frequencies, AI is your best weapon. Using a specific prompt like remove wind noise tells the AI to intelligently identify and separate the chaotic patterns of wind from the speaker's voice. This layered attack—a high-pass filter followed by AI—is how you get the cleanest, most natural results.
Ready to hear what AI-driven audio cleanup can do for your projects? Isolate Audio makes it simple to remove background noise, isolate speech, and perfect your recordings with easy-to-use text prompts. Give it a try for free and hear the difference for yourself. Get started at https://isolate.audio.