Remove Background Noise From Audio Free A Practical Guide
You’ve got a few solid options for removing background noise from audio for free, and the best one really comes down to what you're trying to fix. You could dive into traditional software like Audacity and use its manual controls, or you can go with modern AI tools like Isolate Audio that let you simply describe the noise you want gone.
Honestly, the AI route is often the easiest and fastest way to get great results these days.
Your Quick Guide To Crystal Clear Audio
Nothing ruins a great recording faster than a distracting hum, a persistent hiss, or random background chatter. Luckily, you don't need a professional studio or an expensive software suite to fix it anymore.
The market for noise reduction tools is booming—it's expected to jump from USD 2.31 billion in 2025 to a staggering USD 45.02 billion by 2034, according to a report from Business Research Insights. This growth means even the free tools are getting incredibly powerful. Forget getting bogged down in complex settings; we'll focus on the simple, effective methods that get the job done.
Choosing Your Noise Removal Strategy
First things first, what kind of noise are you dealing with? Is it a constant, predictable sound like the drone of an air conditioner? Or is it something more random and all over the place, like street noise or people talking in a coffee shop?
Figuring this out is key to picking the right tool.
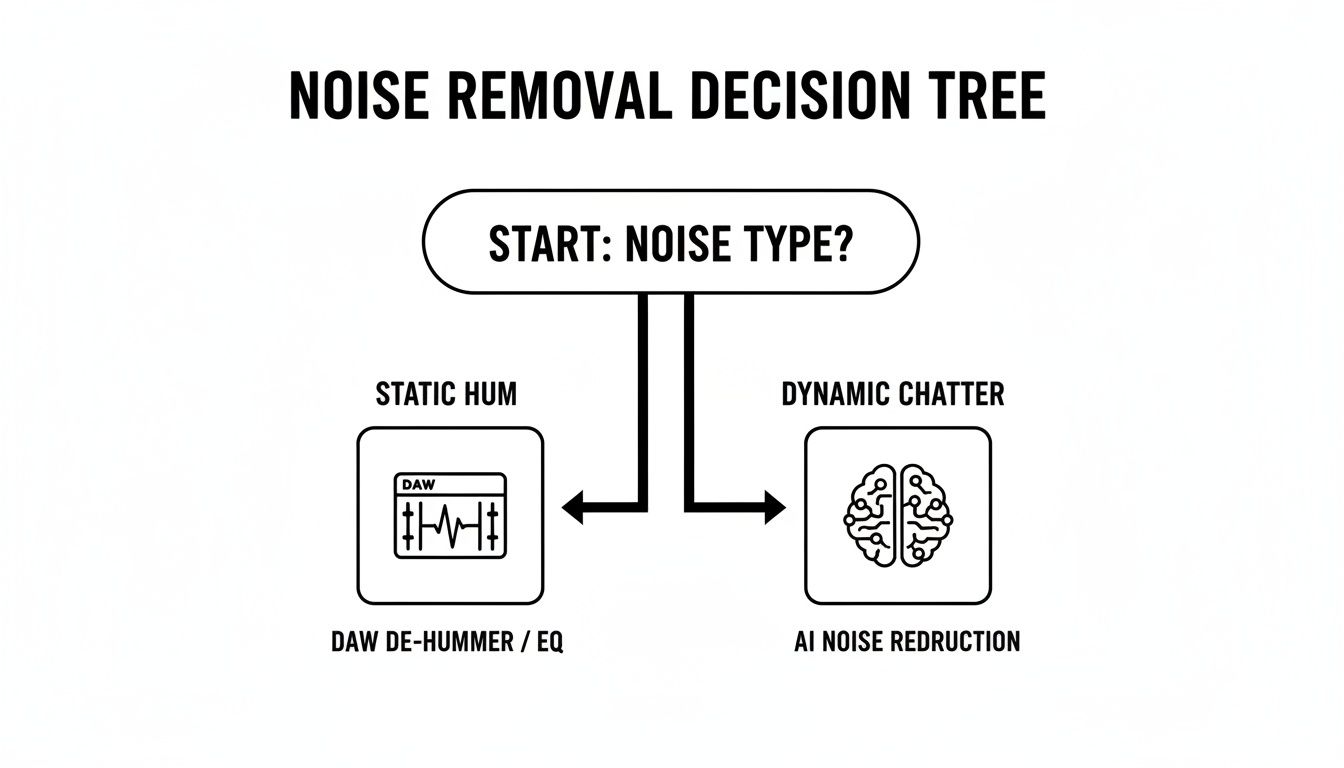
As you can see, a steady hum is often something you can tackle yourself with tools in a Digital Audio Workstation (DAW). But for those unpredictable, dynamic sounds? That's where AI really shines.
Free Noise Reduction Methods At A Glance
To make the choice even clearer, let's compare the most common free techniques. Each has its own strengths, whether you're a podcaster cleaning up an interview or a musician polishing a home recording.
| Method | Best For | Complexity Level | Expected Outcome |
|---|---|---|---|
| AI-Powered Tools | Dynamic noises like traffic, wind, chatter, and music | Beginner | High-quality separation with minimal effort. |
| Software Presets | Common, simple noise issues like "Hiss Removal." | Beginner | Good for a quick fix, but lacks fine control. |
| Noise Profiling | Constant static, hum, or hiss from equipment. | Intermediate | Very effective for steady, predictable background noise. |
| Spectral Editing | Isolating sudden, specific sounds (e.g., a cough, door slam). | Advanced | Precise removal, but requires technical skill. |
While each method has its place, it's clear why AI-powered tools are becoming the go-to. They handle the trickiest audio problems with the least amount of fuss, making them a fantastic starting point for almost anyone.
Preventing Noise Before You Hit Record
Honestly, the best way to get rid of background noise for free is to stop it from getting into your recording in the first place. Think of it this way: post-production tools are the cure, but a little prep work is the prevention. A few minutes of planning before you hit record will save you a ton of headaches in the editing chair later on.
This goes way beyond just finding a quiet room. It's about actively controlling your recording environment. Your brain is fantastic at filtering out the low hum of a refrigerator or the whoosh of an air conditioner, but I promise you, your microphone isn't nearly as smart. These kinds of constant, steady-state noises build up and create a "noise floor" that can make your entire recording sound muddy and unprofessional.
Before you even think about starting, just stop and listen. Seriously. Close your eyes and try to pick out every single sound. Is your computer fan whirring away? Can you hear the faint buzz of a fluorescent light? If you can, unplug what you don't need and kill the AC or heater, even if it's just for the few minutes you're recording.
Taming Your Recording Space
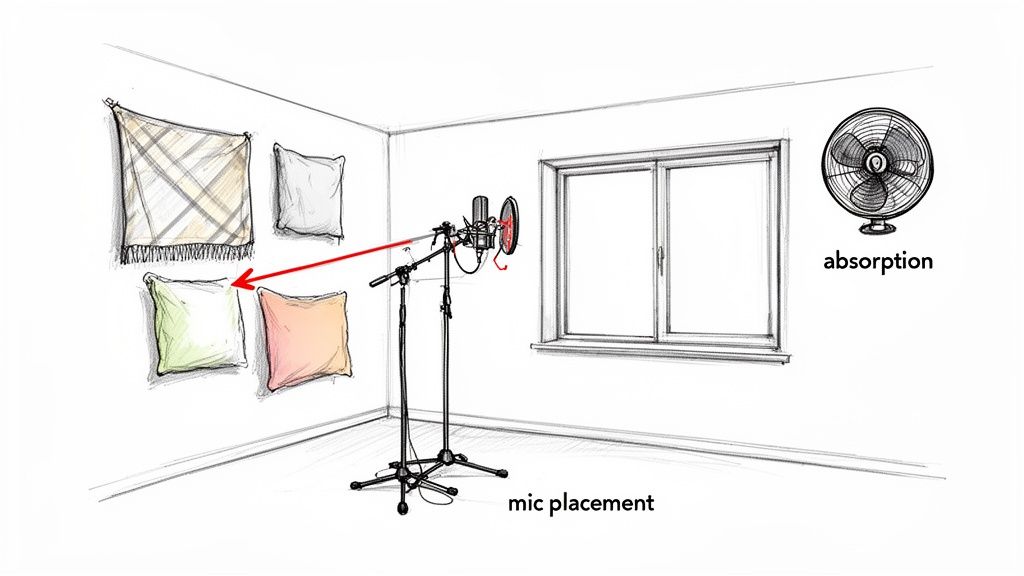
You don't need to go out and buy a bunch of expensive acoustic panels. You probably have everything you need to dramatically improve your sound already lying around the house. The goal here is to absorb sound reflections that create echo and reverb—two of the most common culprits of bad audio.
- Soften Hard Surfaces: Bare walls, wood floors, and big windows are not your friends. They’re like mirrors for sound, bouncing it all over the place and creating a hollow, distant echo. The fix is simple: throw some thick blankets over furniture or hang them on the walls. Lay a rug down. Close the curtains.
- Embrace Smaller Spaces: Got a walk-in closet? You've got a vocal booth. The clothes and soft surfaces are amazing at soaking up sound, which will give you a much cleaner, "drier" vocal track.
- Build a Pillow Fort: If you're recording at a desk, this is a classic for a reason. Just build a little wall of pillows or cushions around your microphone. It acts as a mini-acoustic shield, stopping sound from bouncing off your desk and nearby walls, and helps the mic focus on what's important: your voice.
One of the biggest mistakes I see people make is recording right in the middle of a big, empty room. That's usually the absolute worst spot for acoustics because it gives sound waves maximum room to bounce. You’ll often get a much better result by getting closer to a wall—especially one you've treated with a blanket.
Smart Microphone Placement
Where you put your microphone is just as critical as where you are in the room. Getting the placement right can slash the amount of ambient noise the mic picks up, making your voice stand out loud and clear.
First, you have to know your gear. Most microphones meant for vocals have a cardioid pickup pattern. All that means is they're designed to hear what's directly in front of them while rejecting sound from the sides and back. You can use this to your advantage.
Point the "dead zones" of the mic—the sides and the rear—at any noise sources you can't get rid of, like a computer tower or a window facing a busy street. This tiny adjustment acts like a natural noise filter.
Don't forget about distance, either. As you get closer to the mic (a good rule of thumb is 6-12 inches), you'll notice your voice gets a bit bassier—that's called the proximity effect. More importantly, your voice becomes much, much louder compared to the background noise. This drastically improves your signal-to-noise ratio, which is just a technical way of saying you're giving yourself a cleaner recording to work with from the very start.
Using AI For Instant Audio Cleanup
Let's be honest, cleaning up audio used to be a real chore. If you didn't have the time to master complex software or the budget for a professional engineer, you were often stuck with what you recorded—hiss, hum, and all. But that's changing, fast. AI is making it possible to remove background noise from audio free and with a level of precision that once felt like science fiction.
Instead of hunting for noise profiles or surgically removing problem frequencies one by one, you can now just tell a tool what to fix. It's a completely different way of thinking about audio repair. This is especially true for those messy, unpredictable sounds like passing cars or the murmur of a coffee shop, which traditional noise gates and filters have always struggled with.
The Power Of A Simple Prompt
The whole idea behind AI audio cleaning is to ditch the complexity. You just need your audio or video file—MP3, WAV, MP4, it doesn't matter—and a clear idea of what you want to achieve. No installations, no VST plugins, just a simple instruction.
Think of it like giving directions to a highly skilled audio assistant. Your instruction, or "prompt," is everything. Let's look at a few real-world situations where this comes in handy:
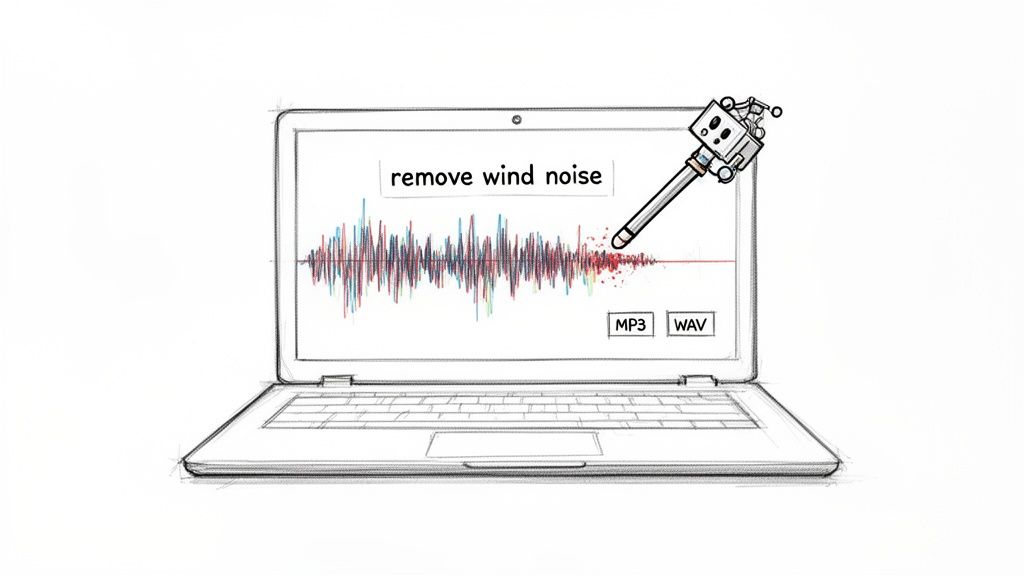
- For a video editor: You just wrapped an outdoor interview, but the wind was howling. A simple prompt like, "remove the wind noise from the dialogue" is all you need.
- For a musician: You've got a fantastic vocal take from a demo, but the guide track is bleeding through. You might type, "isolate the lead vocal."
- For a podcaster: Your interview in a busy cafe has way too much background chatter. A prompt like, "remove the cafe chatter and focus on the two main speakers" would do the trick.
In every case, the AI crunches the numbers, identifies the different sound sources, and gives you back a clean track, ready to go.
Tools like Isolate Audio are designed with this simplicity in mind. The interface is clean and gets straight to the point: upload your file, describe what you want, and let the tech handle the rest. This is what makes advanced audio processing available to everyone, not just the pros.
How AI Delivers Professional-Grade Results
So, how can a few words in a text box replace years of audio engineering experience? The secret is machine learning. These AI models have been fed thousands of hours of audio, learning to tell the difference between a human voice, a guitar strum, a gust of wind, a passing siren—you name it.
This training allows the AI to make incredibly smart separations. When you ask it to "isolate the speaker's voice," it's not just applying a generic filter. It's recognizing the unique sonic fingerprint of human speech and lifting it out from everything else in the recording.
The results are pretty staggering. AI-powered systems are hitting 95% accuracy in telling speech apart from background noise. For podcasters, that can translate into a listener retention boost of up to 40%—because nobody wants to struggle through an episode that's hard to hear. As this tech becomes more common, the old way of doing things is quickly becoming obsolete.
Pro Tip: Specificity is your best friend when writing prompts. Don't just say "clean up the audio." Get descriptive. Try something like, "remove the high-pitched electronic hiss and the distant traffic rumble." The more detail you give the AI, the better it can pinpoint and remove exactly what you don't want.
A Practical Walkthrough With Isolate Audio
Let's walk through a common scenario. Imagine you’re a filmmaker who just shot a great scene in a park, but a construction site a block away left a constant, low rumble in the background. Trying to EQ that out without making the actors' voices sound thin and unnatural would be a massive headache.
Here’s the AI workflow instead:
- Upload Your File: Head over to a tool like Isolate Audio and upload your video clip. The platform handles extracting the audio automatically.
- Write Your Prompt: In the text box, type a clear, direct instruction. Something like: "Isolate the dialogue and remove the construction noise."
- Process and Download: The AI does its thing. In a few moments, you’ll get two files back: one with just the clean dialogue, and another with only the background noise. Grab the clean dialogue track, drop it into your video editor, and you’re done.
This whole process lets you sidestep the complicated, time-consuming world of traditional audio repair. For creators on a deadline, it’s a lifesaver. If you're curious about the old-school methods and how they compare, our guide on different types of audio repair software is a great place to start. It really shows how technology is leveling the playing field for high-quality audio production.
Getting Your Hands Dirty: The Manual Approach With Free Software
AI tools are fantastic for quick fixes, but sometimes you need the precision of a surgeon. If you're dealing with a stubborn, consistent background noise or you just enjoy the satisfaction of doing it yourself, free Digital Audio Workstations (DAWs) are your best friend. Programs like Audacity pack a surprising amount of power, letting you manually remove background noise from audio for free with complete control over the final sound.
Don't let the idea of "manual" editing scare you off. You don't need to be a seasoned audio engineer. It all boils down to a few straightforward concepts. Think of it this way: instead of just telling an AI to "fix it," you're going to teach your software what the problem is and then guide it to the solution.
The Magic of Noise Profiling
The core of this entire process is a technique called noise profiling (sometimes called capturing a "noise print"). The concept is brilliantly simple. You find a short, isolated snippet of your recording that has nothing but the background noise you want to eliminate. This could be the low hum from an air conditioner, the hiss from a cheap microphone preamp, or the whir of a computer fan.
By selecting this little piece of "pure" noise, you're creating a sonic fingerprint. You're telling the software, "See this? This is the sound I hate. Get rid of it." The software then analyzes that fingerprint's unique frequency signature and intelligently subtracts it from the rest of your track.
This method is an absolute game-changer for consistent, steady-state noises. If the hum, hiss, or drone doesn't change much in pitch or volume, noise profiling can clean up a track beautifully with very little negative impact on the main audio, like your voice.
Your Essential Toolkit for Manual Cleanup
Once you've got the hang of noise profiling, you can bring in a few other simple tools that are standard in most free DAWs. These aren't complex, intimidating features; they're your go-to controls for getting the sound just right.
Here are the workhorses you'll come back to again and again:
- Noise Gate: Think of this as a smart mute button. You set a volume level (the "threshold"), and any sound that's quieter than that level gets automatically silenced. It’s perfect for killing the low-level hiss or room tone during the pauses between words, making your whole recording feel tighter and more professional.
- Equalizer (EQ): An EQ is your audio scalpel. It gives you the power to surgically boost or cut specific sound frequencies. Got a low, rumbly sound from passing traffic? A "high-pass filter" can chop off all the low frequencies below a certain point, wiping out the rumble while leaving the crucial vocal frequencies completely untouched.
- Notch Filter: This is just a hyper-specific type of EQ. It’s designed to hunt down and remove a very narrow frequency band. It's the ultimate weapon against electrical hum, which almost always lives at a precise frequency (50 or 60 Hz, depending on your country's power grid).
Putting It All Together: A Practical Scenario
Let's say you just recorded a podcast episode in your home office. On playback, you notice a constant low hum from your computer and a faint hiss that pops up every time you take a breath.
Here’s how you’d tackle it manually in a program like Audacity:
- Capture the Noise Print: The first step is to find a second or two of audio right at the beginning, before you started speaking. This part is pure "room tone"—a mix of that computer hum and mic hiss. Select it, and use the noise reduction tool to create your noise profile from this sample.
- Apply Noise Reduction: Now, select your entire voice track and run the noise reduction effect using the profile you just made. Always start with gentle settings and preview the result. The goal is to reduce the unwanted noise without making your voice sound thin, robotic, or "watery."
- Use a High-Pass Filter: That computer hum is a low-frequency problem. To zero in on it, open the Equalizer and apply a high-pass filter. By setting it to cut everything below about 80-100 Hz, you can often eliminate the hum entirely without any noticeable impact on your voice's natural warmth.
This layered approach is what gives you such granular control. It definitely takes more time than a one-click AI solution, but the skills you pick up are invaluable for any future audio work. If you're interested in going deeper, exploring topics like vocal isolation in Audacity can give you an even better grasp of how these tools work. By learning the manual way, you empower yourself to rescue audio that automated tools might give up on, making you a far more capable and confident creator.
Advanced Techniques For Tricky Audio Problems
Sometimes, the standard noise reduction playbook just doesn't cut it. You’re not dealing with a simple, steady hiss from an air conditioner; you're up against a sudden dog bark, a loud keyboard click during a crucial line of dialogue, or a phone notification that ruins an otherwise perfect take.
These isolated, unpredictable sounds are the worst because they get tangled up with the very audio you want to keep. Traditional tools that apply a broad filter across your entire track often fail miserably here, creating more problems than they solve.
This is where you need to think more like a photo editor than an audio engineer. For these tricky problems, we need to get surgical.
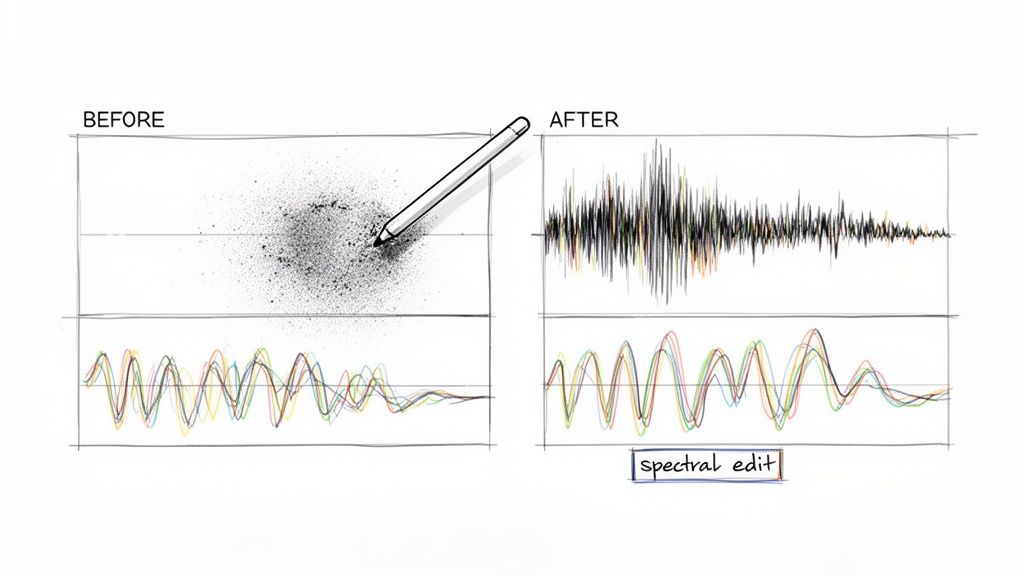
Seeing Your Sound With Spectral Editing
One of the most powerful ways to tackle these issues is with spectral editing. Some free audio programs, like certain versions of Audacity, offer a spectrogram view. Instead of the typical waveform showing volume over time, a spectrogram gives you a visual map of your sound’s frequencies.
Think of it as a heat map for your audio:
- Time runs from left to right.
- Frequency (pitch) runs from bottom (low) to top (high).
- Loudness is shown by color intensity—brighter colors mean louder sounds.
With this view, a sudden door slam appears as a bright vertical streak. A bird chirp might look like a distinct, wavy line. A persistent electronic whine shows up as a solid, bright horizontal line. You can literally see the noise.
Once you’ve spotted the visual fingerprint of the unwanted sound, you can use selection tools—much like the lasso or brush tool in Photoshop—to draw around it and simply delete or quiet it down. It's a remarkably intuitive way to remove background noise from audio free when other methods have failed.
Taming Inconsistent Noise With Expansion
Another real headache is inconsistent background chatter, like the murmur of a distant crowd that swells and fades. A standard noise gate is too clumsy for this; it just chops the audio up, creating an unnatural, jarring effect.
This is where an expander comes in.
An expander is the opposite of a compressor. While a compressor makes loud sounds quieter, an expander makes quiet sounds even quieter. By setting the threshold just above the level of the background chatter, the expander gently pushes down the volume of the murmur during pauses in speech. It makes the noise far less distracting without creating that abrupt, dead silence.
Key Takeaway: For sudden, isolated noises, think visually with spectral editing. For inconsistent, low-level noise that weaves in and out, use an expander to gently push it down without creating jarring silence.
Fine-Tuning With Dynamic EQ
For the most complex problems—where the noise shares frequencies with the voice you're trying to save—a Dynamic EQ is your ultimate tool. A standard EQ cuts or boosts a frequency permanently across the whole track. A dynamic EQ is much smarter; it only activates when a specific frequency gets too loud.
Imagine a speaker has audible mouth clicks or harsh "s" sounds (sibilance). These are just short, sharp bursts of high-frequency energy. You don't want to kill those high frequencies all the time, or the voice will sound dull and lifeless.
With a dynamic EQ, you can tell it to clamp down on those specific high frequencies only when they spike, taming the click or the hiss for just that split second. It's a game-changer for preserving the natural tone of a voice while fixing momentary problems. For more on managing frequencies, our article on using an audio high-pass filter provides a great foundation.
These advanced techniques require more patience, but they can salvage recordings that seem beyond repair.
Troubleshooting Common Audio Noise Issues
Even with the best tools, identifying the problem is half the battle. Different types of noise require different solutions, and just throwing a generic "denoiser" at everything rarely works well. Here’s a quick guide to diagnosing and fixing the most common culprits you'll run into.
| Noise Type | Common Cause | Recommended Free Solution |
|---|---|---|
| Hiss | Preamp noise, air conditioner, computer fan | Noise reduction with a noise profile (Audacity, Isolate Audio) |
| Hum/Buzz | Ground loop, electrical interference (60Hz/50Hz) | Notch filter or precise EQ cut at the fundamental frequency |
| Clicks & Pops | Mouth noise, vinyl crackle, digital errors | Spectral editing to visually select and remove the click |
| Rumble | Wind, handling noise, traffic, vibrations | A steep audio high-pass filter set around 80-100Hz |
| Echo/Reverb | Poor room acoustics, hard surfaces | Gating/expansion can help, but prevention is key |
Learning to recognize these sounds and their causes will make your cleanup process faster and more effective. Sometimes, a simple EQ adjustment is all you need, while other times, you’ll have to roll up your sleeves with some spectral editing.
The demand for cleaner audio has fueled incredible innovation in this space. The market for noise suppression components reached USD 24.15 billion in 2024 and is projected to hit USD 73.04 billion by 2033. This growth is driven by needs in everything from consumer electronics to aerospace, with a significant 42% of online audio solutions now focusing specifically on denoising. Knowing these advanced techniques puts you right at the forefront of this trend.
Common Questions About Free Noise Removal
When you first start cleaning up audio, it's easy to get bogged down by technical terms and confusing software. Let's tackle some of the most common questions and hurdles I see people run into, so you can get the clean audio you're after.
Can I Really Get Professional Results With Free Tools?
Absolutely. The gap between what paid and free audio tools can do has shrunk dramatically over the last few years. Today’s free options, especially the AI-powered ones, can deliver results that used to cost a fortune. Even a classic tool like Audacity still does a fantastic job on predictable, consistent noise like an air conditioner hum or equipment hiss.
The real trick is knowing which tool is right for the job. AI is your best bet for complex, unpredictable sounds like street traffic or background chatter. For static, unchanging sounds, manual tools give you pinpoint control. Honestly, for most creators today, smart recording habits combined with a good free tool are more than enough to produce clean, professional-sounding audio.
The Difference Between AI And Manual Noise Reduction
Choosing between AI and manual tools really boils down to three things: speed, simplicity, and the type of noise you’re dealing with.
- AI Tools: These are built for speed and ease of use—no audio engineering degree required. You just tell it what the problem is, like "remove the wind," and the algorithm does the complex work of separating the sounds for you. It's the perfect fix for dynamic, messy audio like crowds, weather, or dialogue buried under music.
- Manual Tools: This approach is more hands-on. You need to find a "noise print" (a small, clean sample of just the noise) and then tell the software to remove anything that matches that sonic signature. It’s incredibly effective for constant, steady noise like a fan whine or static. Manual methods offer more control but definitely have a steeper learning curve and can stumble when the noise changes over time.
For most people, it's a practical decision. If you're on a deadline with complicated noise, AI is the clear winner. If you have a consistent hum and want to learn the fundamentals of audio repair, going the manual route is a great learning experience.
What If The Background Noise Is Louder Than The Voice?
This is one of the toughest audio problems out there, but it's not always a lost cause. Your best shot is an advanced AI tool designed specifically for sound separation. These platforms are trained on huge libraries of audio, teaching them how to tell the difference between a voice and a car horn, even when they're mashed together.
Try starting with a direct prompt like, "isolate the main speaker's voice from the loud music." If that doesn't quite get you there, try flipping the script. Use a prompt to isolate the noise itself: "remove the voice and keep only the background music."
Once you have the two elements separated, you can pull them into an editor and adjust their volume levels manually. While a perfect result isn't guaranteed when the voice is completely buried, this technique can often recover dialogue that would have been unusable, saving you from a reshoot.
Are There Risks To My Original Audio?
Yes, the biggest risk with any kind of noise reduction is over-processing. If you get too aggressive with the effect, especially with manual tools, you can introduce bizarre-sounding digital artifacts. This usually sounds robotic or gives the voice a weird, "watery" quality.
This happens when the algorithm accidentally removes frequencies that are part of the voice or instrument you're trying to save. To avoid this, just follow one simple rule: less is more.
Always start with the gentlest setting possible and listen closely. Slowly increase the intensity until the background noise is gone, but stop before it starts hurting the main audio. AI tools are generally better at avoiding this because their models are trained not just to remove noise, but also to preserve the quality of the sound you want to keep.
Ready to skip the guesswork and get clean audio in seconds? Isolate Audio uses powerful AI to remove background noise with simple text prompts. Just upload your file, describe what you want to remove, and let our technology do the heavy lifting.